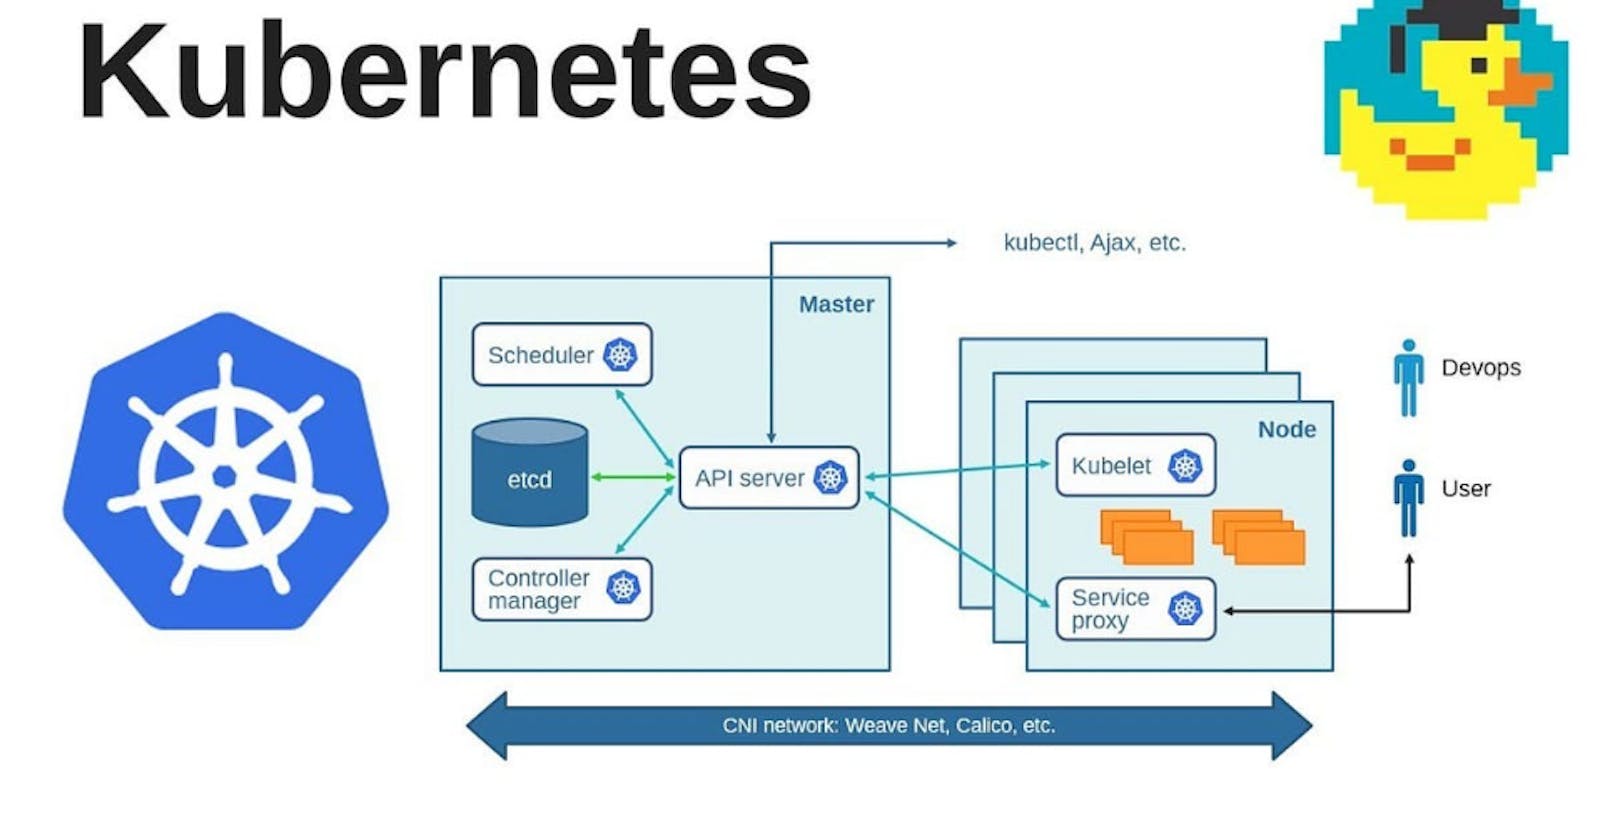
kubeadm is a command-line tool for simplifying the process of creating and managing Kubernetes clusters. It helps with cluster initialization, node joining, configuration management, upgrades, and adheres to secure defaults, making it easier for users to set up Kubernetes environments.
Here are some key features and functions of kubeadm:
Cluster Initialization:
kubeadmcan be used to initialize the control plane (master) node of a Kubernetes cluster. It sets up the necessary components like the API server, etcd, and controller manager with default configurations.Node Joining: After initializing the control plane,
kubeadmprovides a command for worker nodes to join the cluster. This command contains the necessary authentication tokens and certificates required for secure communication with the master node.Configuration Management:
kubeadmgenerates the initial Kubernetes configuration files, including thekubeconfigfiles forkubectl. This simplifies the process of configuringkubectlto interact with the cluster.Network Plugin Integration:
kubeadmcan be combined with various network plugins or add-ons to enable pod communication within the cluster. It often suggests popular network plugins like Calico, Flannel, or Weave.Upgrades and Downgrades:
kubeadmprovides commands and features for upgrading and downgrading a Kubernetes cluster. This makes it easier to perform version updates of Kubernetes.Customization: While
kubeadmoffers default configurations for cluster initialization, it also allows advanced users to customize the setup by providing configuration files for various components.Secure Defaults:
kubeadmis designed with security in mind and sets up the cluster with secure defaults, such as using certificates for authentication and enabling RBAC (Role-Based Access Control) by default.Ease of Use: It aims to simplify the cluster setup process, making it accessible to users who may not have deep knowledge of Kubernetes internals.
Both Master & Worker Node
Run the following commands on both the master and worker nodes to prepare them for kubeadm.
 # using 'sudo su' is not a good practice.
 sudo apt update
 sudo apt-get install -y apt-transport-https ca-certificates curl
 sudo apt install docker.io -y

 sudo systemctl enable --now docker # enable and start in single command.

 # Adding GPG keys.
 curl -fsSL "https://packages.cloud.google.com/apt/doc/apt-key.gpg" | sudo gpg --dearmor -o /etc/apt/trusted.gpg.d/kubernetes-archive-keyring.gpg

 # Add the repository to the sourcelist.
 echo 'deb https://packages.cloud.google.com/apt kubernetes-xenial main' | sudo tee /etc/apt/sources.list.d/kubernetes.list

 sudo apt update
 sudo apt install kubeadm=1.20.0-00 kubectl=1.20.0-00 kubelet=1.20.0-00 -y


ON Worker node repeat the same steps.
Master Node
Initialize the Kubernetes master node.
sudo kubeadm init
Set up local kubeconfig (both for root user and normal user):
mkdir -p $HOME/.kube
sudo cp -i /etc/kubernetes/admin.conf $HOME/.kube/config
sudo chown $(id -u):$(id -g) $HOME/.kube/config

Apply Weave network:
kubectl apply -f https://github.com/weaveworks/weave/releases/download/v2.8.1/weave-daemonset-k8s.yaml

Generate a token for worker nodes to join:
sudo kubeadm token create --print-join-command

Expose port 6443 in the Security group for the Worker to connect to Master Node:

On worker node:
Run the following commands on the worker node.
sudo kubeadm reset pre-flight checks

Paste the join command you got from the master node and append --v=5 at the end. Make sure either you are working as sudo user or use sudo before the command.

Now on master node:


Thank you
