Deploying a Three-Tier Application on Amazon EKS with React.js, Node.js, and MongoDB
A three-tier architecture divides applications into three interconnected components: Presentation (Frontend), Application (Backend), and Data (Database). This modular approach ensures scalability, maintainability, and separation of concerns. Leveraging Amazon EKS for container orchestration enhances deployment efficiency.
Advantages of Amazon EKS:
Container Orchestration: Simplifies the deployment, management, and scaling of containerized applications through Kubernetes.
Scalability: Seamlessly scales containerized applications based on demand, optimizing resource utilization.
Managed Service: Fully managed service eliminates manual intervention in cluster management, upgrades, and scaling.
Integration with AWS Services: Integrates seamlessly with various AWS services, facilitating deployment within the broader AWS ecosystem.
Technologies Overview:
Section 1: Understanding Three-Tier Architecture
Three Tiers:
Presentation (Frontend): Manages the user interface using React.js, allowing for dynamic and interactive user experiences.
Application (Backend): Processes user requests, communicates with the database, and utilizes Node.js for scalability and speed.
Data (Database): Stores and retrieves data with MongoDB, a NoSQL database known for flexibility and scalability.
Benefits:
Scalability: Each tier can be independently scaled for improved performance under varying loads.
Maintainability: Changes in one tier do not impact others, simplifying maintenance.
Section 2: Technologies Overview
2.1 React.js (Frontend)
Overview:
- JavaScript library for building user interfaces efficiently.
Key Concepts:
- Components, State, Props.
2.2 Node.js (Backend)
Overview:
- Server-side runtime for scalable backend applications.
Advantages:
- Non-blocking I/O, Event-Driven Architecture.
2.3 MongoDB (Database)
Overview:
- NoSQL database for flexible and scalable data storage.
Key Features:
- Document-Oriented, Scalability.
Next Steps on EC2 Instance:
Build and Deploy:
Navigate to the cloned GitHub repository.
Install Docker to run Docker files.
Create Docker images for frontend and backend. Dockerfiles for frontend and backend are available at https://github.com/Pardeep32/TWSThreeTierAppChallenge.git
Push images to Amazon ECR.
1. Navigate to the Project Directory:
git clone https://github.com/Pardeep32/TWSThreeTierAppChallenge.git
Navigate to the root directory of the project using the following command:
cd /path/to/project/root
To enable the execution of Docker files, you need to install Docker. Execute the following commands one by one:
Install Docker:
    sudo apt-get update
    sudo apt-get install docker.io
Now, your environment is set up to run Docker files, and you can proceed with building and deploying Dockerized applications in the project directory.
#write docker file for frontend
    sudo apt-get update
    sudo apt install docker.io
    docker ps
    vim Dockerfile
    docker build -t three-tier-frontend .
    docker images
    docker run -d -p 3000:3000 three-tier-frontend:latest


Set Up EKS Cluster:
- Create an EKS cluster.
To push a Docker image to Amazon ECR (Elastic Container Registry), you'll need to have the AWS Command Line Interface (CLI) installed on your machine. Follow these steps to install the AWS CLI:
- Create an EKS cluster.
    curl "https://awscli.amazonaws.com/awscli-exe-linux-x86_64.zip" -o "awscliv2.zip"
    sudo apt install unzip
    unzip awscliv2.zip
    sudo ./aws/install -i /usr/local/aws-cli -b /usr/local/bin --update
    aws configure


To push a Docker image to Amazon ECR:
Create a repository named "three-tier-frontend" on the Amazon ECR console.
Select the repository, and click "View push commands."
Execute the provided commands in your terminal, including authentication, tagging, and pushing the Docker image to ECR.


Now, repeat the process for the backend. Begin by creating a Dockerfile for the backend application. Once the Dockerfile is ready, follow these steps to push the backend Docker image to Amazon ECR:
Create a repository named "three-tier-backend" on the Amazon ECR console.
Select the backend repository, and click "View push commands."
Execute the provided commands in your terminal, including authentication, tagging, and pushing the Docker image to ECR.


Now, both Docker images for the frontend and backend applications have been successfully uploaded to Amazon Elastic Container Registry (ECR).
Now to run docker images on EKS, you have to install kubectl and eksctl:
    ### Install eksctl
    curl -o kubectl https://amazon-eks.s3.us-west-2.amazonaws.com/1.19.6/2021-01-05/bin/linux/amd64/kubectl
    chmod +x ./kubectl
    sudo mv ./kubectl /usr/local/bin
    kubectl version --short --client

    ###Install eksctl
    curl --silent --location "https://github.com/weaveworks/eksctl/releases/latest/download/eksctl_$(uname -s)_amd64.tar.gz" | tar xz -C /tmp
    sudo mv /tmp/eksctl /usr/local/bin
    eksctl version

    ###Setup EKS Cluster
    eksctl create cluster --name three-tier-cluster --region ca-certral-1 --node-type t2.medium --nodes-min 2 --nodes-max 2
it wil create eks cluster using cloud formation.
Deploy Kubernetes Resources:
Create deployment, secret, and service files for backend and frontend.
Deploy MongoDB resources.
Connect frontend and backend to the database.


Three-tier-cluster is now created.

  aws eks update-kubeconfig --region ca-certral-1 --name three-tier-cluster
  kubectl get nodes


now, create a deployment, secret and service files for backend and frontend. Backend need to connect with database so first create deployment and service for mongodb. (link of all files available at https://github.com/Pardeep32/TWSThreeTierAppChallenge/tree/main/k8s_manifests/mongo)


Database tier is up and running.
Backend tier:


Backend tier is connected to database tier.
Frontend tier:


Frontend tier , backend tier and database tier is working in a kubernetes cluster now in order to connect to outside of kubernetes we need to install ALB(application load balancer).
Install load balancer
curl -O https://raw.githubusercontent.com/kubernetes-sigs/aws-load-balancer-controller/v2.5.4/docs/install/iam_policy.json
aws iam create-policy --policy-name AWSLoadBalancerControllerIAMPolicy --policy-document file://iam_policy.json
eksctl utils associate-iam-oidc-provider --region=us-west-2 --cluster=three-tier-cluster --approve
eksctl create iamserviceaccount --cluster=three-tier-cluster --namespace=kube-system --name=aws-load-balancer-controller --role-name AmazonEKSLoadBalancerControllerRole --attach-policy-arn=arn:aws:iam::626072240565:policy/AWSLoadBalancerControllerIAMPolicy --approve --region=us-west-2


Deploy ALB controller using Helm charts
sudo snap install helm --classic
helm repo add eks https://aws.github.io/eks-charts
helm repo update eks
helm install aws-load-balancer-controller eks/aws-load-balancer-controller -n kube-system --set clusterName=my-cluster --set serviceAccount.create=false --set serviceAccount.name=aws-load-balancer-controller
kubectl get deployment -n kube-system aws-load-balancer-controller
kubectl apply -f full_stack_lb.yaml

ALB is up and running.

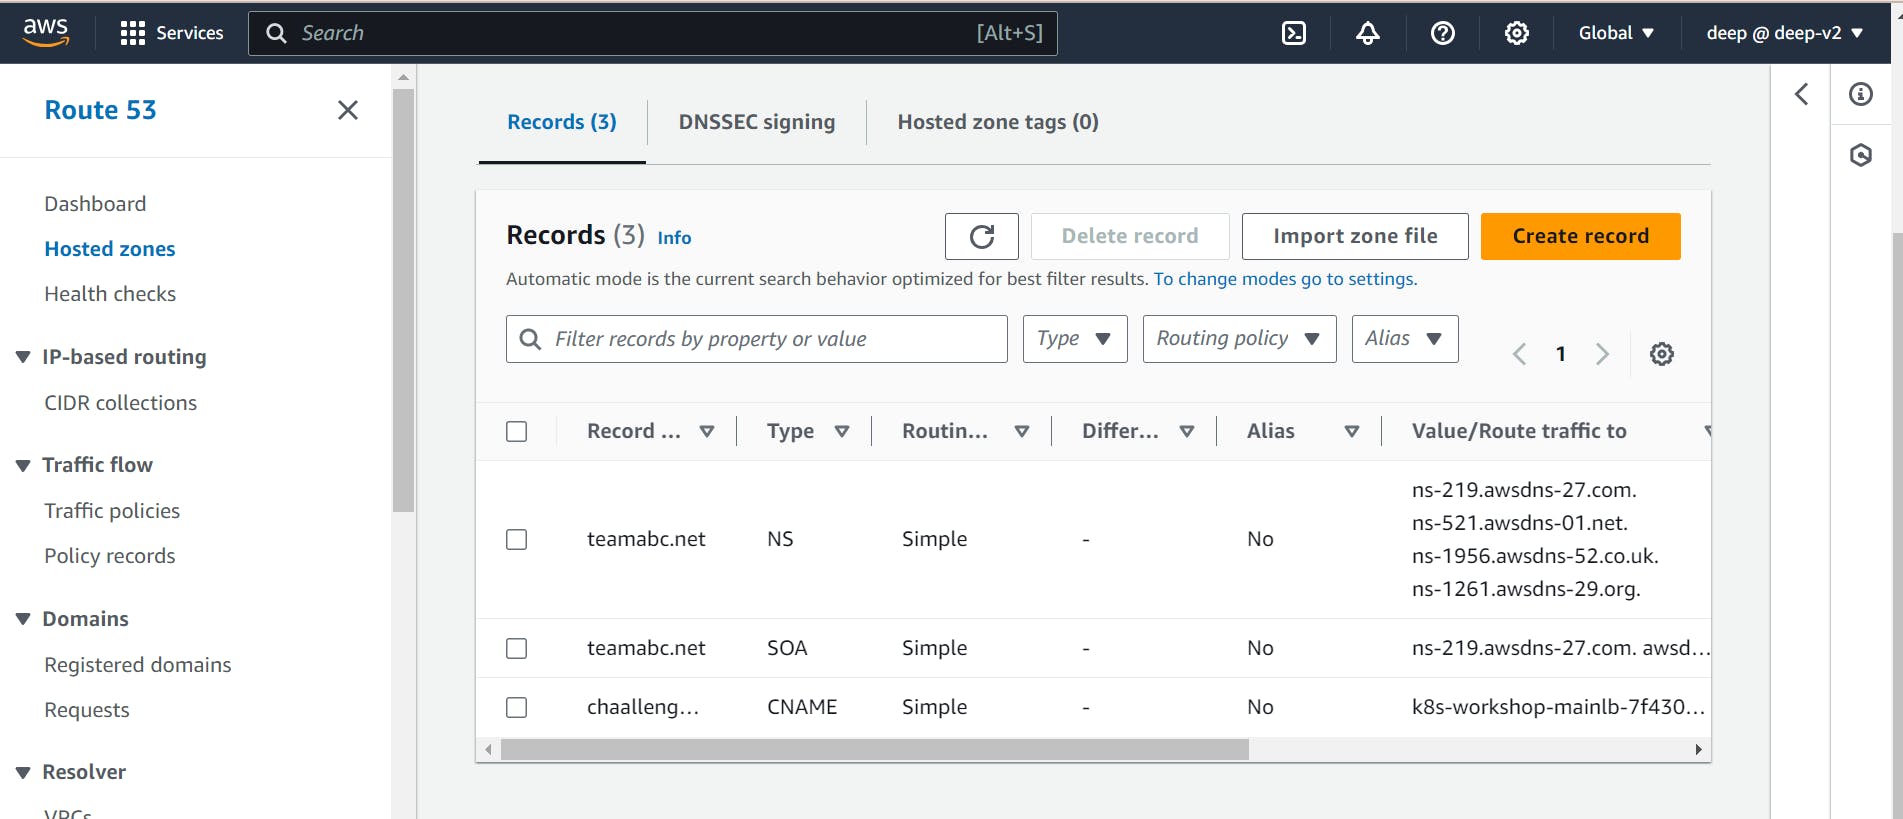
Here are the steps to purchase a domain name on Route 53, create a subdomain (chaallenge.teamabc.net), and add a CNAME record pointing to a load balancer DNS name:
Purchase a Domain on Route 53:
Go to the AWS Management Console.
Navigate to Route 53.
Click on "Registered domains" and then "Register domain."
Follow the on-screen instructions to search for and purchase your desired domain.
Create a Subdomain and CNAME Record:
After purchasing the domain, go to the Route 53 dashboard.
In the navigation pane, select "Hosted zones."
Choose the hosted zone for your domain (e.g., teamabc.net).
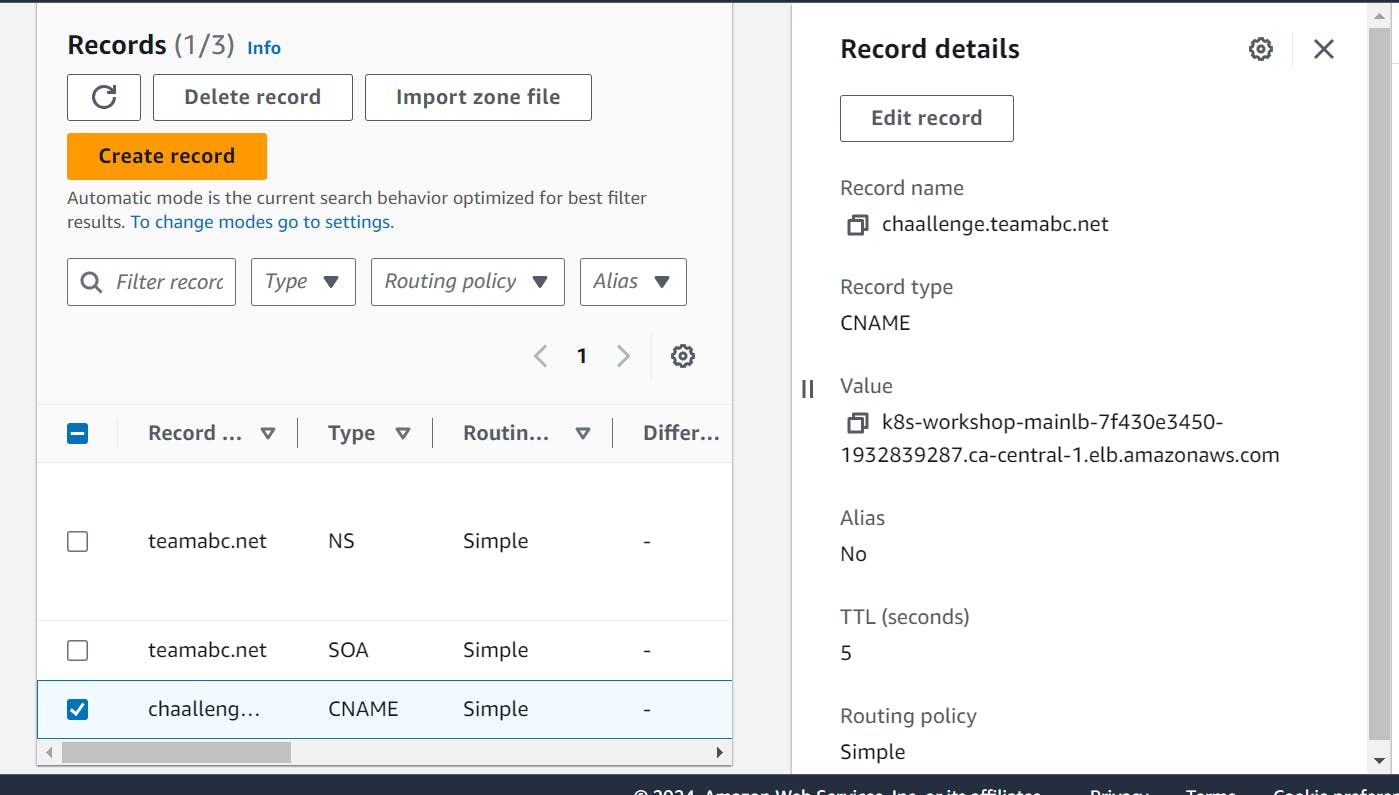
Click on "Create Record."
For "Record name," enter "chaallenge".
Select "CNAME" as the record type.
In the "Value/Route traffic to" field, enter the load balancer DNS name (e.g., k8s-workshop-mainlb-7f430e3450-1932839287.ca-central-1.elb.amazonaws.com).
Set the TTL (Time to Live) based on your preference (e.g., 300 seconds).
Save the record.
This creates a CNAME record for the subdomain "chaallenge.teamabc.net" that routes traffic to the specified load balancer DNS name.
Remember that DNS changes might not be immediately reflected, and it could take some time for the changes to propagate across the internet.
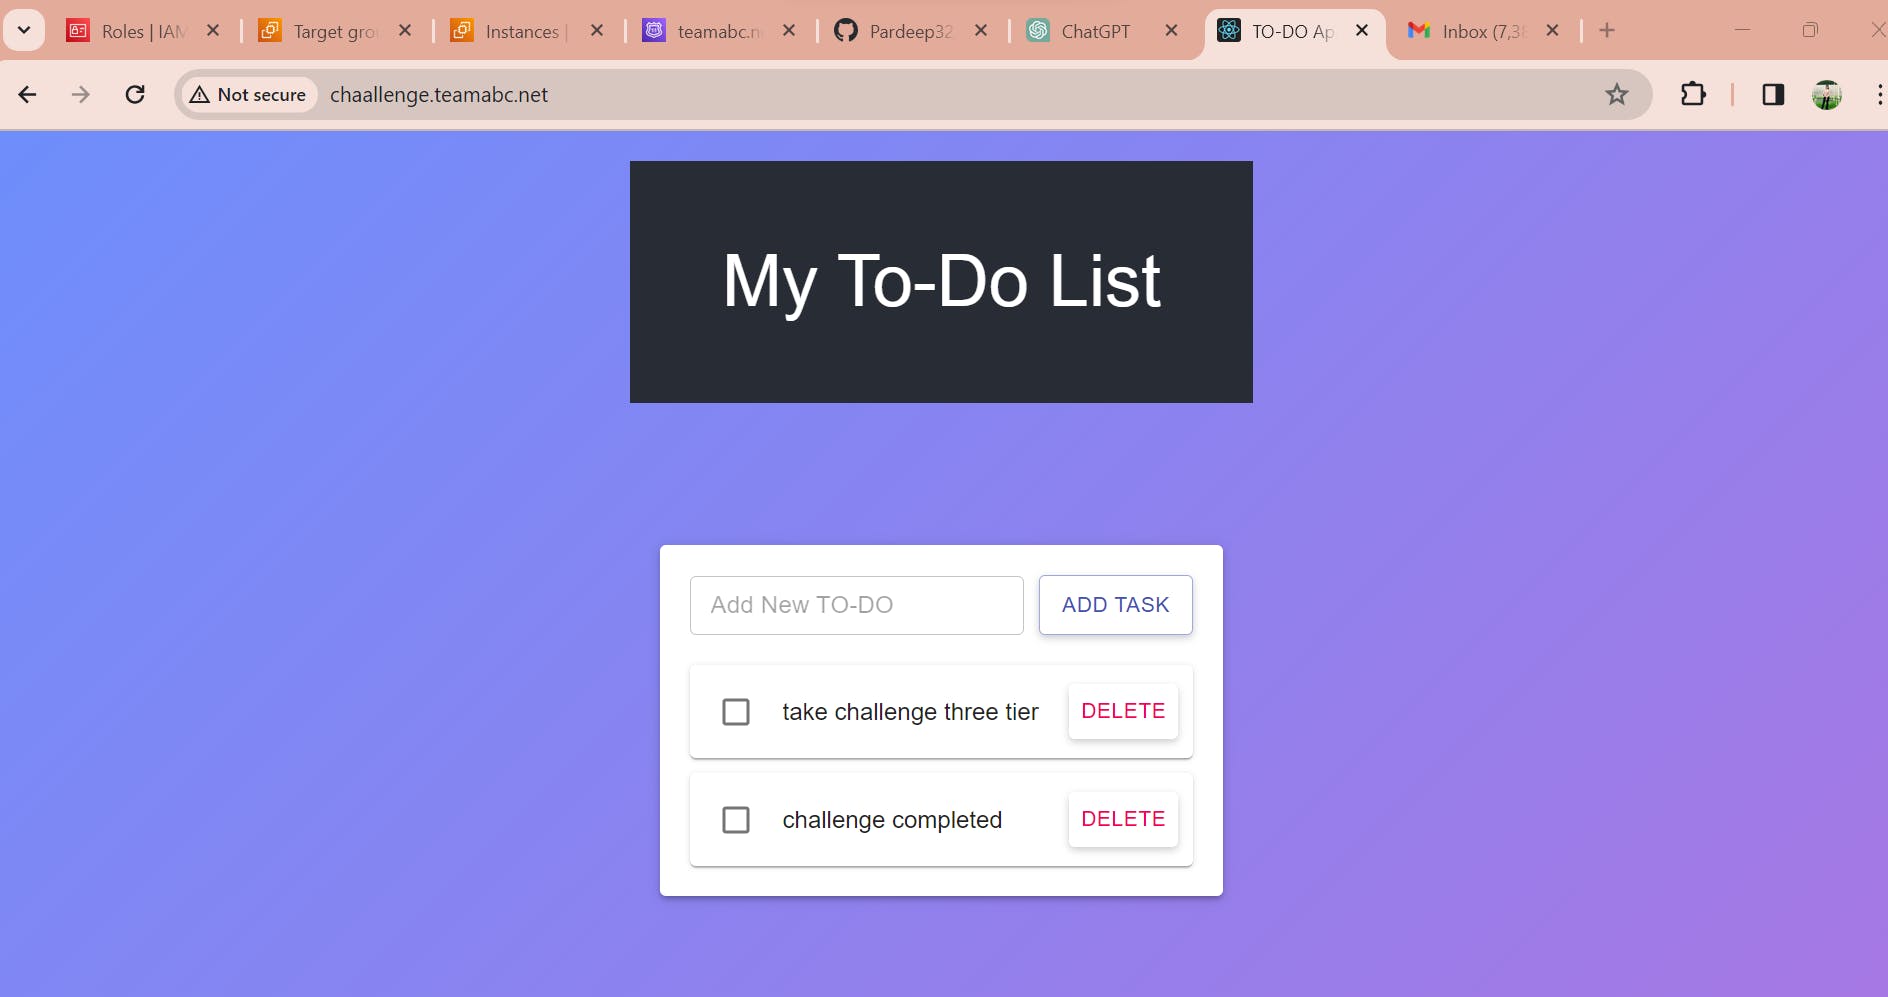
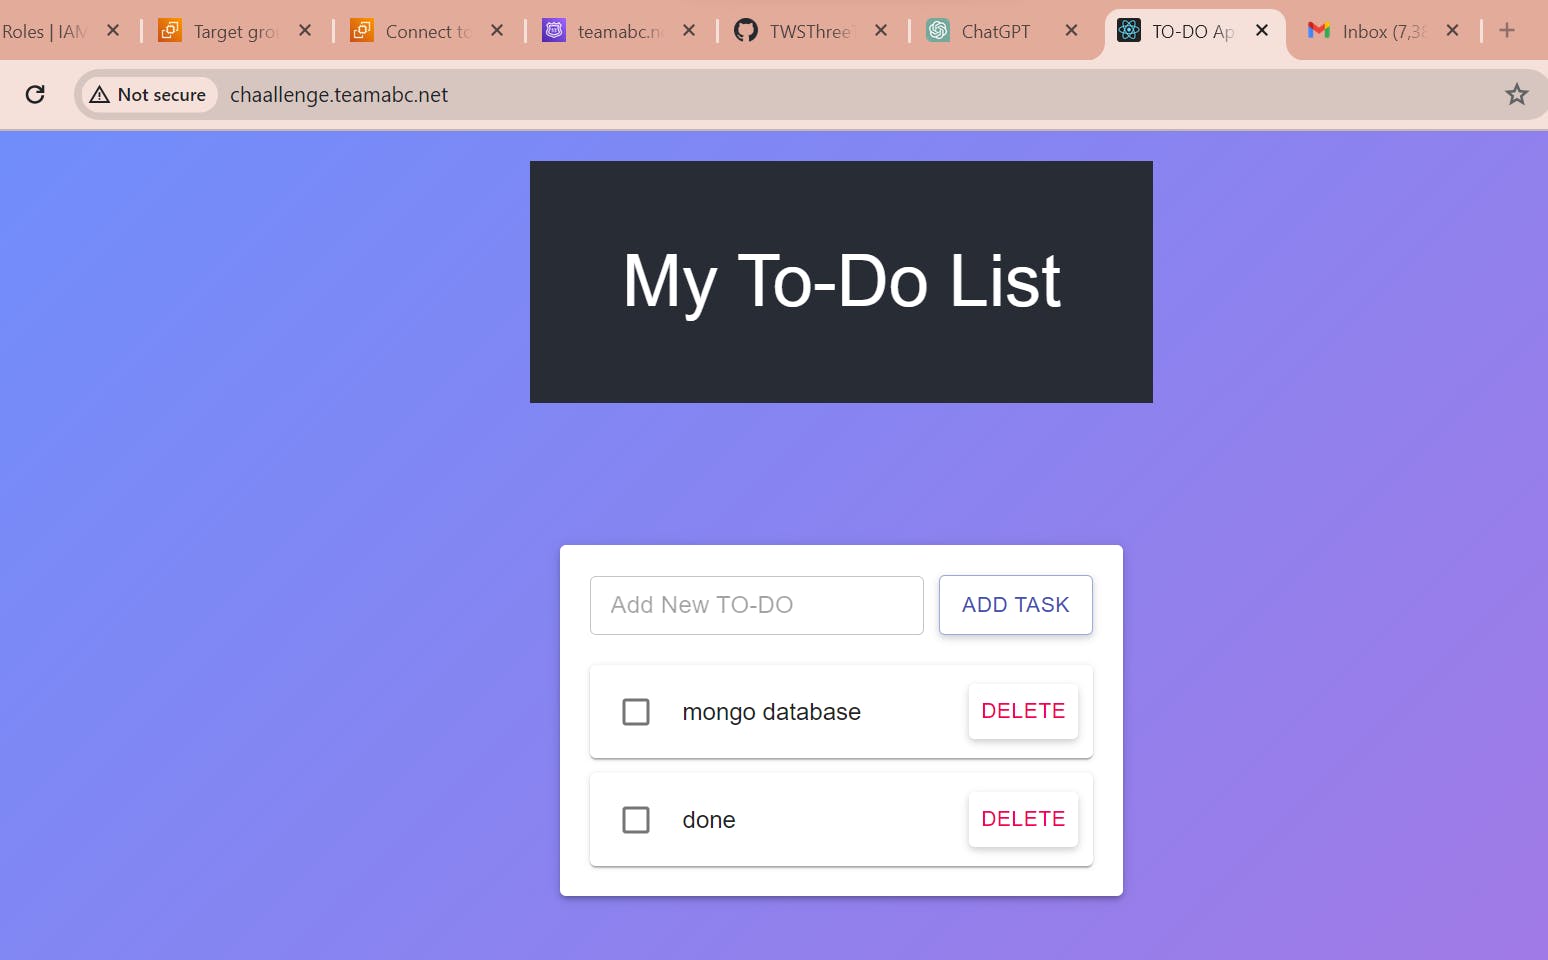
Frontend tier, backend tier and database tier are up and running.


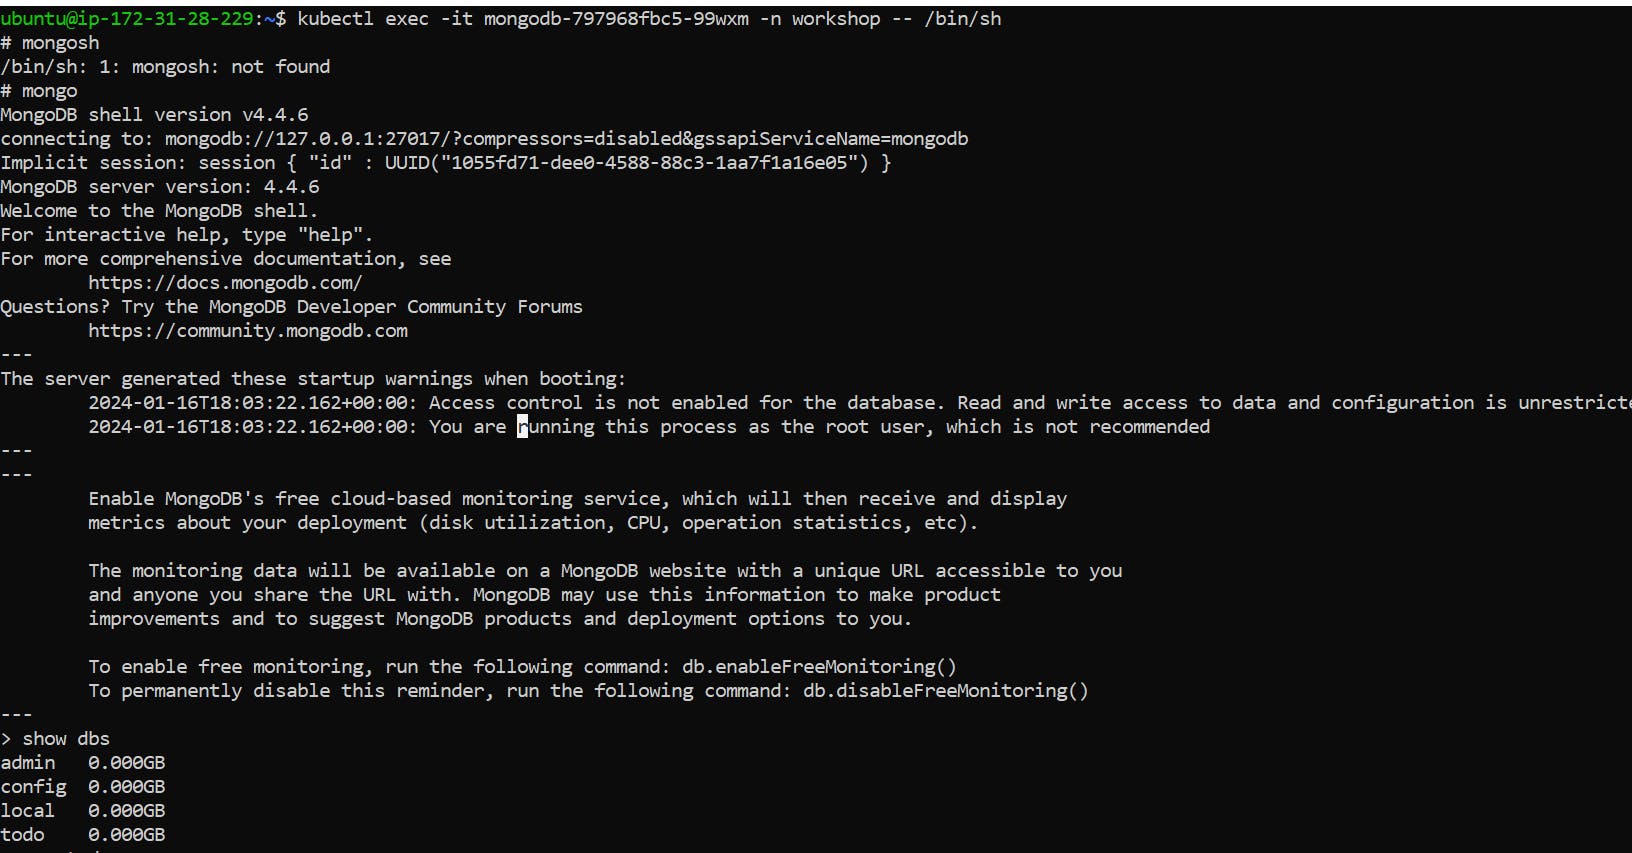
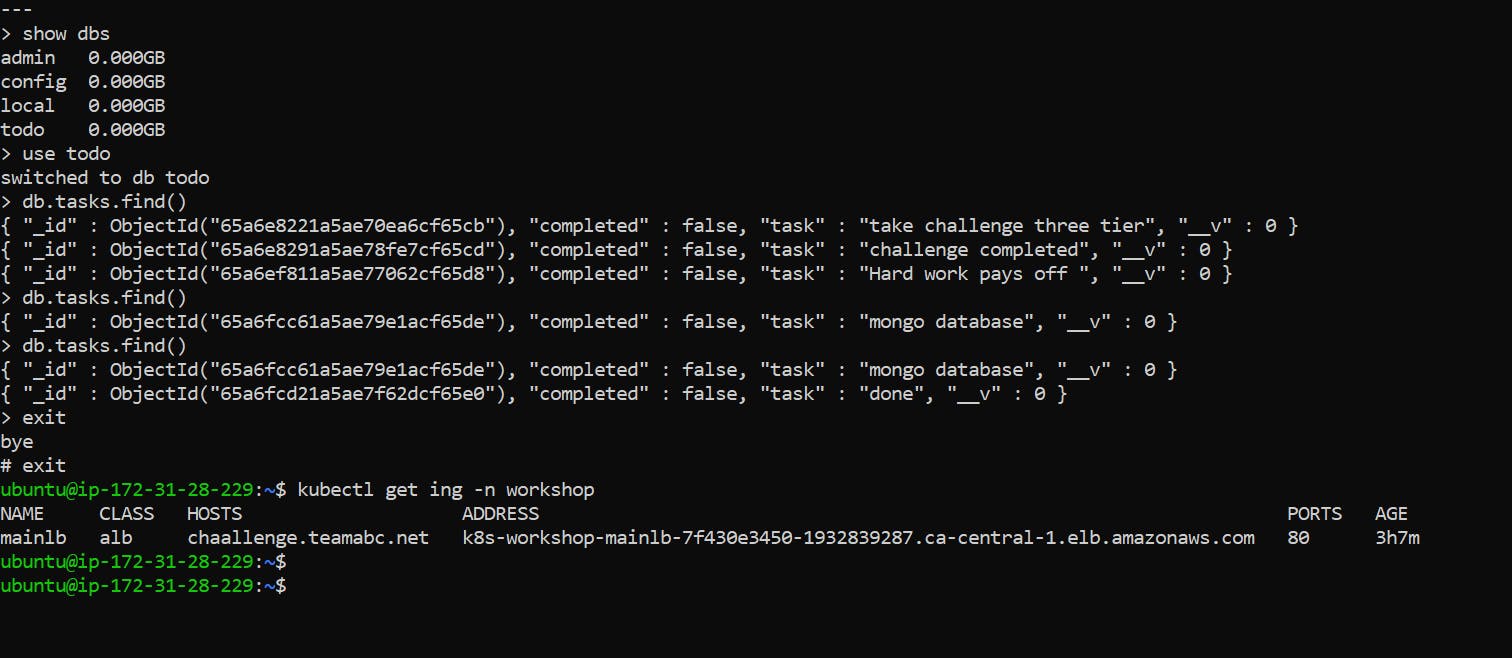
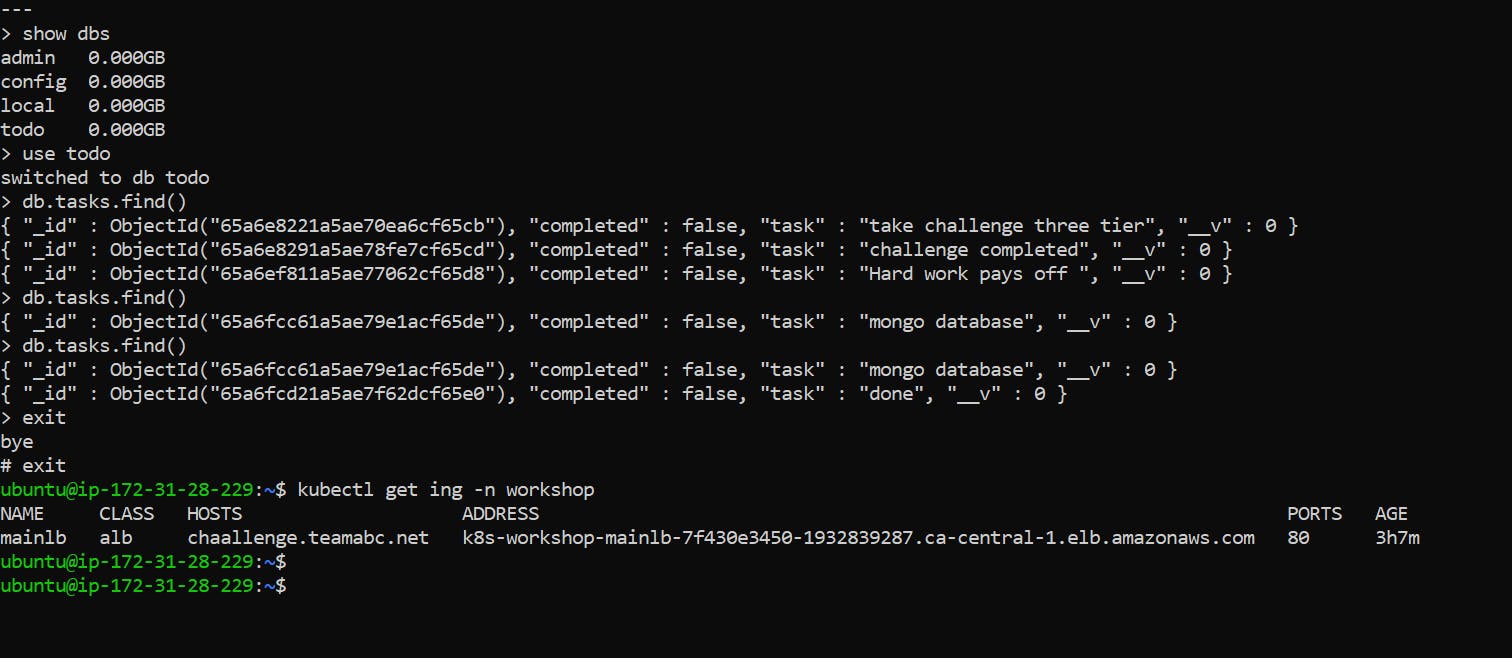
go inside mongo db and use todo database to check the saved content that uploaded on frontend.
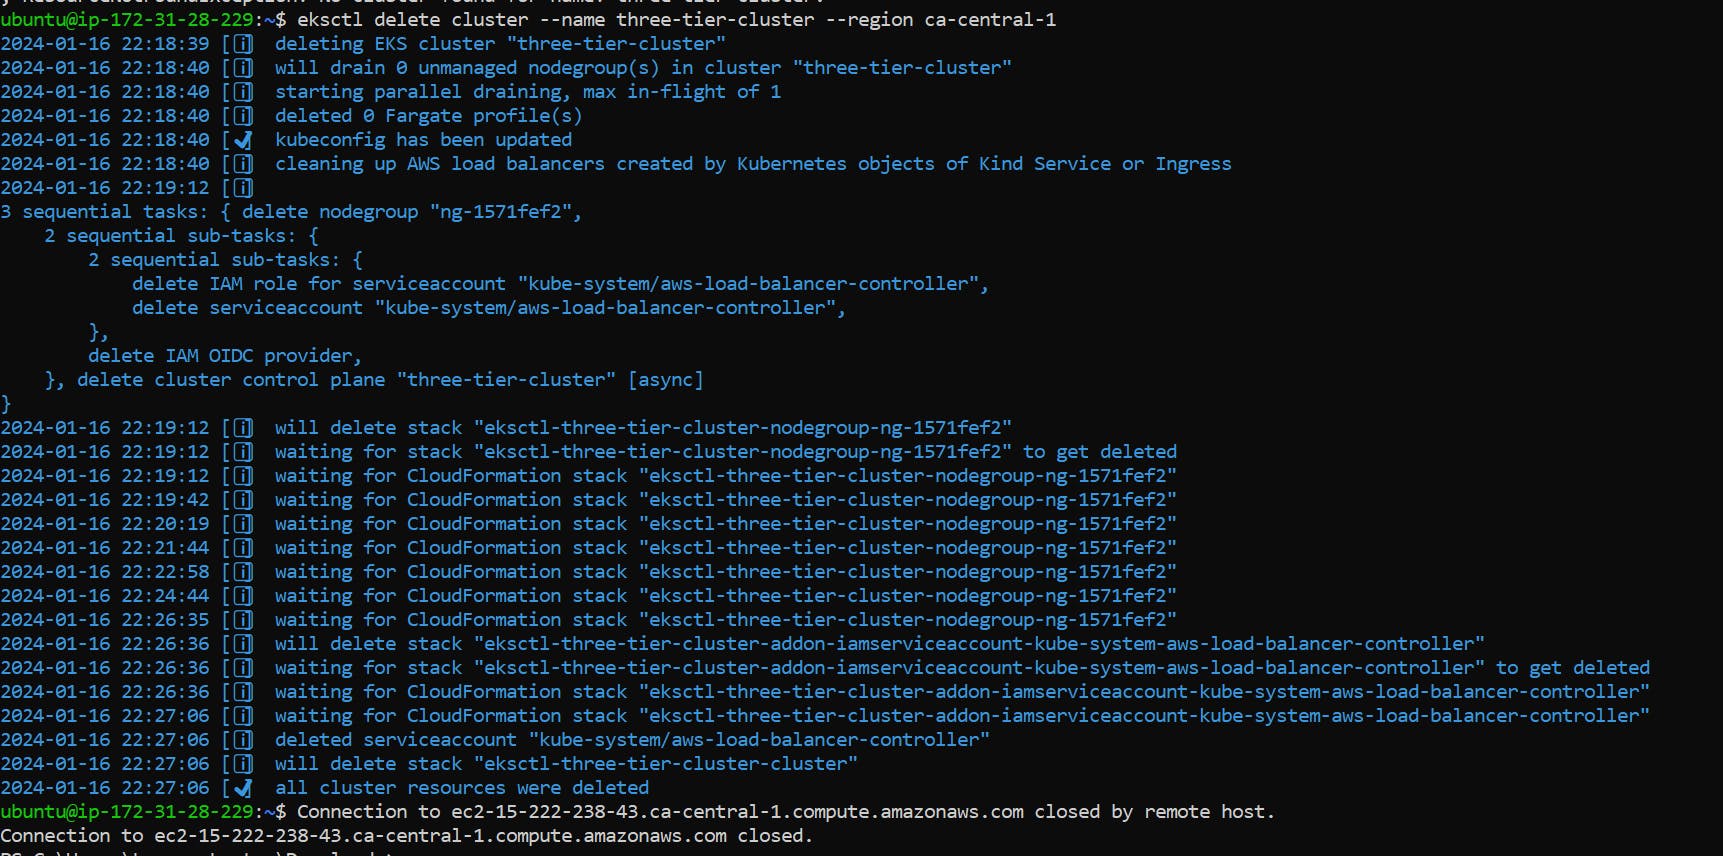
Delete EKS cluster.
As we wrap up our journey through the implementation of a three-tier architecture using Amazon EKS, we've witnessed the seamless integration of React.js for the frontend, Node.js for the backend, and MongoDB for the database. Leveraging the power of Kubernetes orchestration with Amazon EKS, we've containerized our applications, ensuring scalability, maintainability, and efficient resource utilization.
The deployment process, from creating Docker images to pushing them to Amazon ECR, has been streamlined with the AWS CLI. The integration of the Amazon Application Load Balancer (ALB) further enhances our application's accessibility.
By creating subdomains and configuring Route 53, we've added a personalized touch to our application's URL, making it accessible to users worldwide.
As you embark on your own projects, feel free to explore additional AWS services and functionalities to enhance your three-tier architecture further. Amazon EKS provides a solid foundation for containerized applications, and the possibilities for expansion and optimization are vast.
May your three-tier applications thrive in the cloud, and happy coding!
Feel free to ask me any doubts. Contact : pardeep17.kp@gmail.com