Automating Tetris Deployments with ArgoCD, Terraform, Kubernetes, Docker and Jenkins CICD


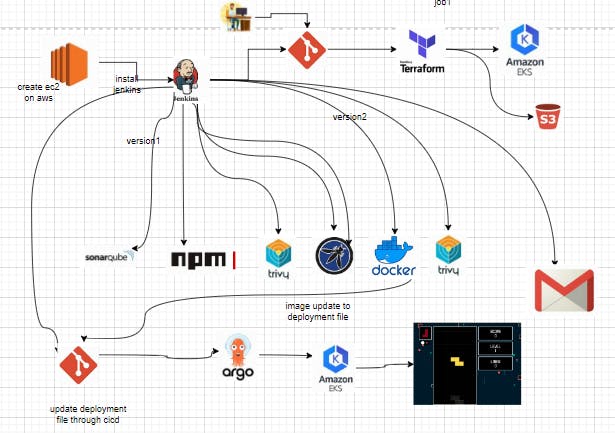
In our project, we leverage DevOps practices to streamline collaboration between development and operations teams, ensuring faster software delivery through continuous integration and deployment. With Terraform, we define and provision infrastructure resources in a consistent and reproducible manner, while Docker simplifies application deployment by encapsulating dependencies in lightweight containers. Kubernetes (EKS) automates the management of containerized applications, and ArgoCD facilitates GitOps-based continuous delivery to Kubernetes clusters. Jenkins orchestrates our DevOps pipeline, enabling automated build, test, and deployment processes, and seamlessly integrates with other tools to ensure efficient software delivery pipelines. Together, these technologies empower us to achieve a scalable, reliable, and auditable software delivery workflow.
phase1: Create an ec2 instance, where install terraform, jenkins, aws cli, kubectl, trivy and docker.
phase2: Create eks cluster with jenkins pipeline and Implementation of security with sonarqube and trivy.
phase3: Now we automate the whole deployment of application including docker image build, tag and push, scan, post to email using by jenkins pipeline
phase4: ArgoCD facilitates GitOps-based continuous delivery to Kubernetes cluster
github repo:
Tetris-v1 - https://github.com/Pardeep32/Tetris-V1.git
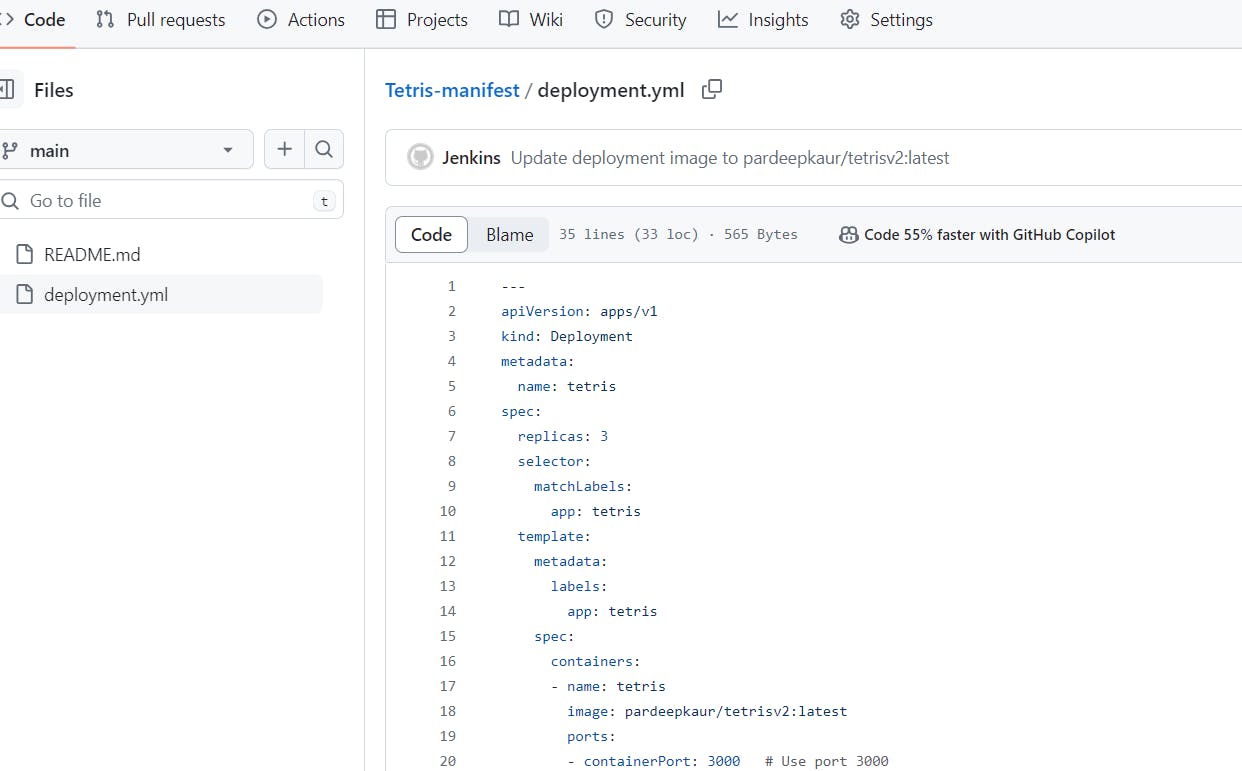
Tetris-manifest - https://github.com/Pardeep32/Tetris-manifest.git
Tetris-v2 - https://github.com/Pardeep32/Tetris-V2.git
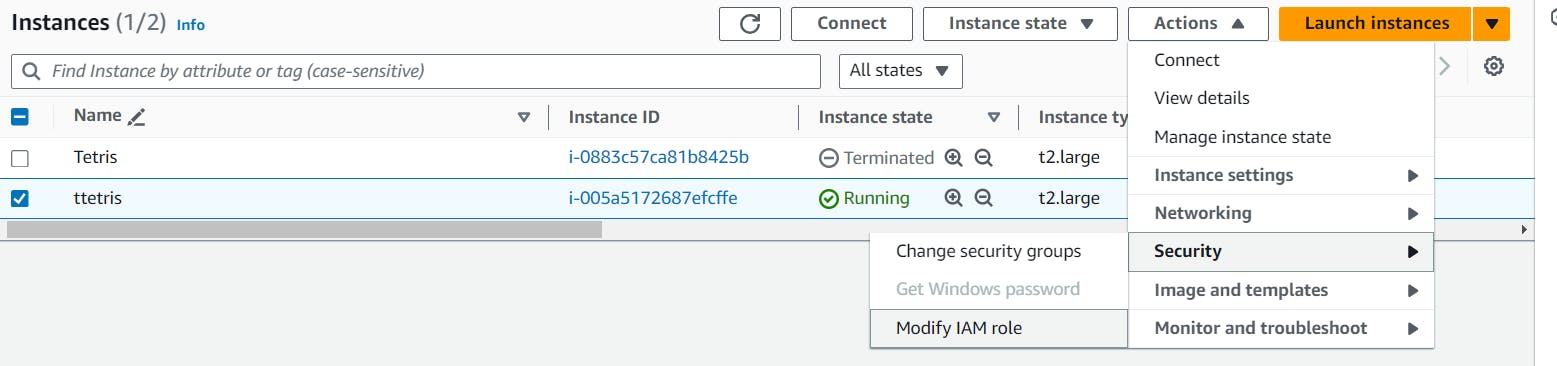
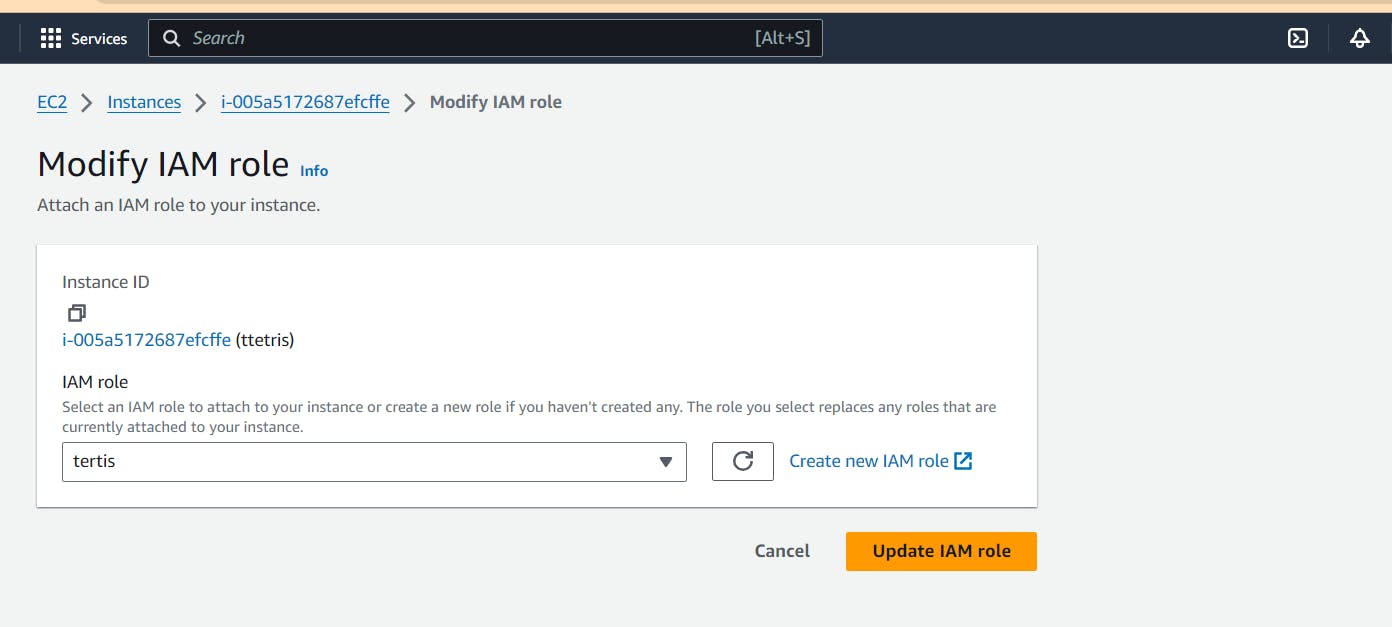
step1: create an ec2 instance of t2.large type attach an iam role with the addministration access to instance. connect through ssh and install following tools on ec2:

Jenkins
Docker
Trivy
Terraform
Kubectl
Aws cli
sudo su become root user only then install all tools
Vim jenkins.sh
chmod 777 jenkins.sh give execution permissions.
sh jenkins.sh
#!/bin/bash
sudo apt update -y
wget -O - https://packages.adoptium.net/artifactory/api/gpg/key/public | tee /etc/apt/keyrings/adoptium.asc
echo "deb [signed-by=/etc/apt/keyrings/adoptium.asc] https://packages.adoptium.net/artifactory/deb $(awk -F= '/^VERSION_CODENAME/{print$2}' /etc/os-release) main" | tee /etc/apt/sources.list.d/adoptium.list
sudo apt update -y
sudo apt install temurin-17-jdk -y
/usr/bin/java --version
curl -fsSL https://pkg.jenkins.io/debian-stable/jenkins.io-2023.key | sudo tee /usr/share/keyrings/jenkins-keyring.asc > /dev/null
echo deb [signed-by=/usr/share/keyrings/jenkins-keyring.asc] https://pkg.jenkins.io/debian-stable binary/ | sudo tee /etc/apt/sources.list.d/jenkins.list > /dev/null
sudo apt-get update -y
sudo apt-get install jenkins -y
sudo systemctl start jenkins
sudo systemctl status jenkins
vim docker.sh
chmod 777 docker.sh
sh docker.sh
#!/bin/bash
#install docker
sudo apt-get update
sudo apt-get install docker.io -y
sudo usermod -aG docker ubuntu
newgrp docker
sudo chmod 777 /var/run/docker.sock
docker run -d --name sonar -p 9000:9000 sonarqube:lts-community
docker ps
vim trivy.sh
chmod 777 trivy.sh
sh trivy.sh
#!/bin/bash
# install trivy
sudo apt-get install wget apt-transport-https gnupg lsb-release -y
wget -qO - https://aquasecurity.github.io/trivy-repo/deb/public.key | gpg --dearmor | sudo tee /usr/share/keyrings/trivy.gpg > /dev/null
echo "deb [signed-by=/usr/share/keyrings/trivy.gpg] https://aquasecurity.github.io/trivy-repo/deb $(lsb_release -sc) main" | sudo tee -a /etc/apt/sources.list.d/trivy.list
sudo apt-get update
sudo apt-get install trivy -y
vim terraform.sh
chmod 777 terraform.sh
sh terraform.sh
#!/bin/bash
#install terraform
sudo apt install wget -y
wget -O- https://apt.releases.hashicorp.com/gpg | sudo gpg --dearmor -o /usr/share/keyrings/hashicorp-archive-keyring.gpg
echo "deb [signed-by=/usr/share/keyrings/hashicorp-archive-keyring.gpg] https://apt.releases.hashicorp.com $(lsb_release -cs) main" | sudo tee /etc/apt/sources.list.d/hashicorp.list
sudo apt update && sudo apt install terraform
vim kubectl.sh
chmod 777 kubectl.sh
sh kubectl.sh
#!/bin/bash
#install Kubectl on Jenkins
sudo apt update
sudo apt install curl -y
curl -LO https://dl.k8s.io/release/$(curl -L -s https://dl.k8s.io/release/stable.txt)/bin/linux/amd64/kubectl
sudo install -o root -g root -m 0755 kubectl /usr/local/bin/kubectl
kubectl version --client
vim awscli.sh
chmod 777 awscli.sh
sh awscli.sh
#!/bin/bash
#install Aws cli
curl "https://awscli.amazonaws.com/awscli-exe-linux-x86_64.zip" -o "awscliv2.zip"
sudo apt-get install unzip -y
unzip awscliv2.zip
sudo ./aws/install

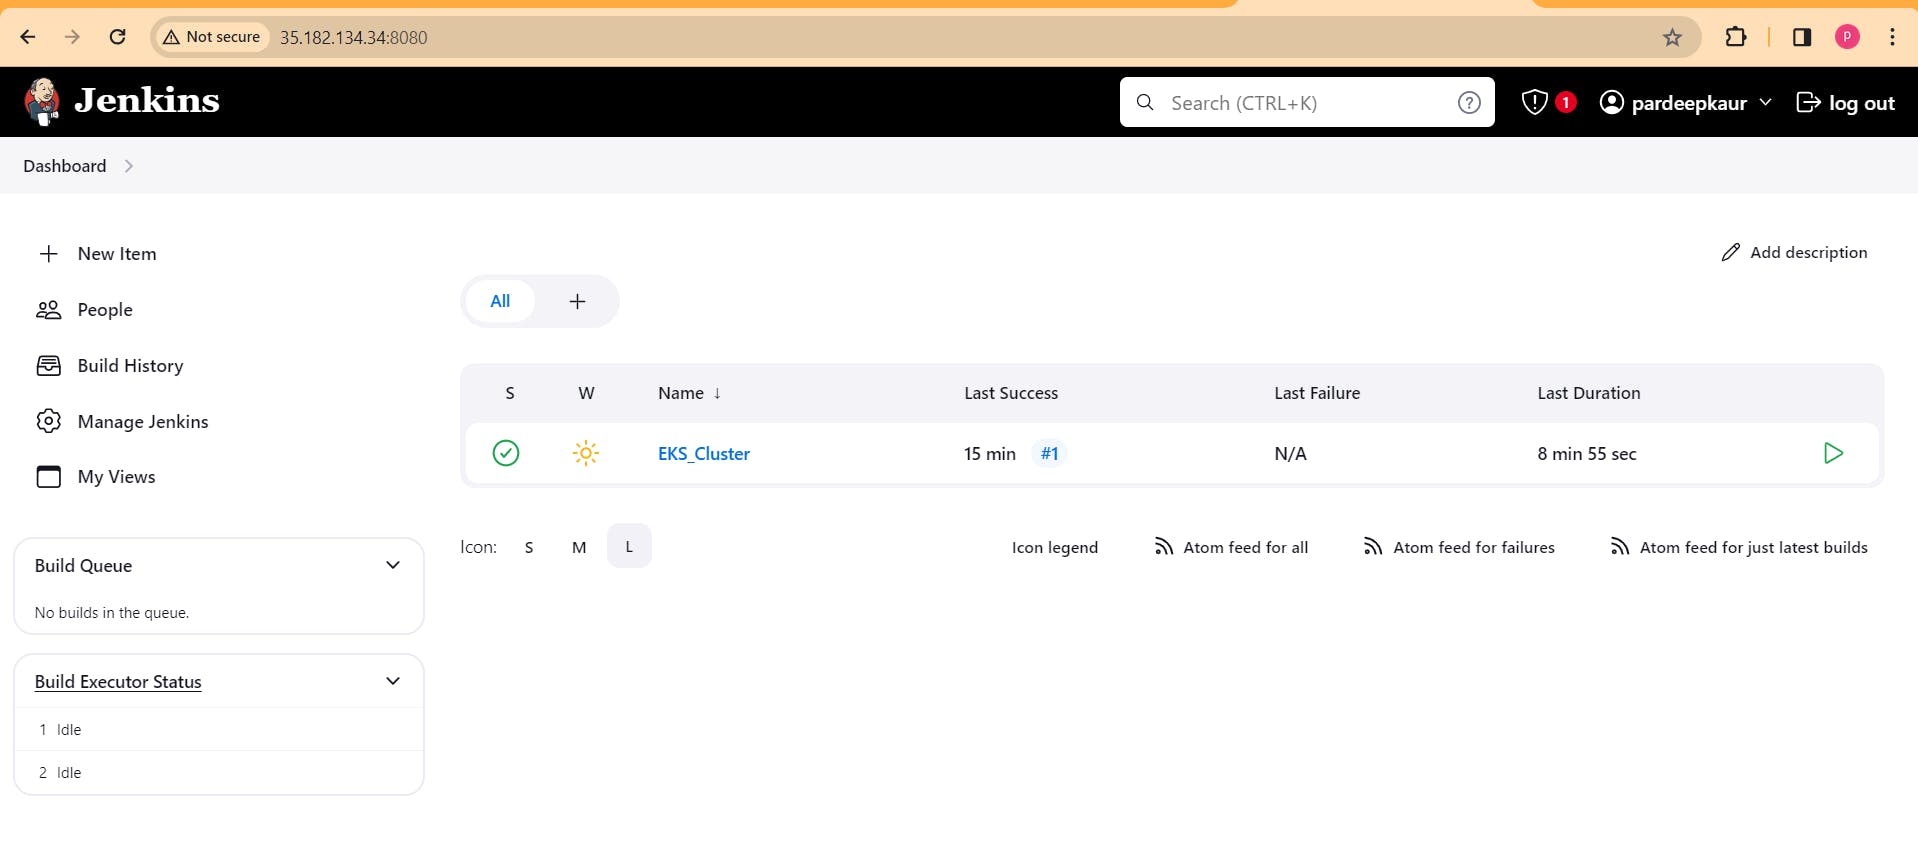
Now copy the public ip address on ec2 instance, paste in browser 35.182.134.34:8080. jenkins is running on port 8080. add 8080 in secuirty group fo ec2 instance.
Step2: Configure terraform on jenkins server
go to manage jenkins -> plugins -> available plugins -> terraform . install terraform. then configure terraform in jenkins tools:
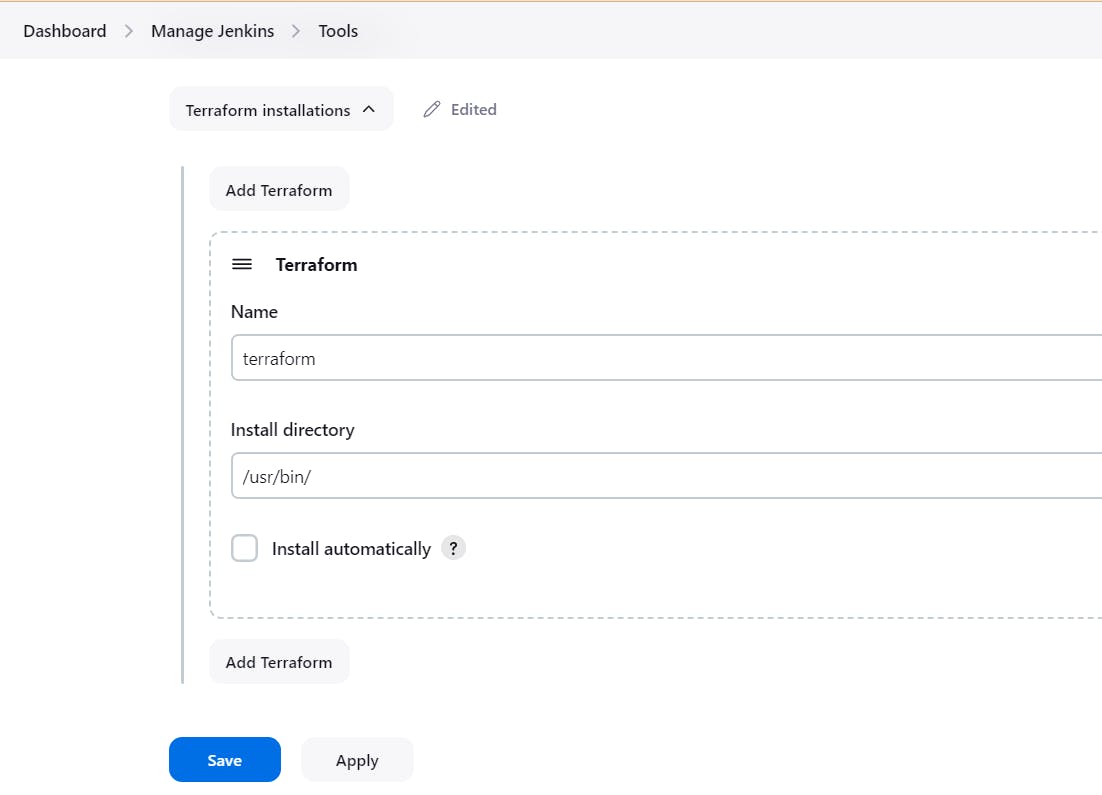
add path for terraform , go to ec2 server and
which terraform

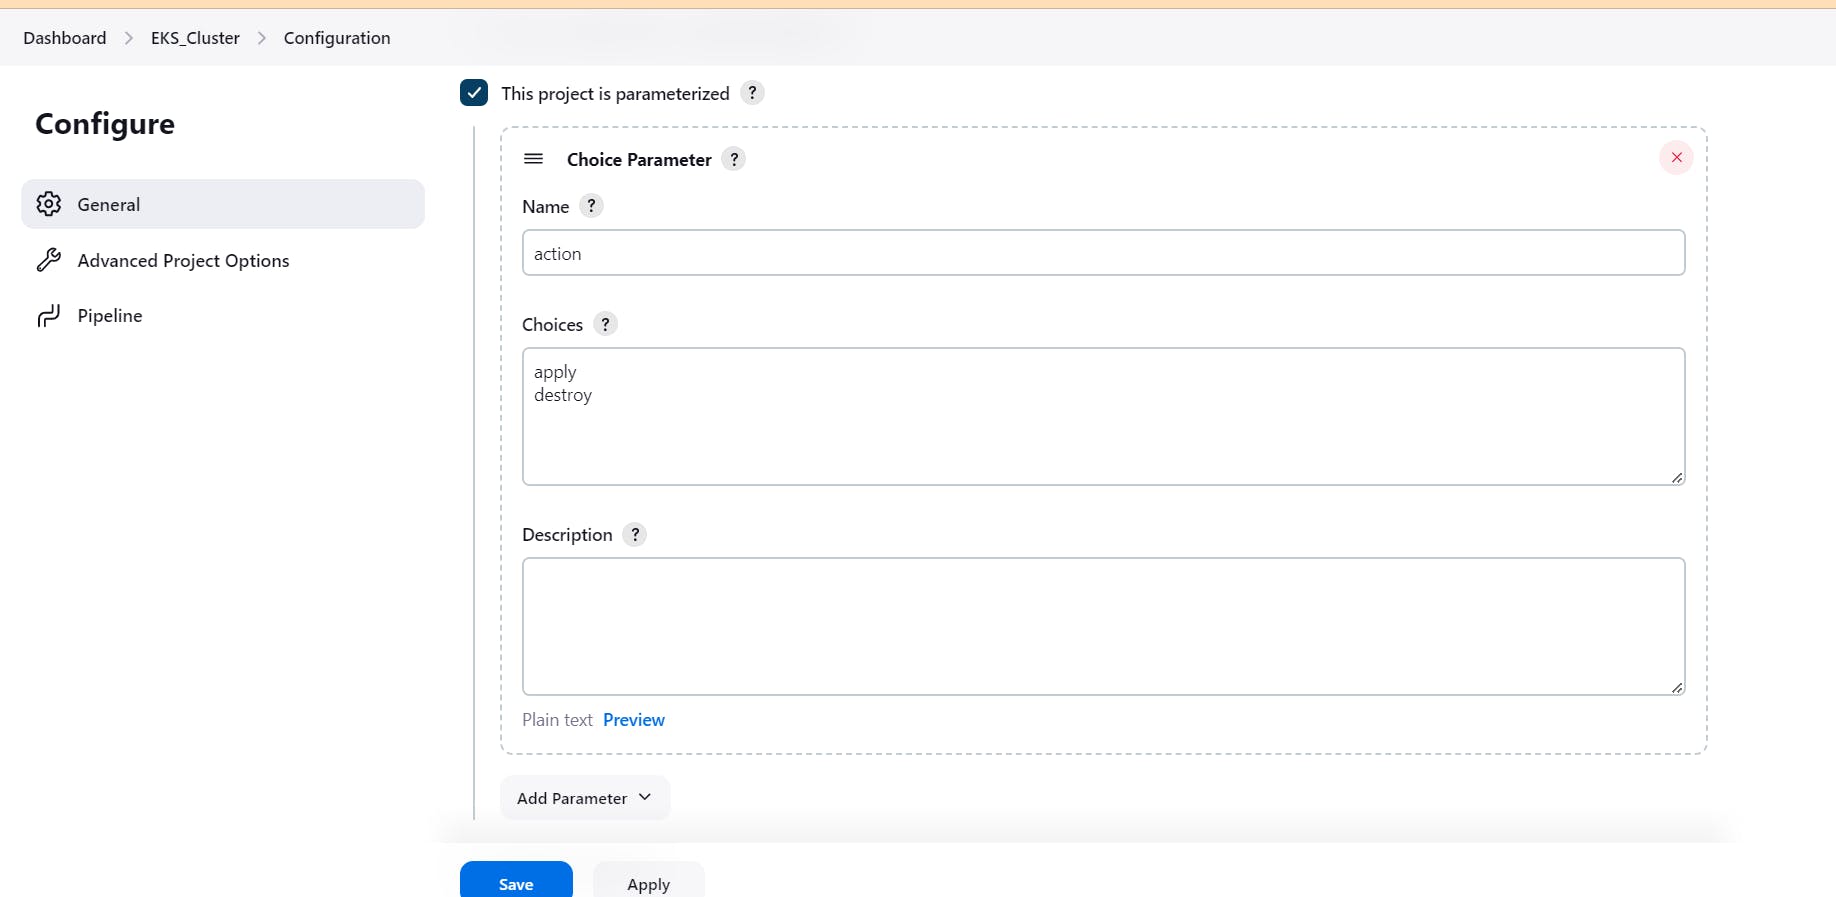
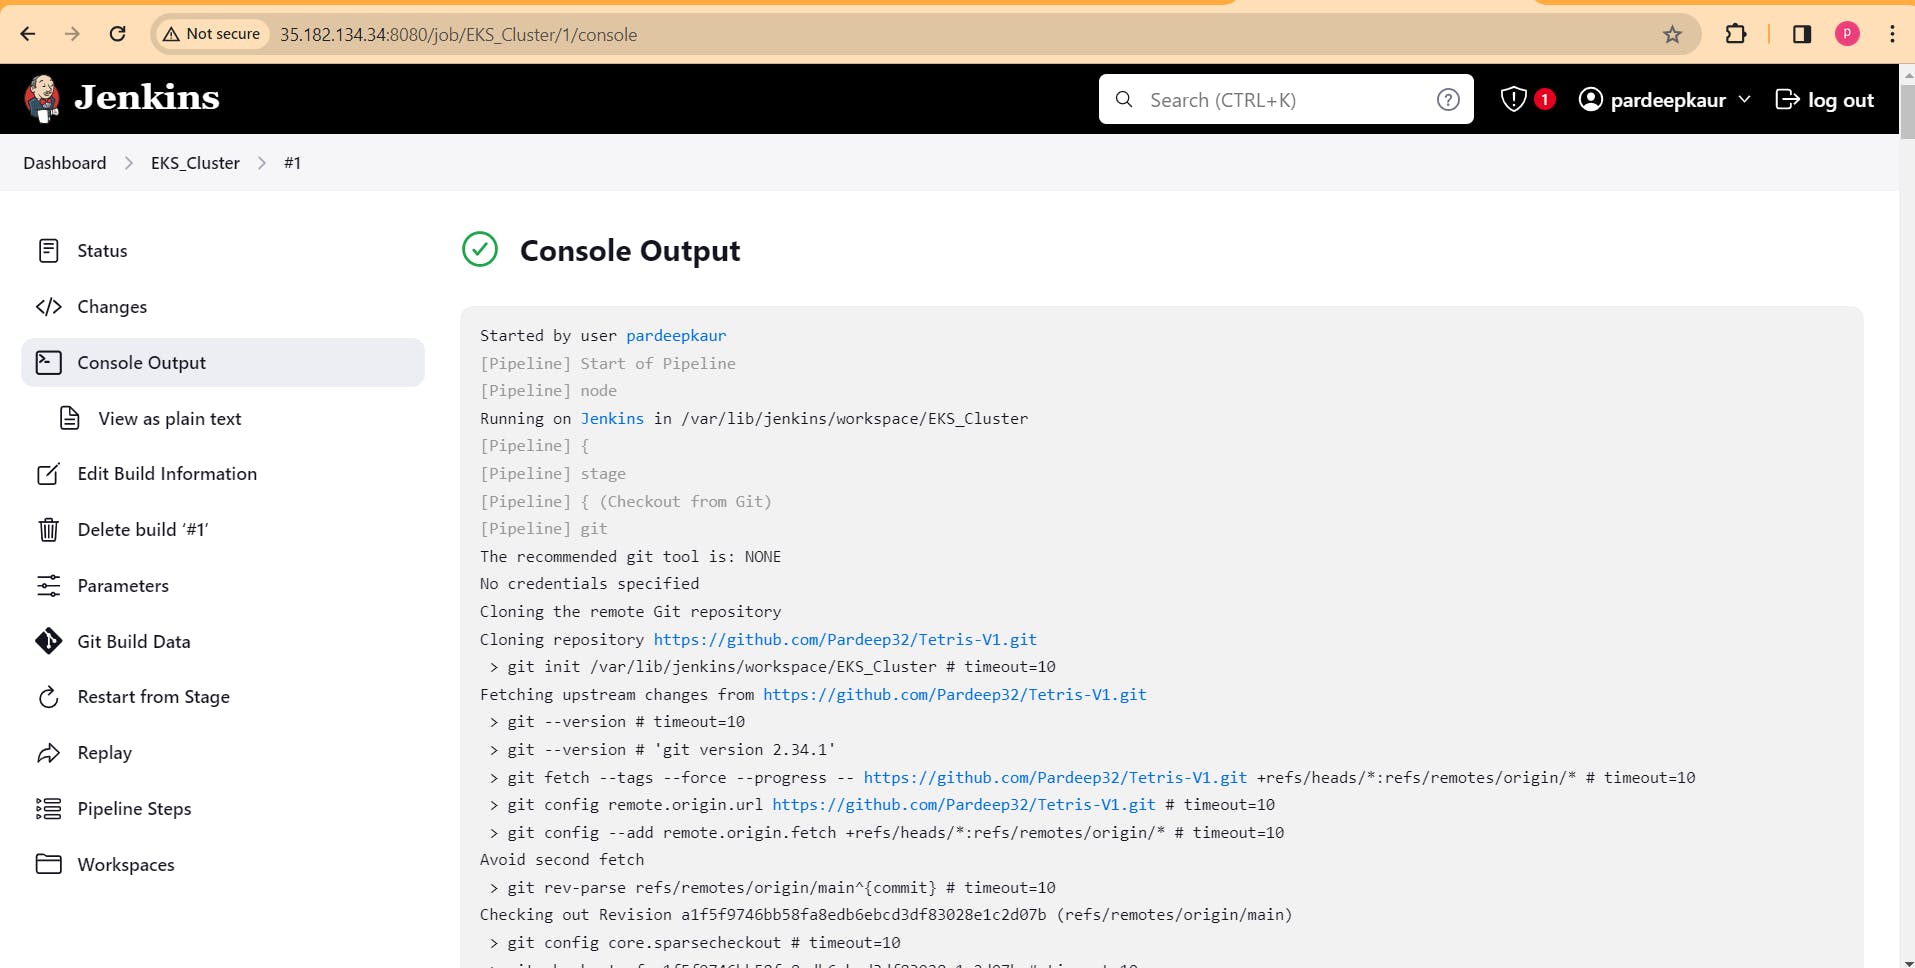
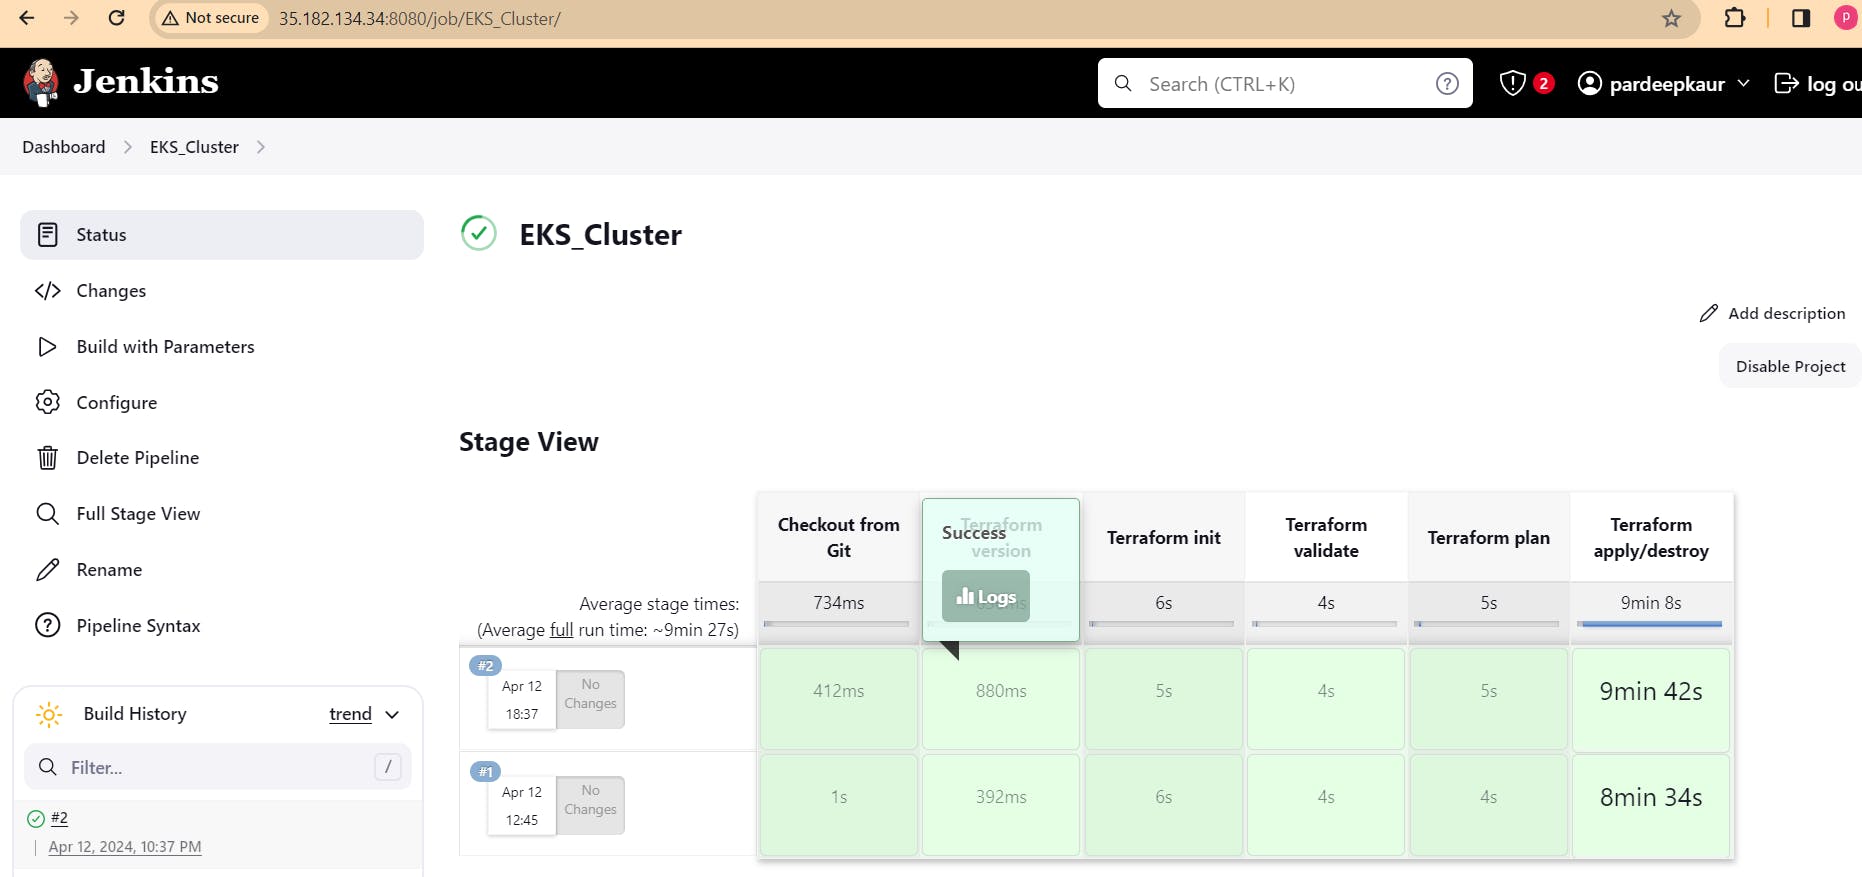
Step3. Create a pipeline for eks cluster
Enter name of pipleline , select pipeline, create. do the following steps and create eks cluster on aws . it took 7-8 mins.

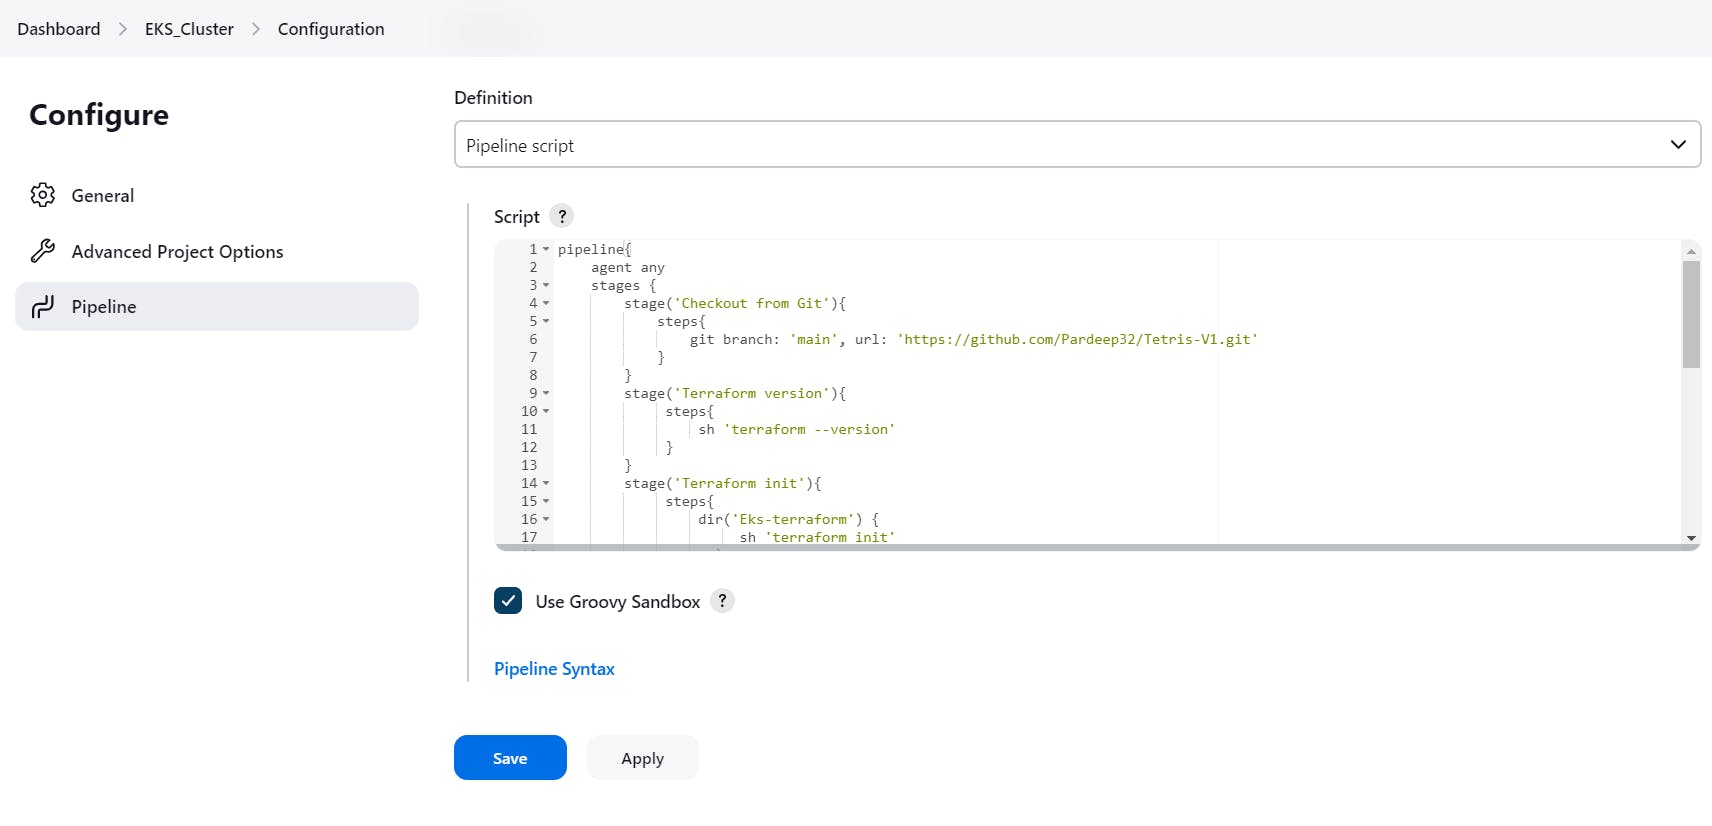
pipeline{
agent any
stages {
stage('Checkout from Git'){
steps{
git branch: 'main', url: 'https://github.com/Pardeep32/Tetris-V1.git'
}
}
stage('Terraform version'){
steps{
sh 'terraform --version'
}
}
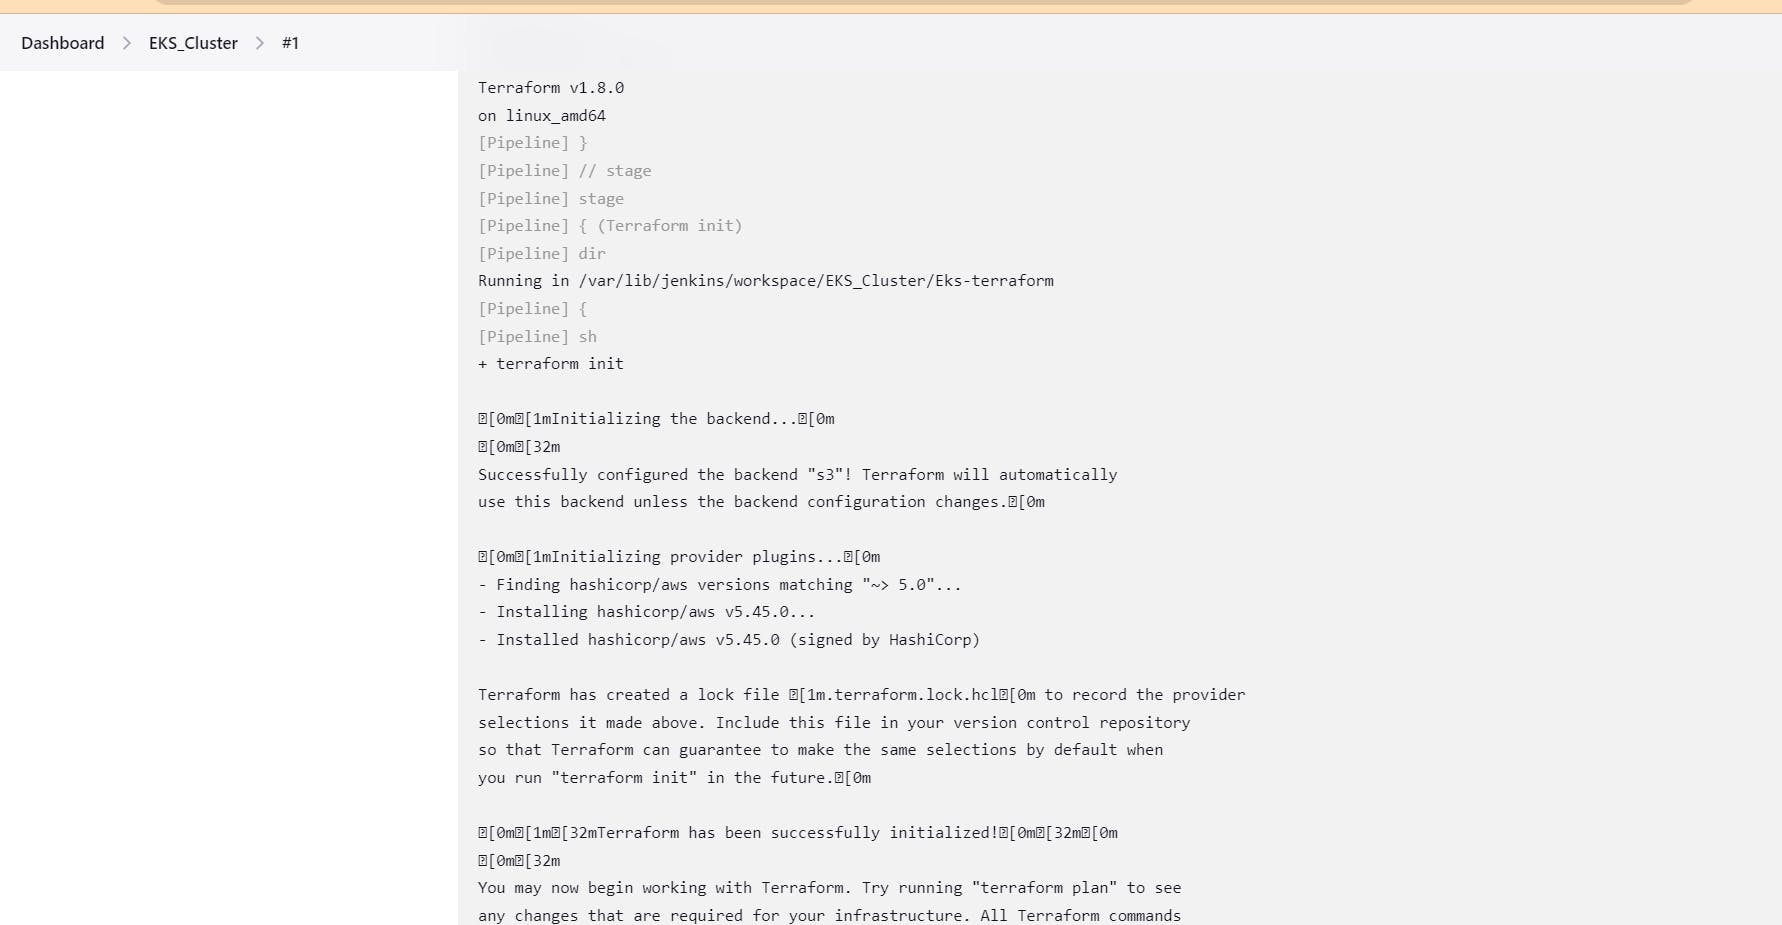
stage('Terraform init'){
steps{
dir('Eks-terraform') {
sh 'terraform init'
}
}
}
stage('Terraform validate'){
steps{
dir('Eks-terraform') {
sh 'terraform validate'
}
}
}
stage('Terraform plan'){
steps{
dir('Eks-terraform') {
sh 'terraform plan'
}
}
}
stage('Terraform apply/destroy'){
steps{
dir('Eks-terraform') {
sh 'terraform ${action} --auto-approve'
}
}
}
}
}
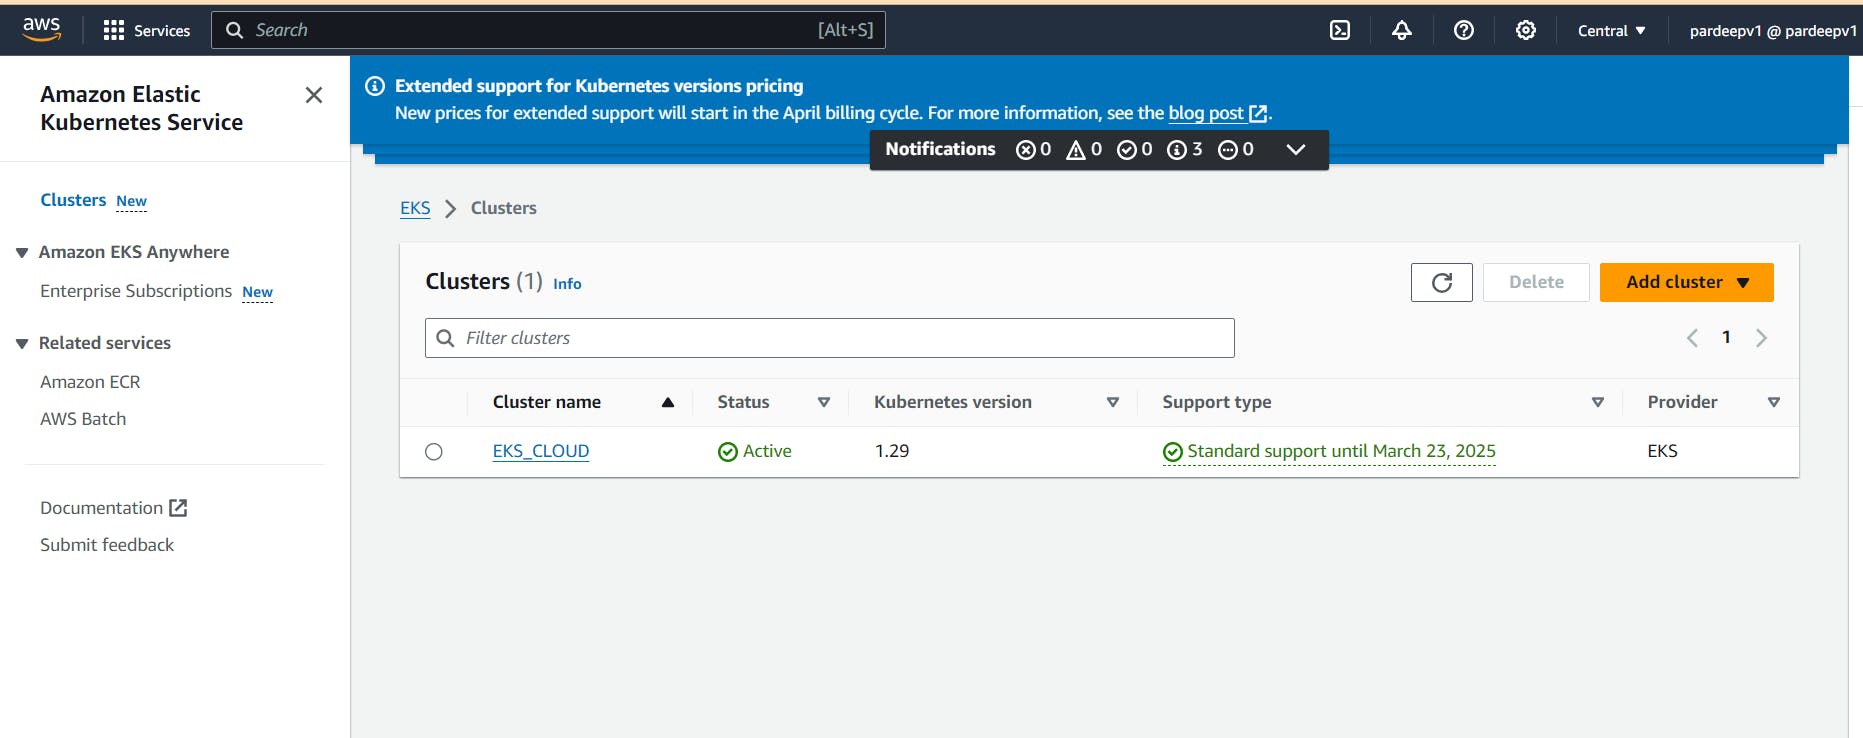
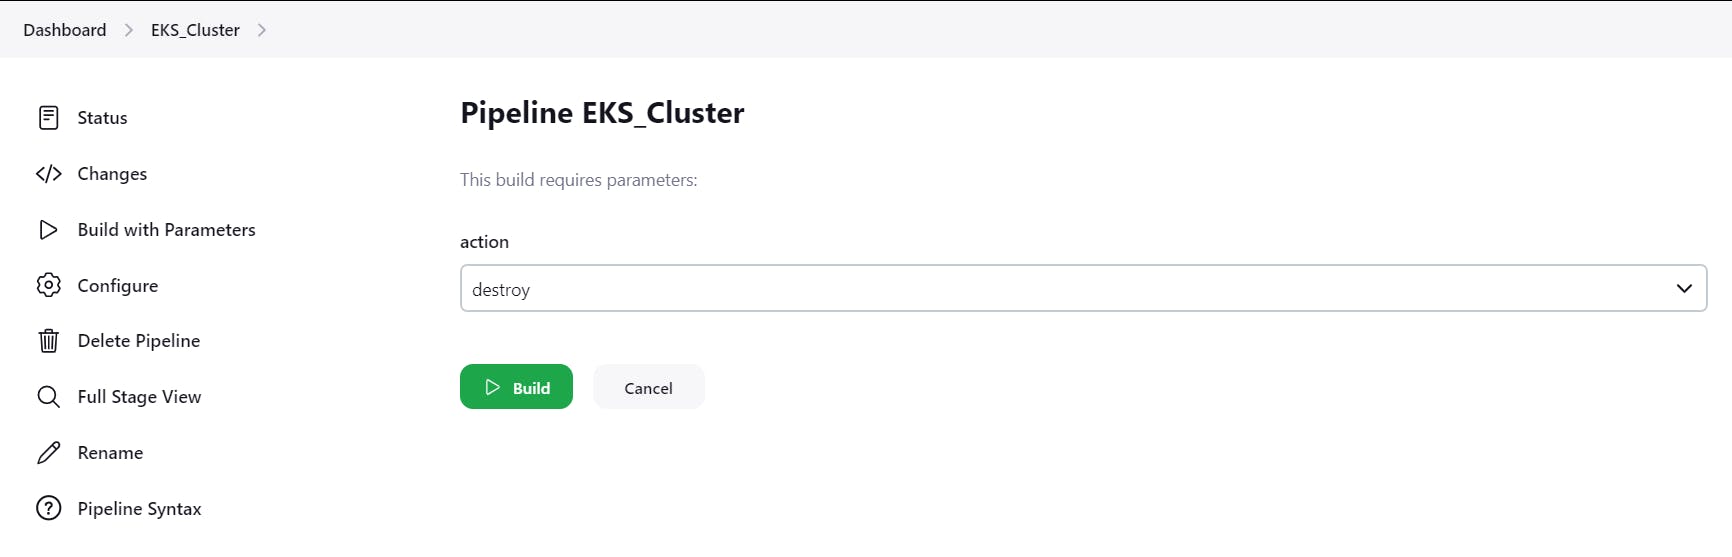
After creation item, go to EKS_cluster pipeline -> build with parameter, select apply -> build.
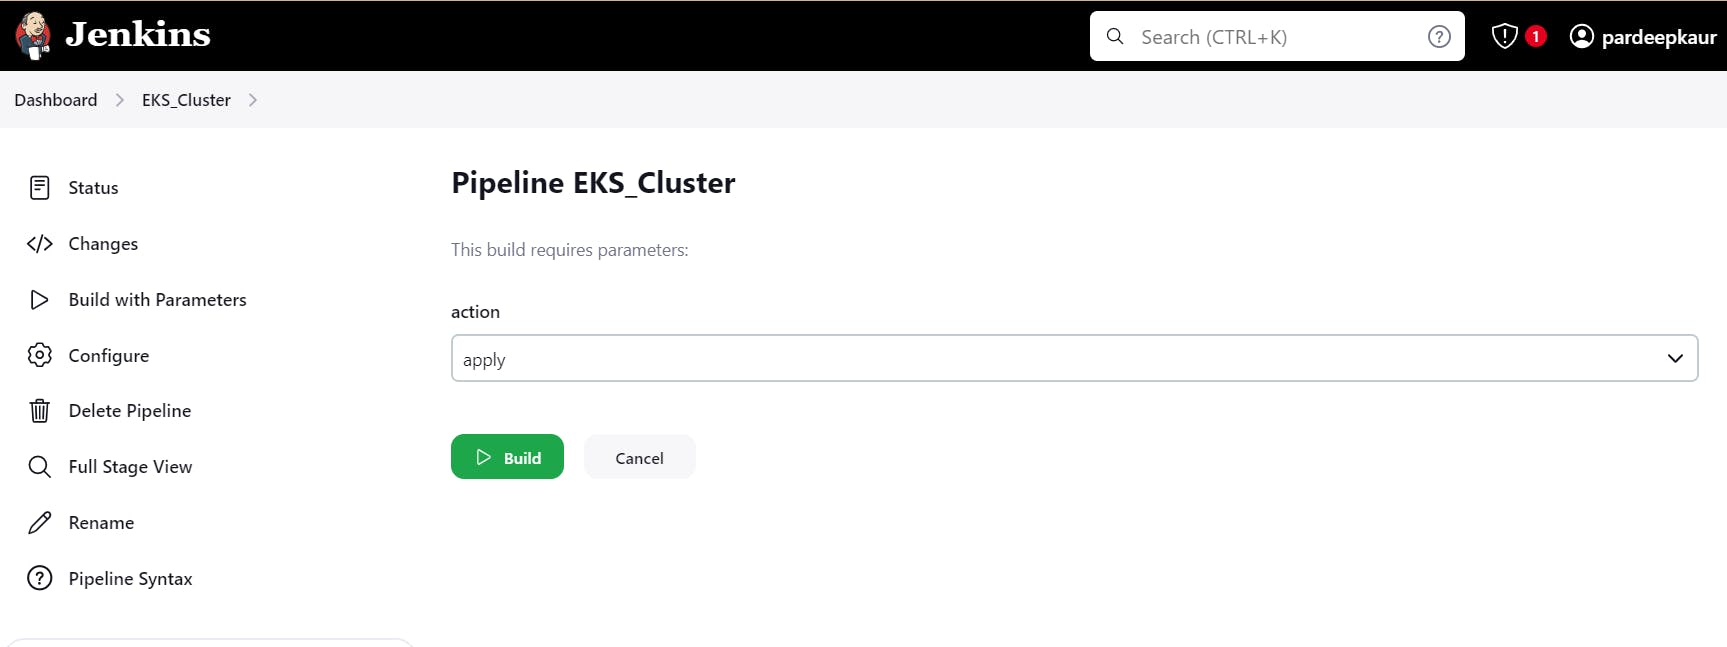
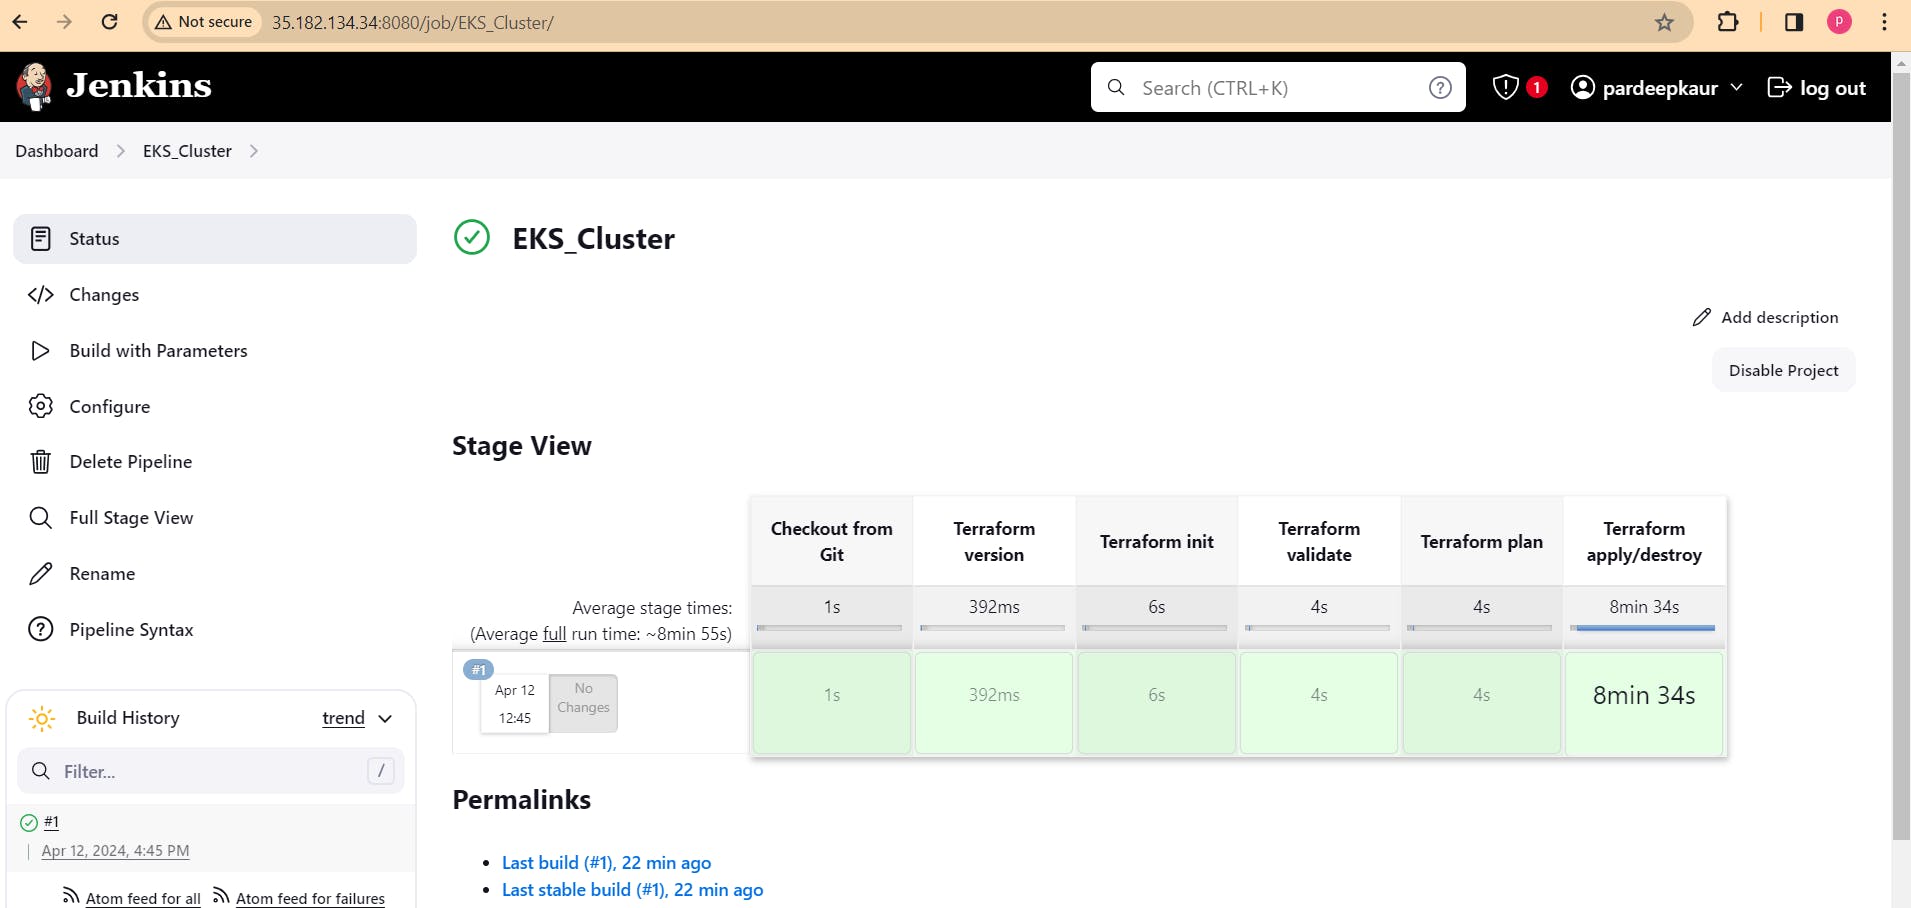
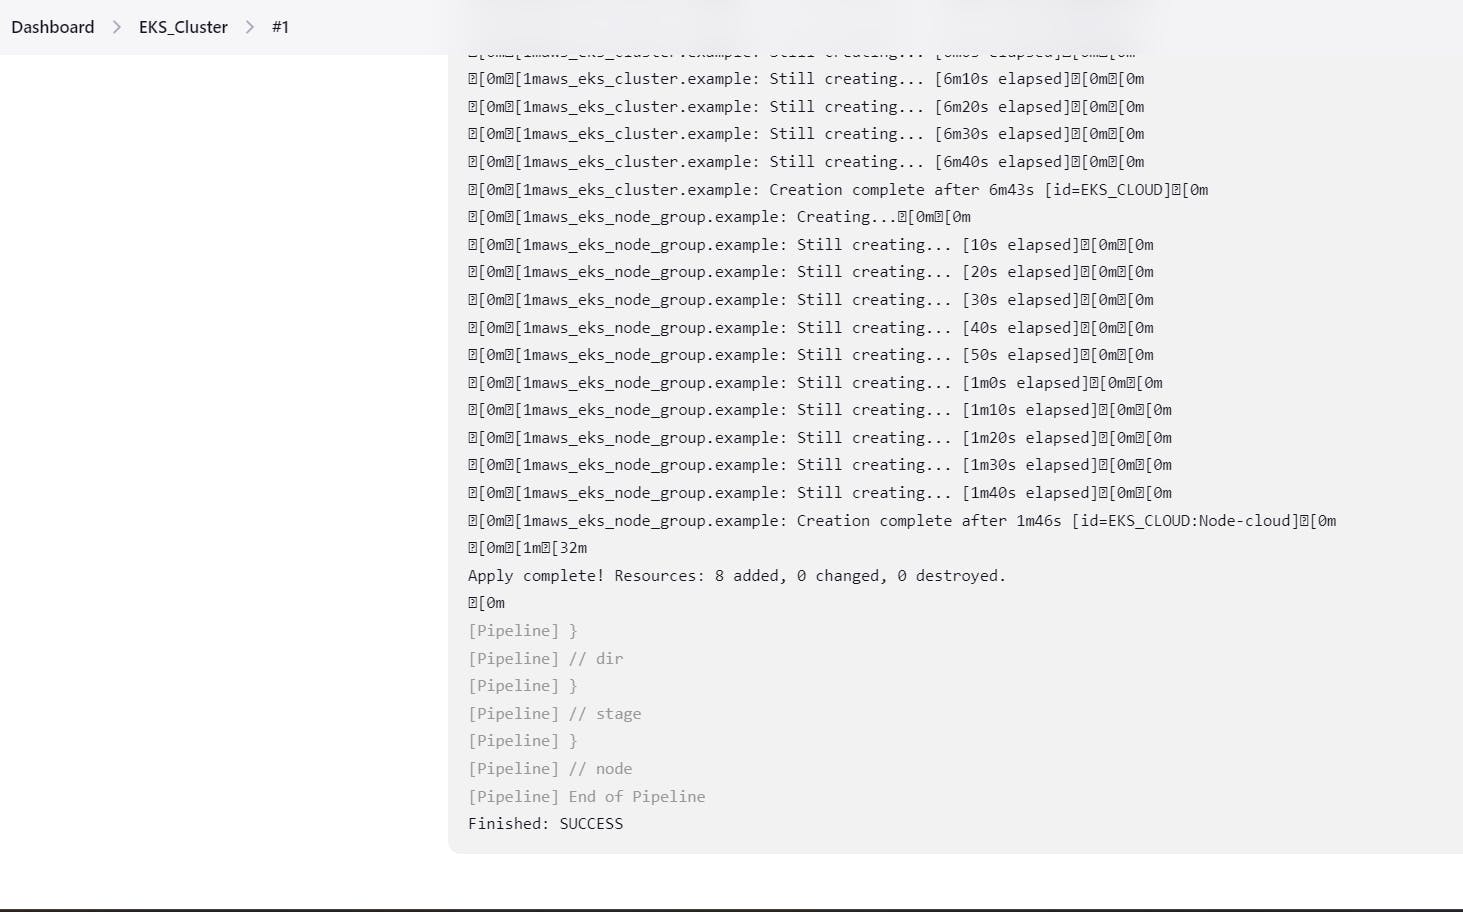
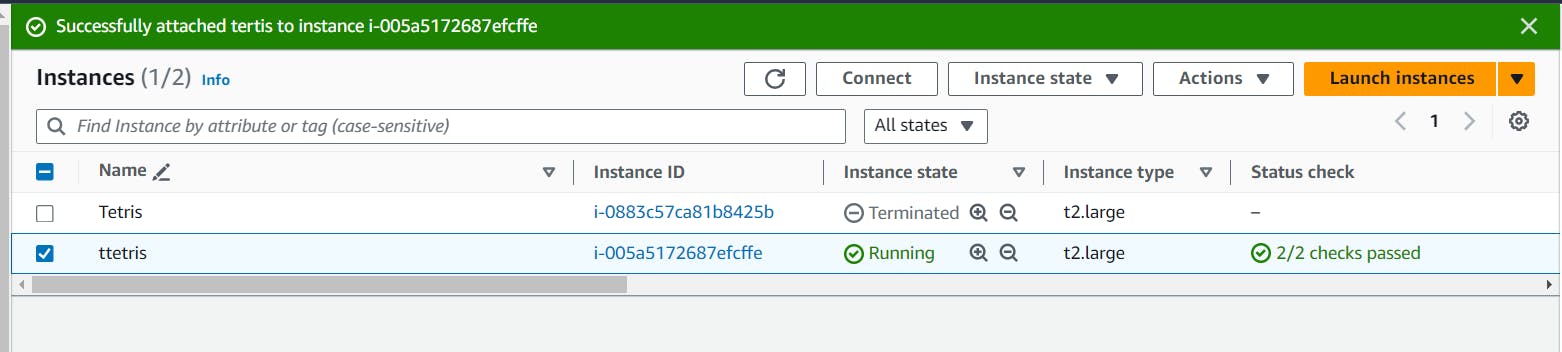
it will create EKS cluster on AWS.
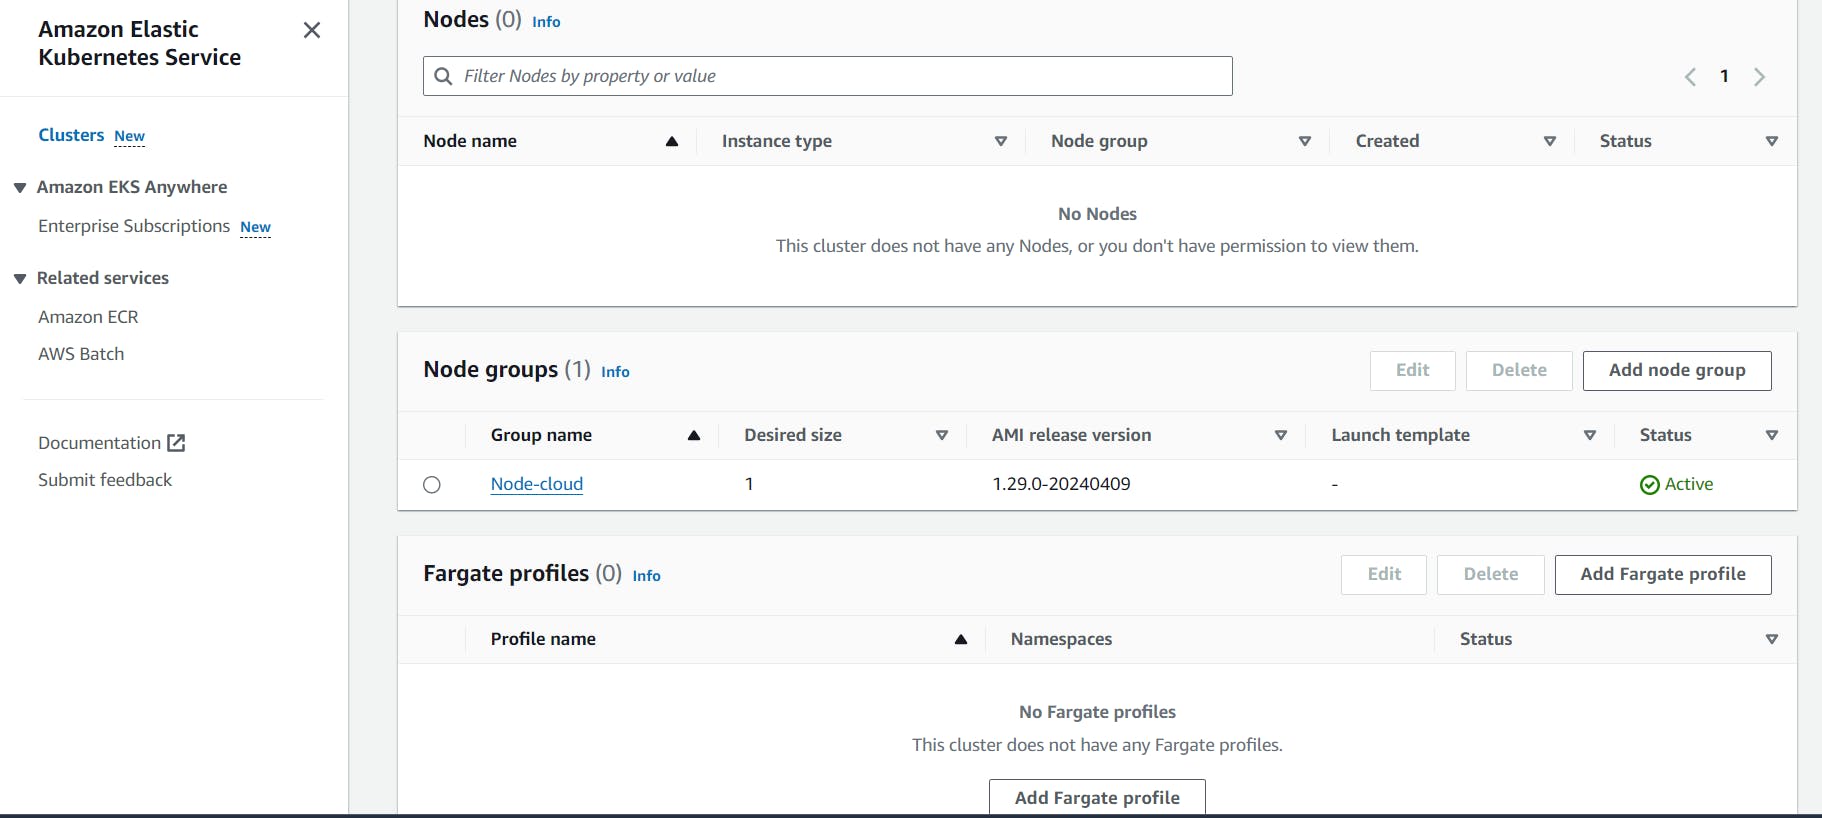
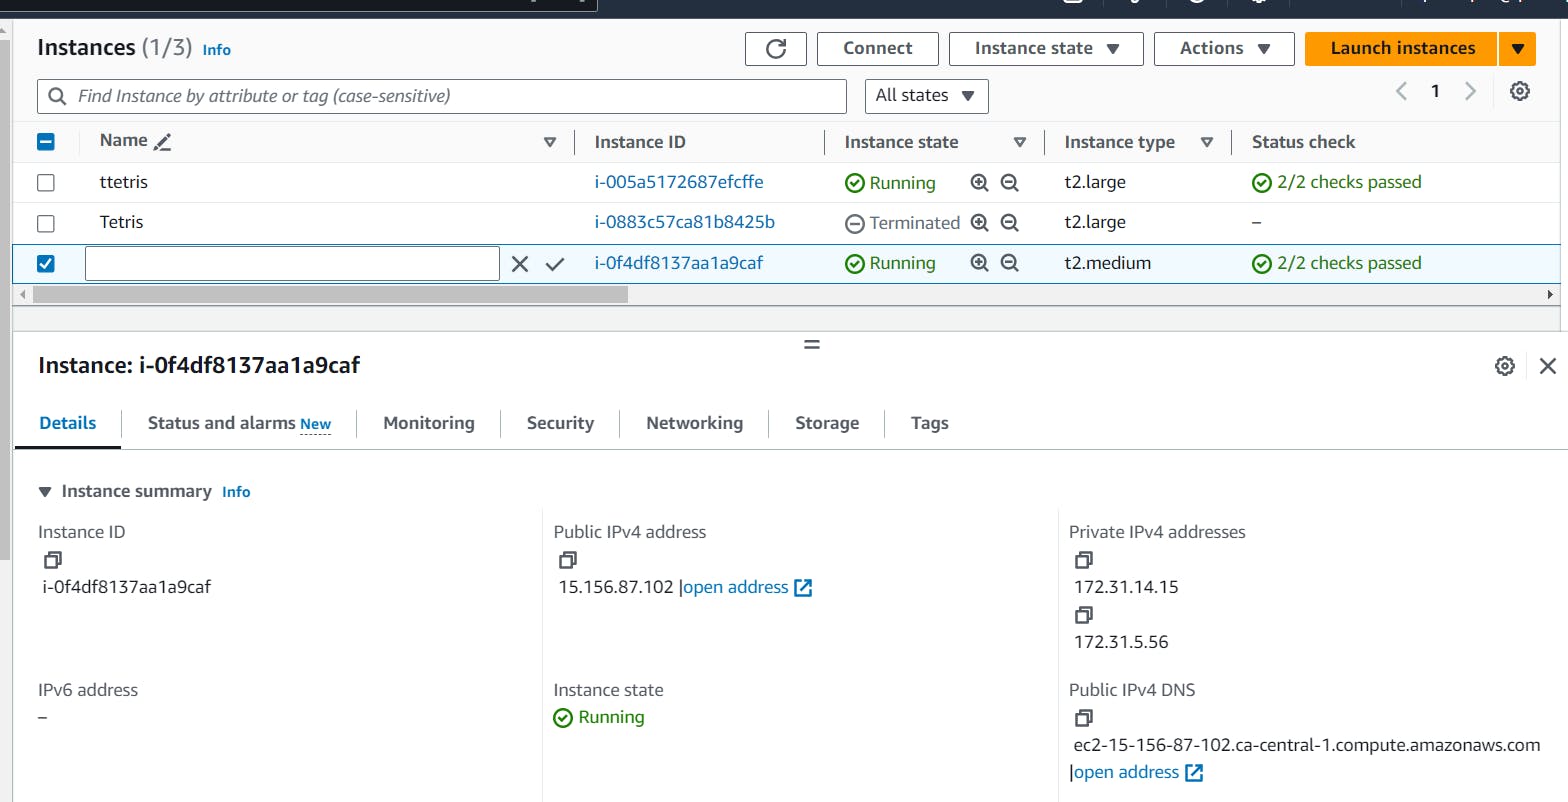
ec2 instance of t2.medium will be generated.
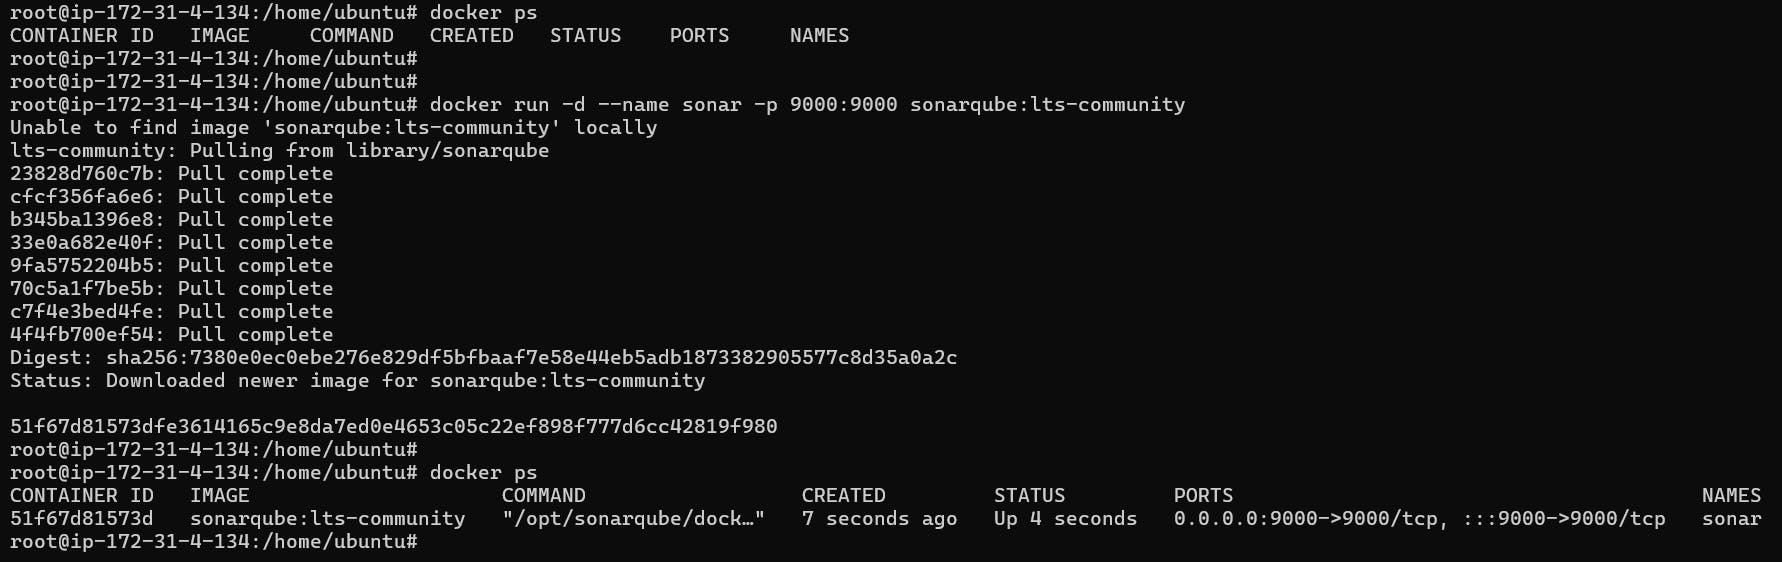
Step 4. Run snarqube container:
docker run -d --name sonar -p 9000:9000 sonarqube:lts-community
docker ps
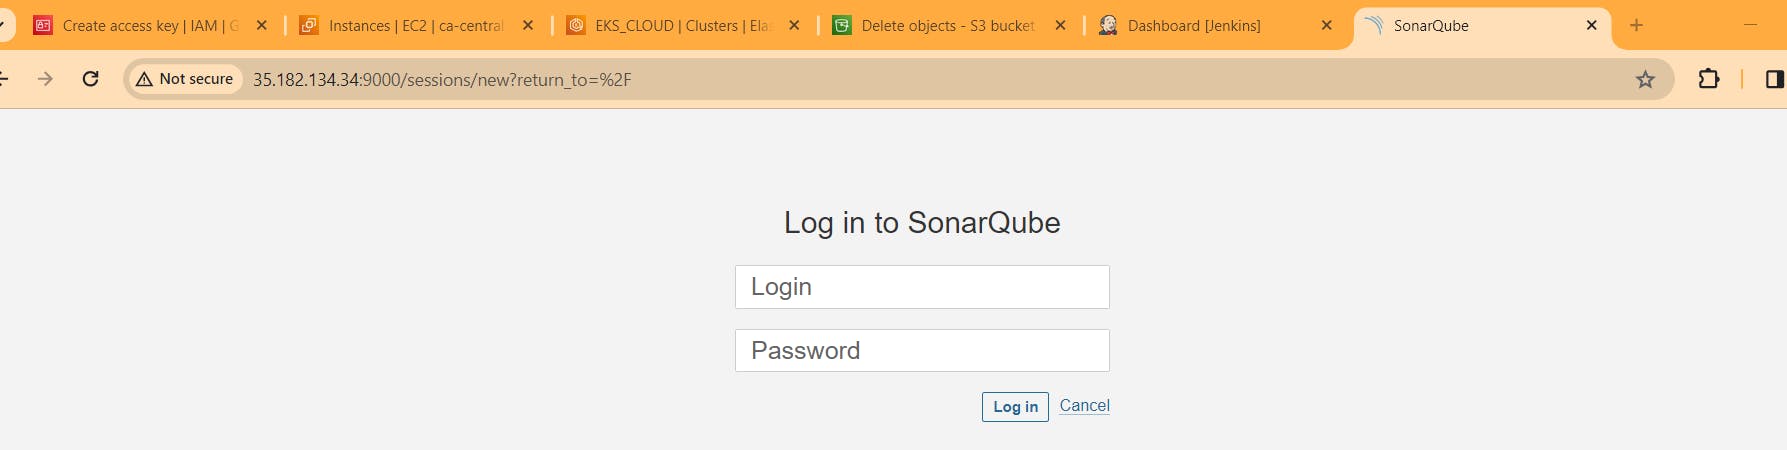
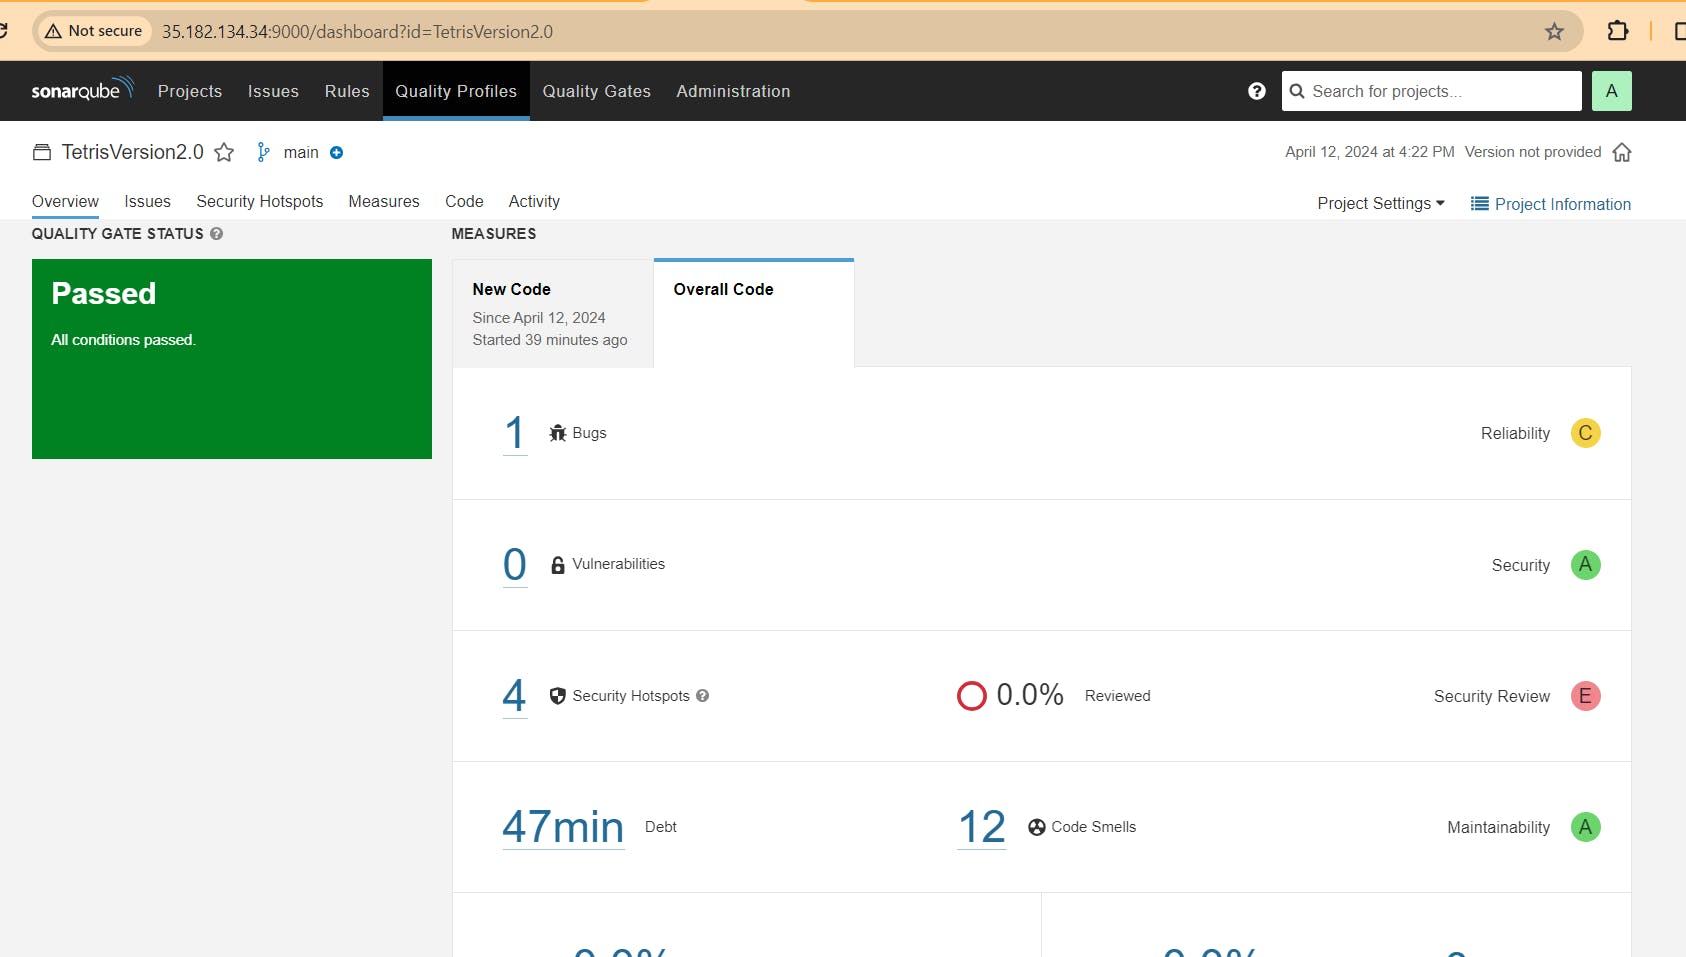
Copy the ip address of ec2 instance, 35.182.134.34:9000. Sonarqube is running t 9000. add 9000 in scurity group of ec2 instance.

Step5. Now let’s build Tetris game of version 1
Install plugins on jenkins to complete this process
Go to Jenkins dashboard
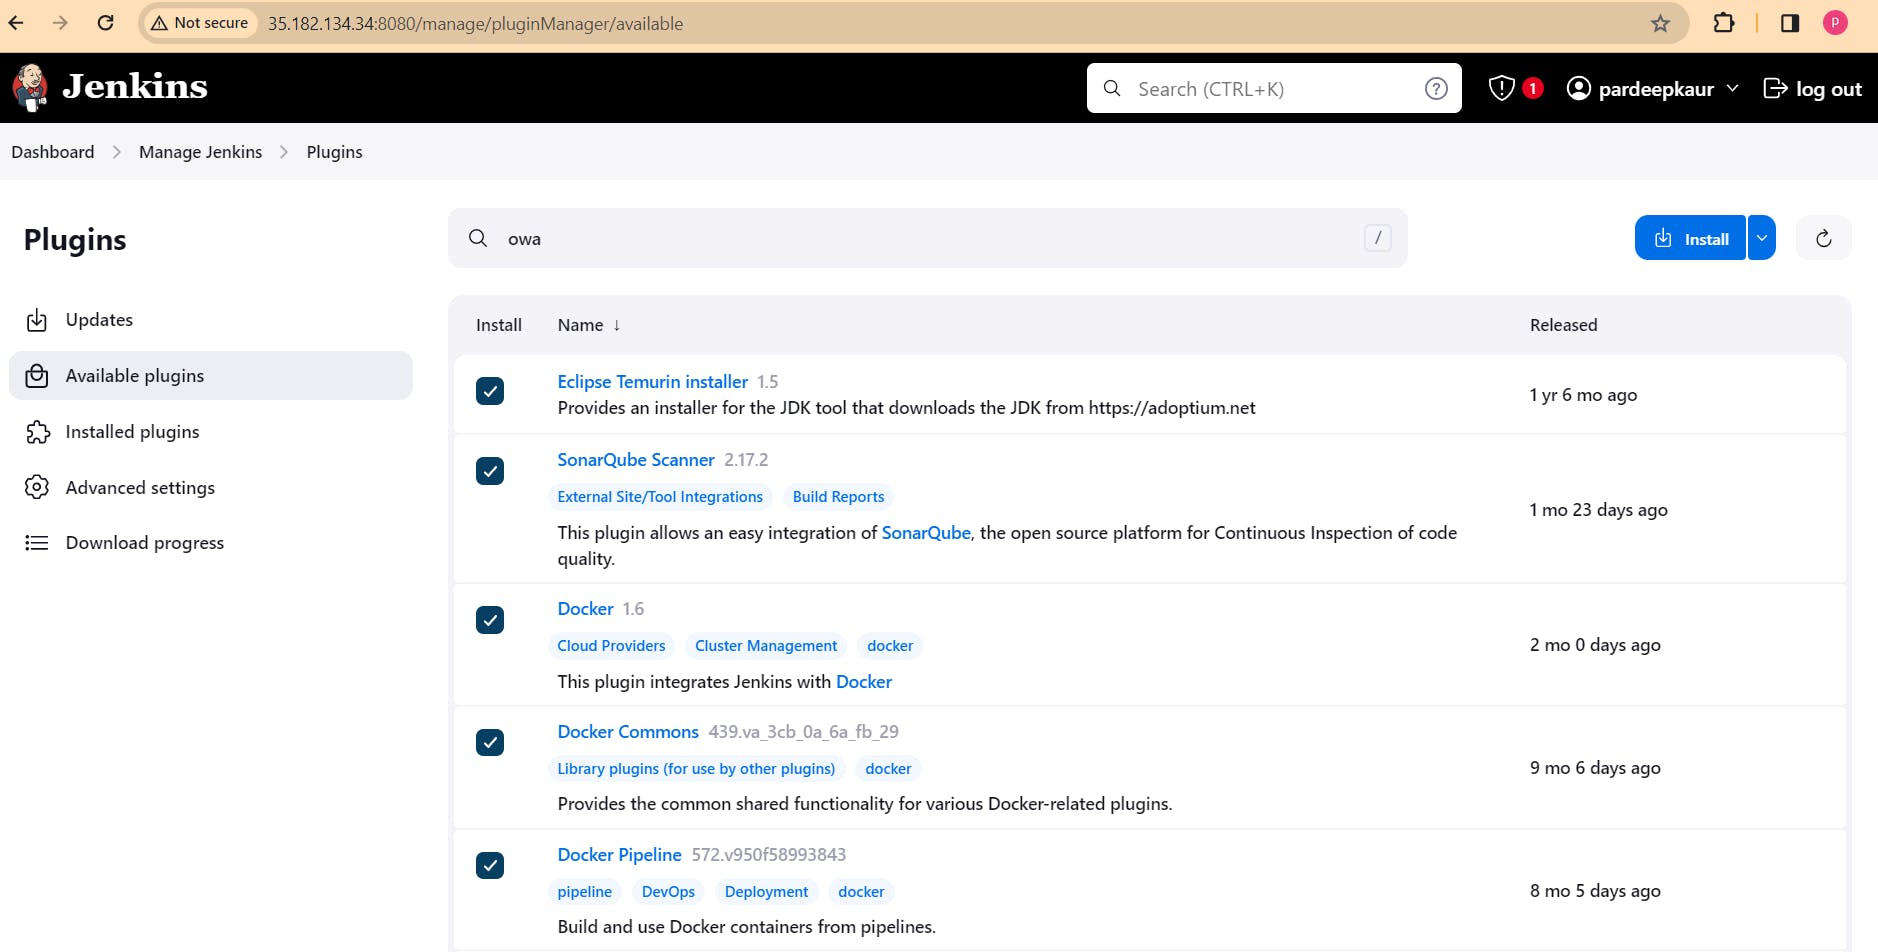
Manage Jenkins –> Plugins –> Available Plugins
Search for the Below Plugins
Eclipse Temurin installer
Sonarqube Scanner
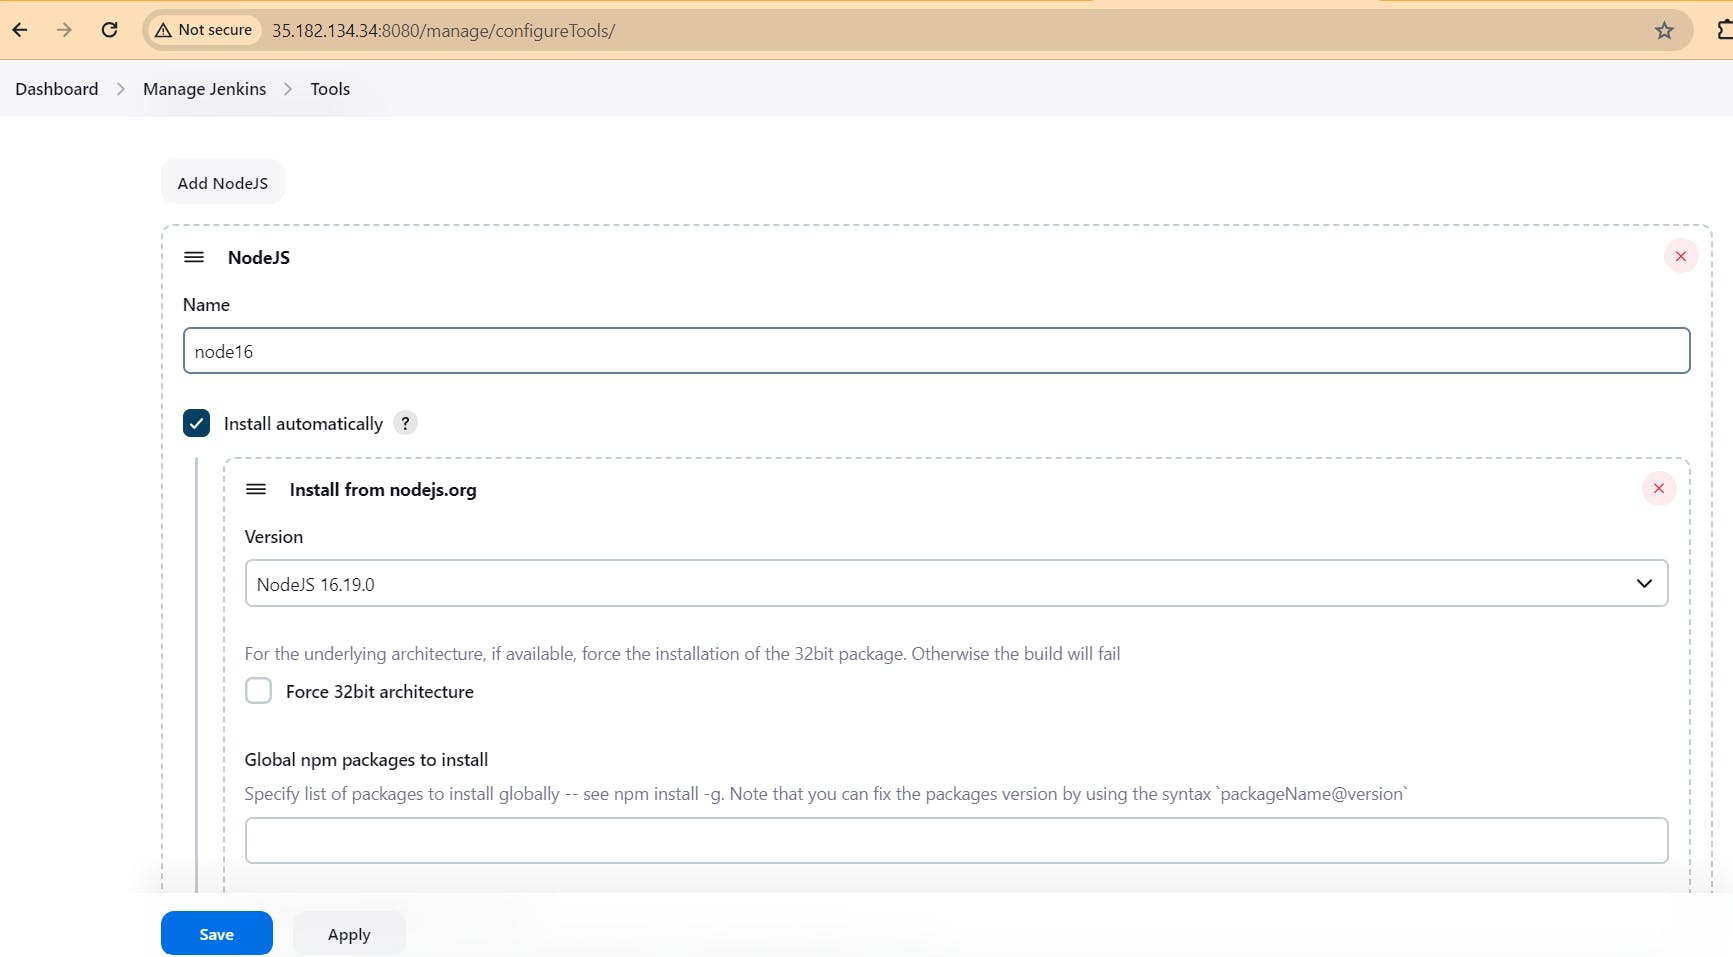
NodeJs
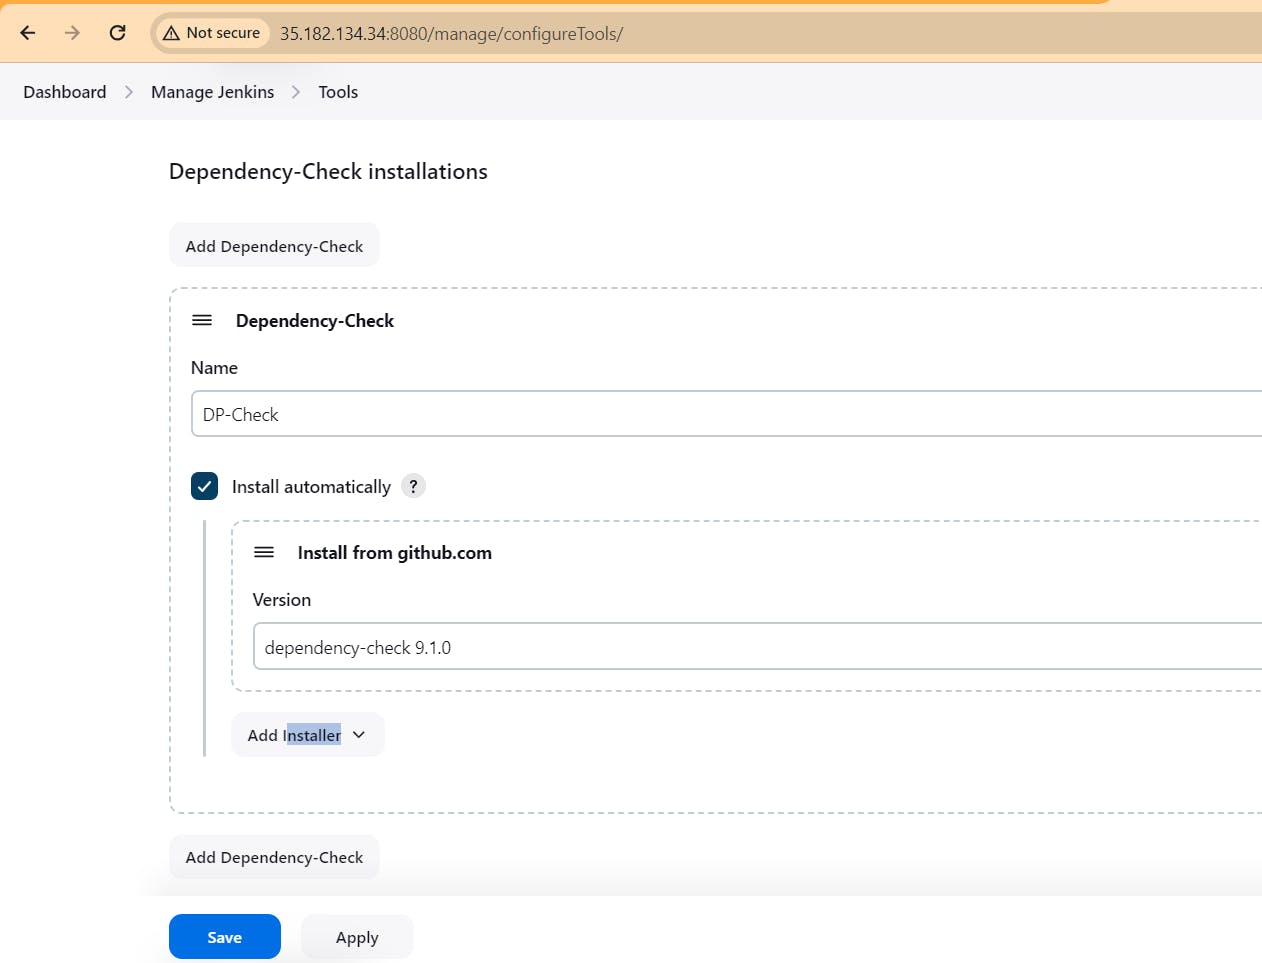
Owasp Dependency-Check
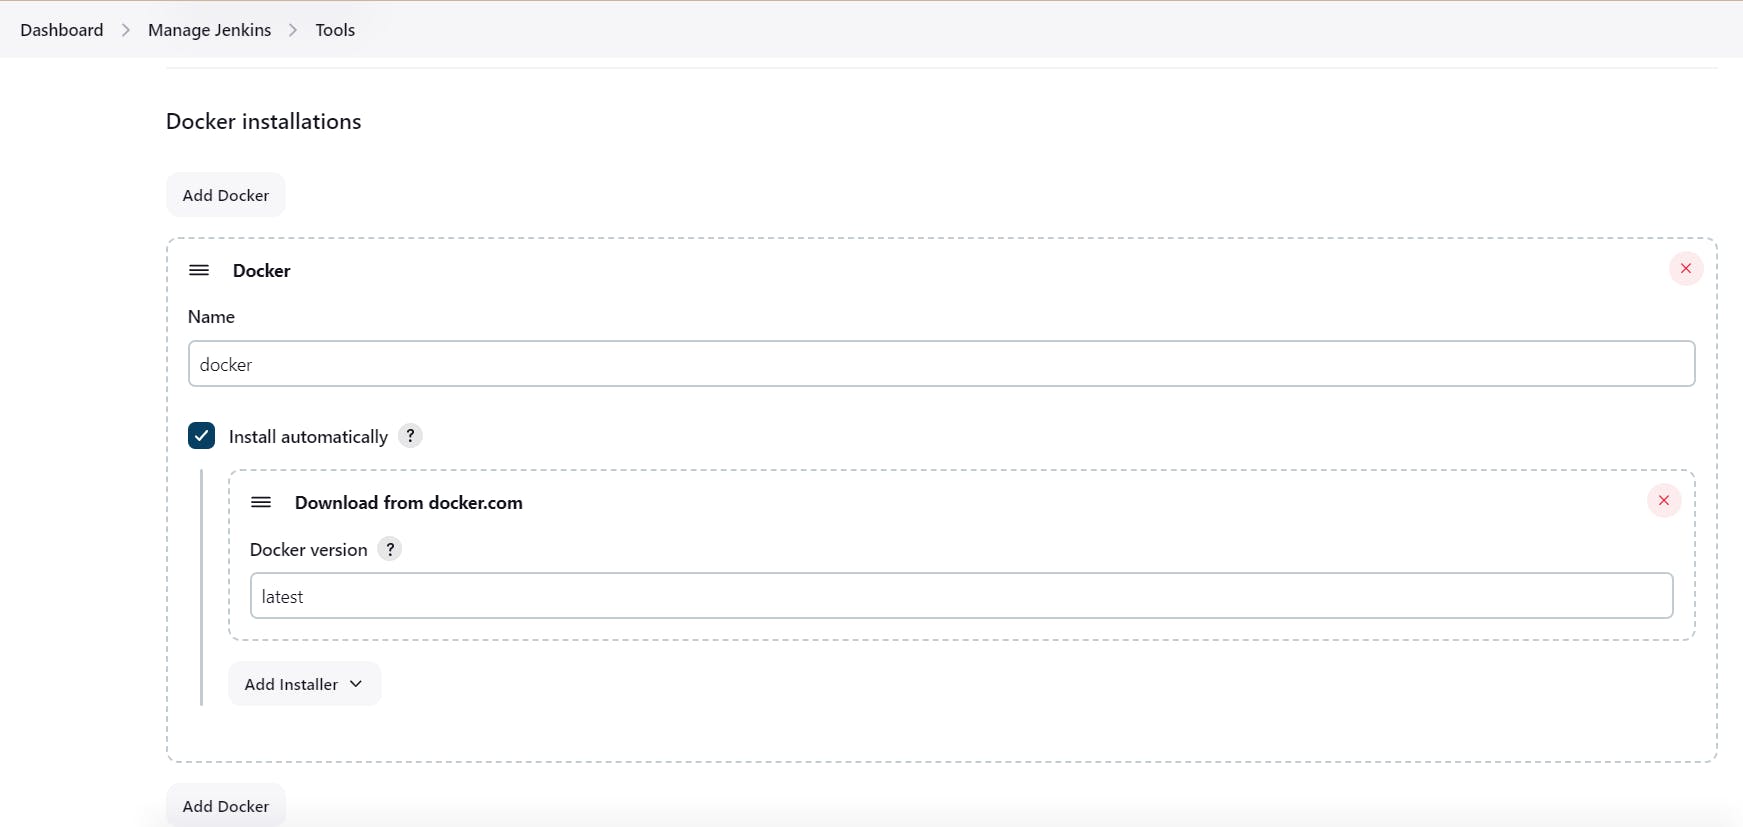
Docker
Docker Commons
Docker Pipeline
Docker API
Docker-build-step
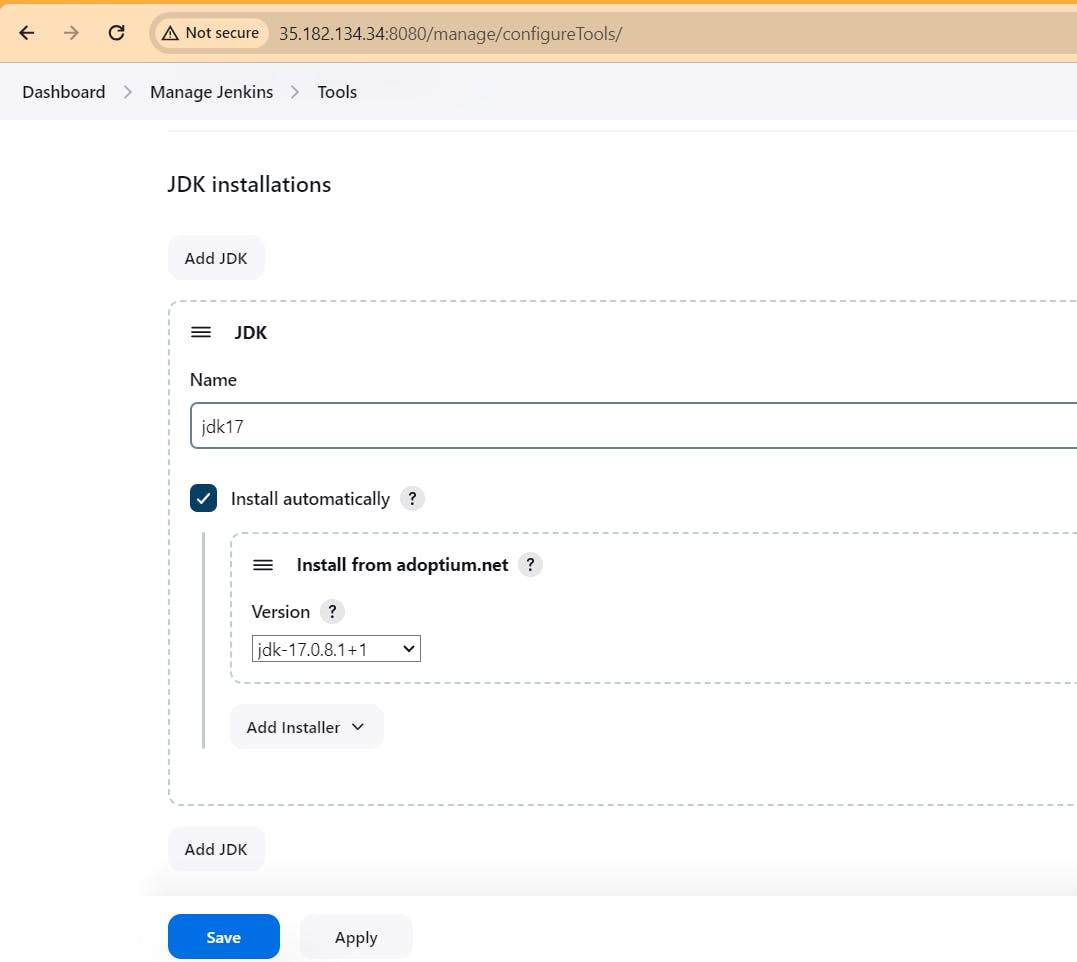
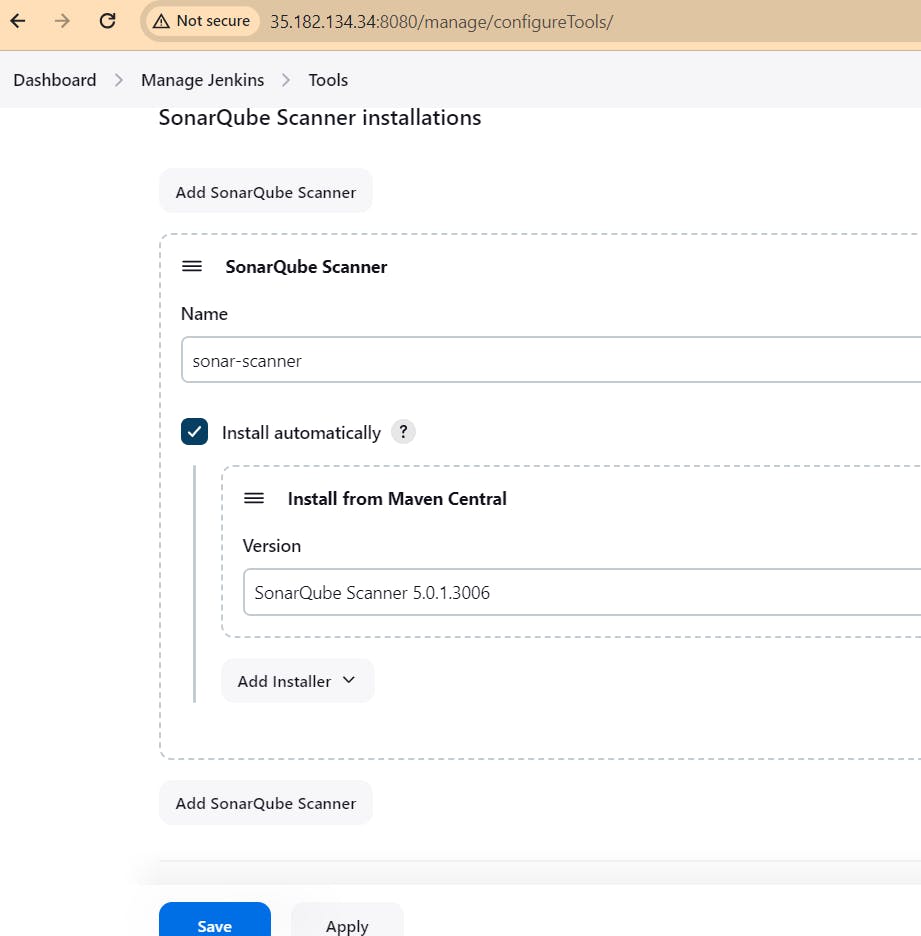
Step6. Configure in Global Tool Configuration
Goto Manage Jenkins → Tools → Install JDK(17) , sonar-scanner, OWASP NodeJs(16) and docker→ Click on Apply and Save
Step7. Configure Sonar Server in Manage Jenkins
Grab the Public IP Address of your EC2 Instance, Sonarqube works on Port 9000, so <Public IP>:9000. Goto your Sonarqube Server. Click on Administration → Security → Users → Click on Tokens and Update Token → Give it a name → and click on Generate Token.
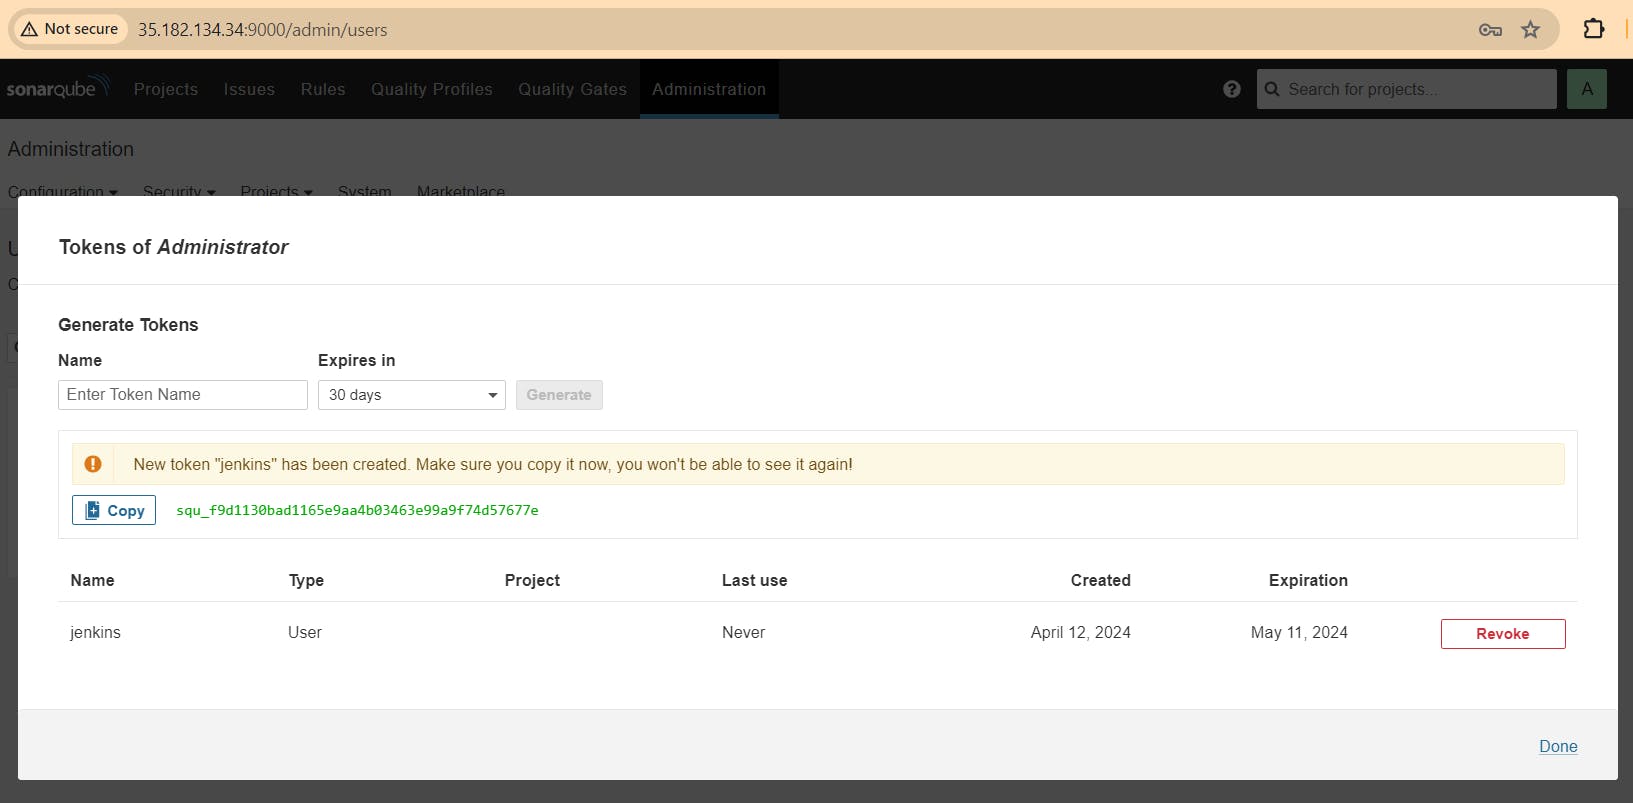
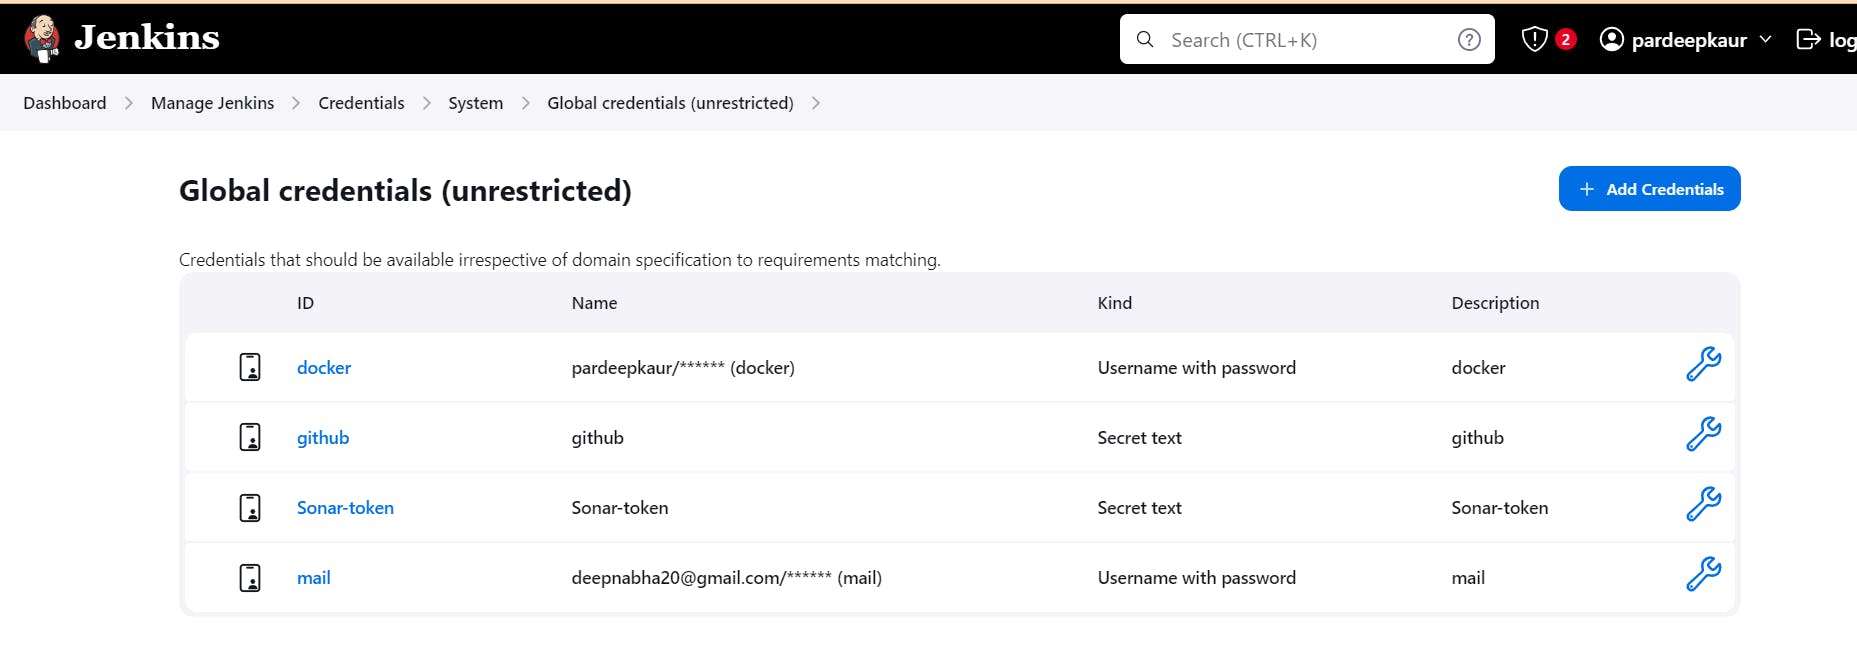
Copy that token, go to jenkins server -> Dashboard -> Manage jenkins -> Credentials -> system -> Global crdentials
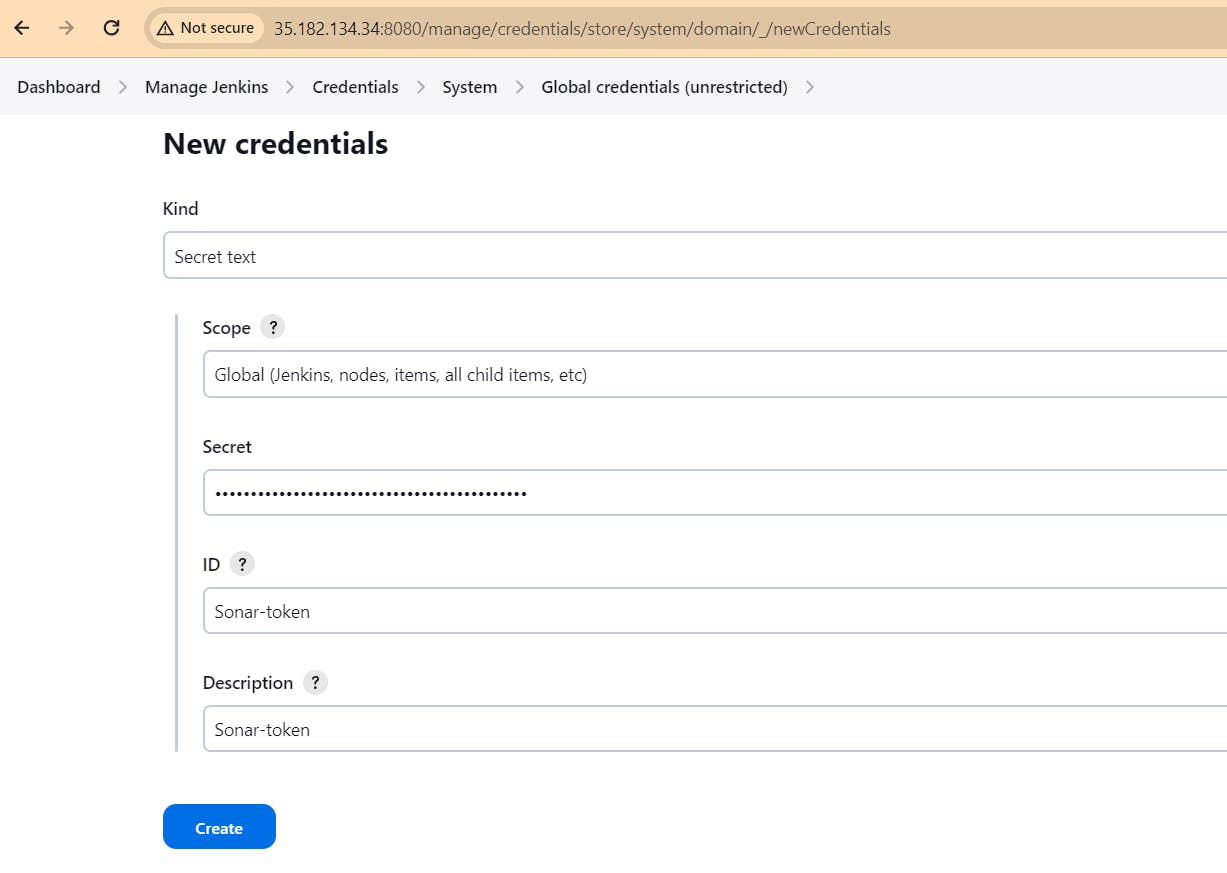

configure sonar server in systems of jenkins:
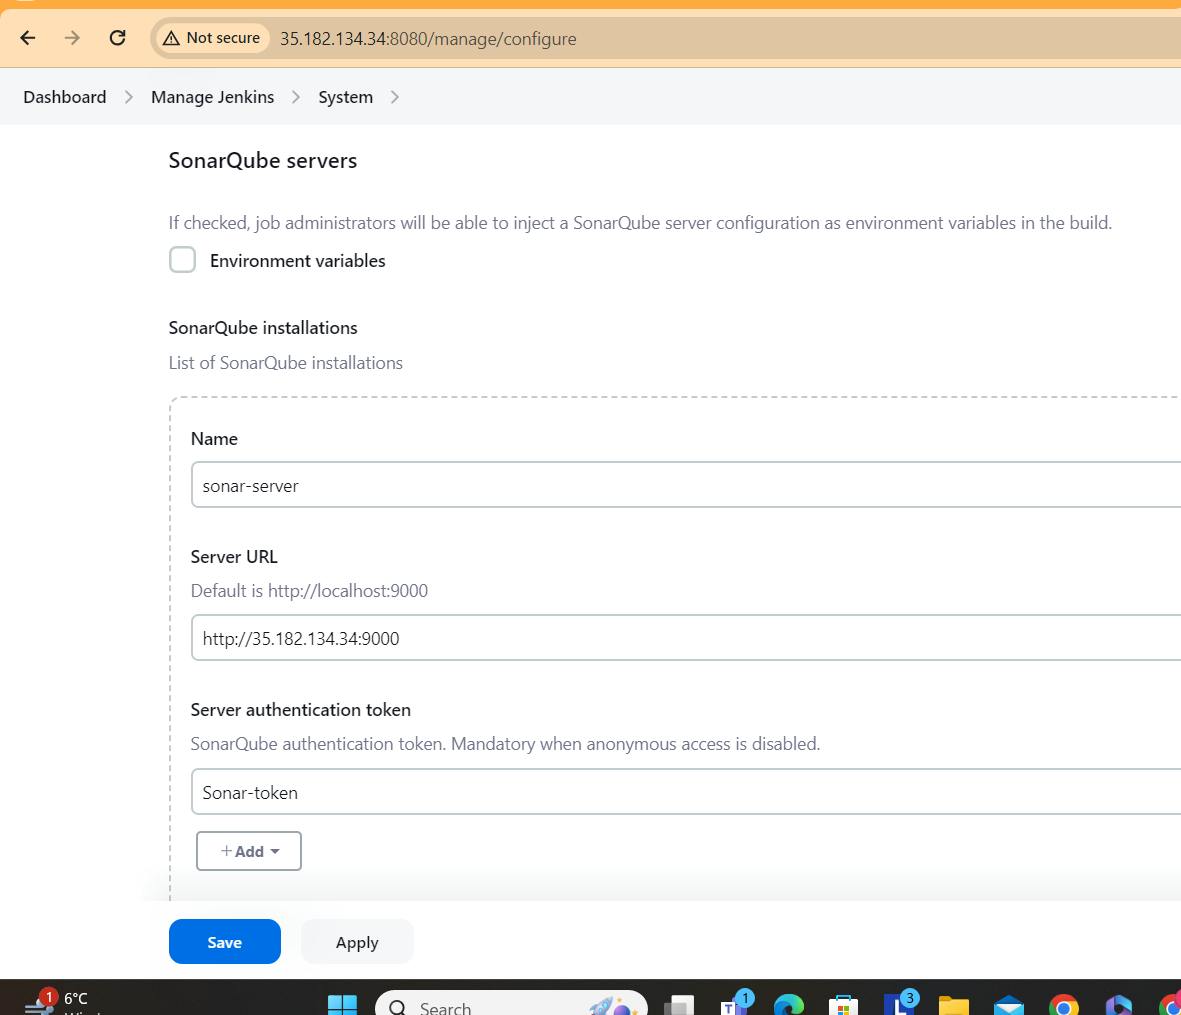
apply and save
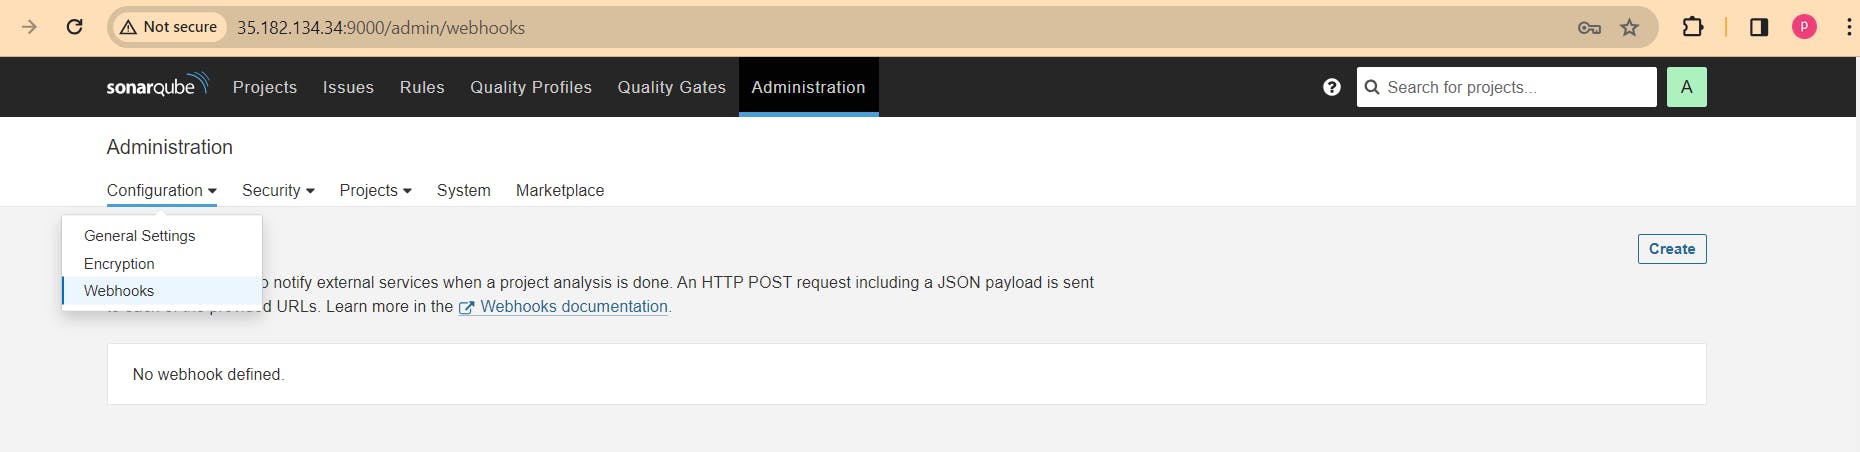
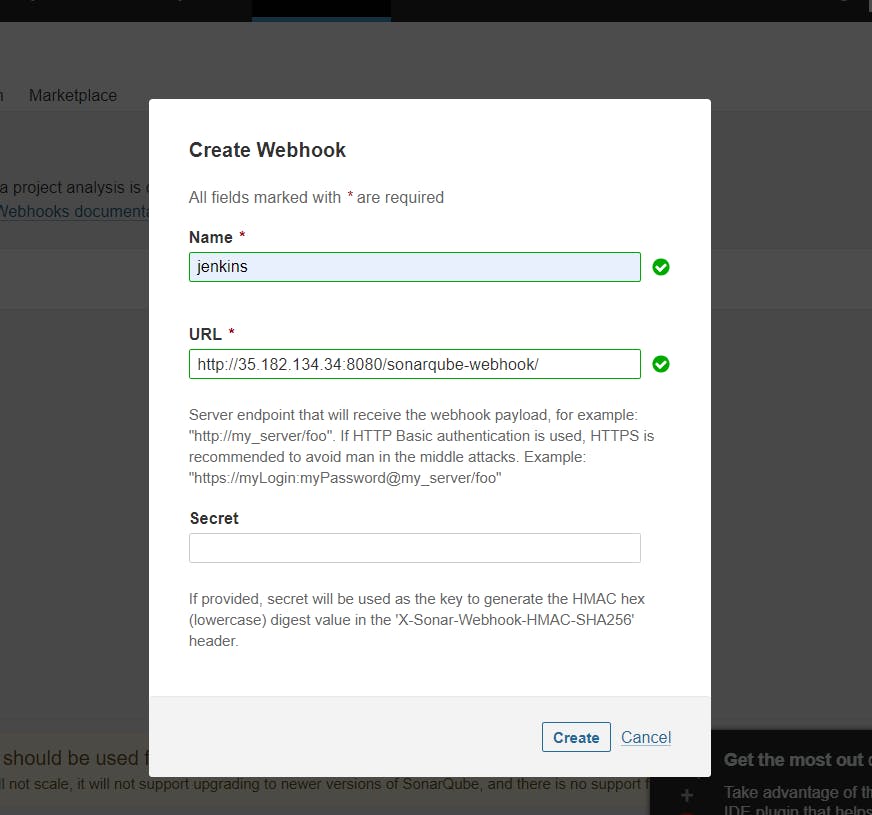
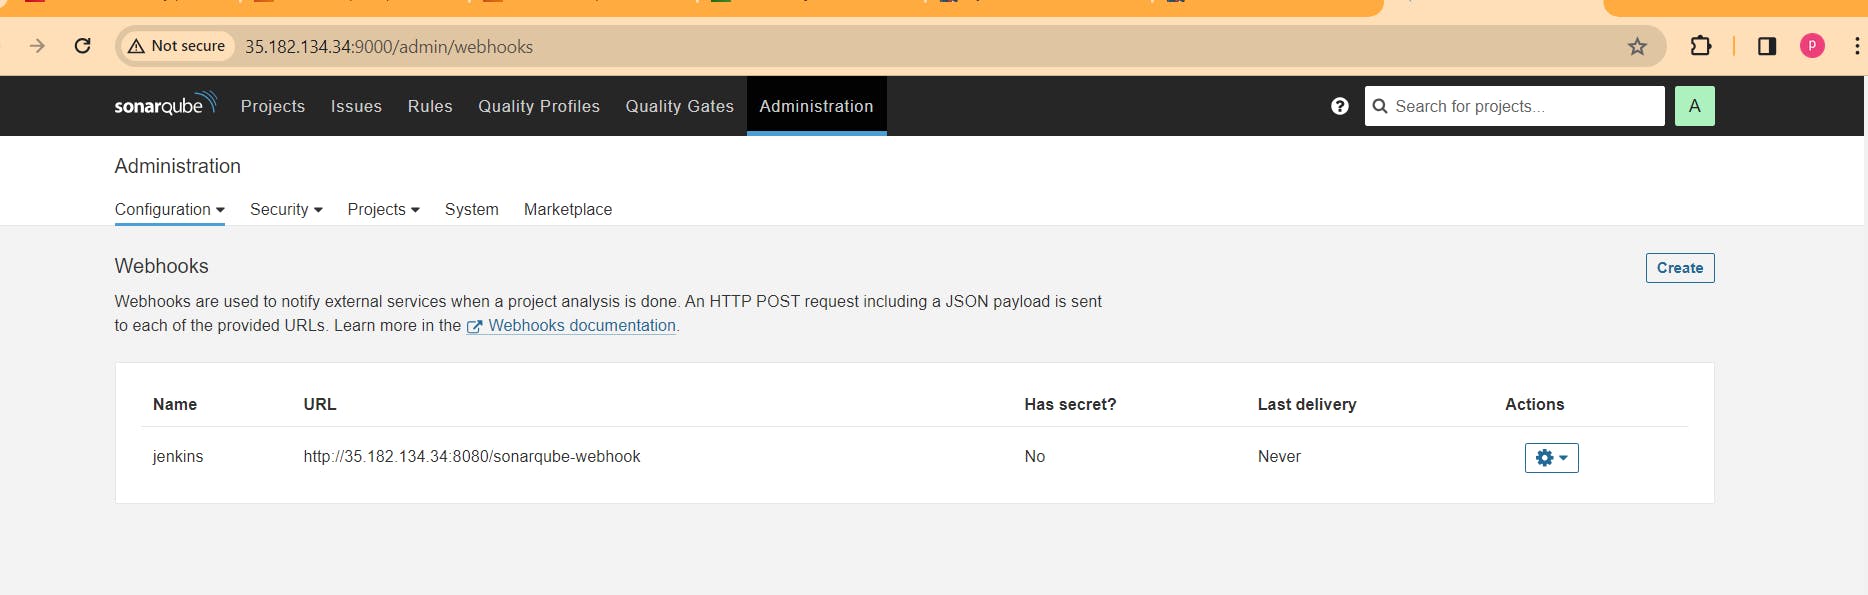
In the Sonarqube Dashboard add a quality gate also
Administration–> Configuration–>Webhooks
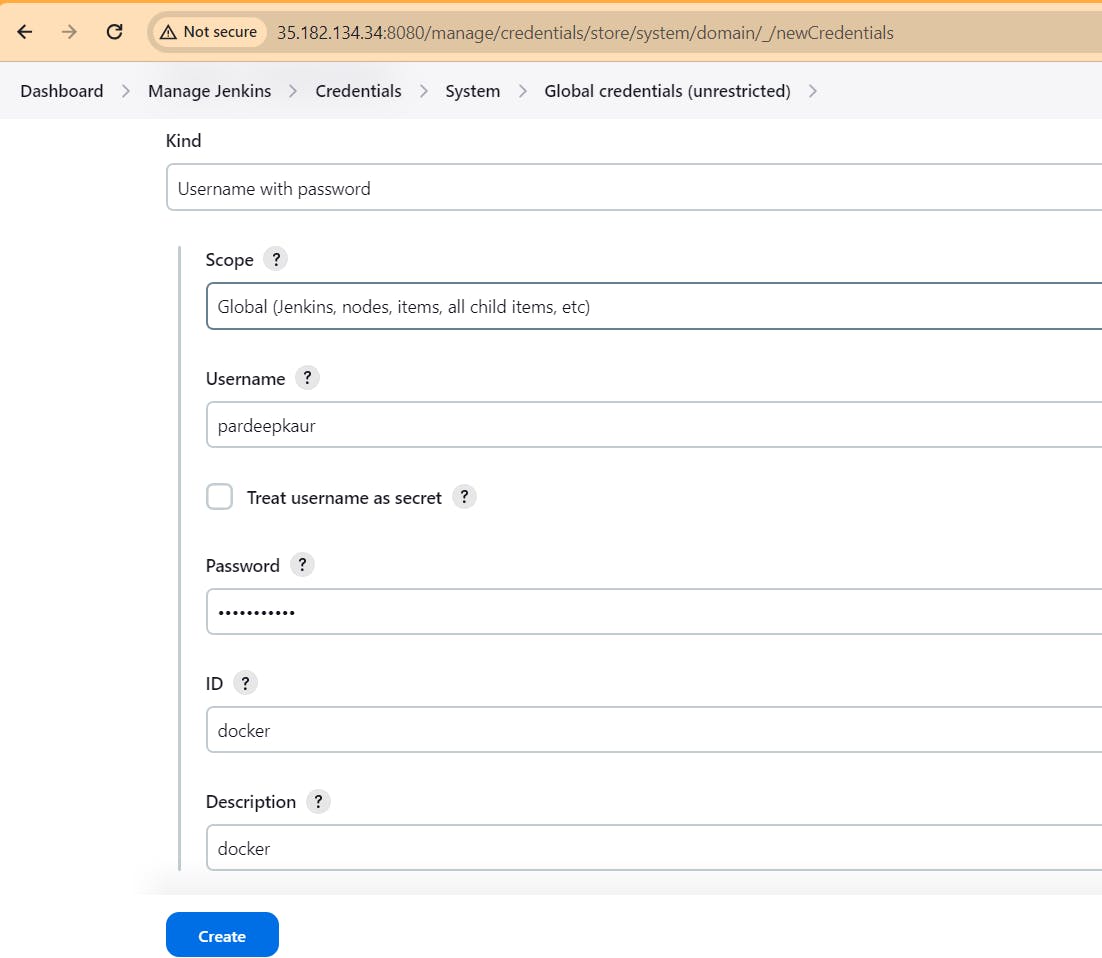
Step 8. Now add Docker credentials to the Jenkins to log in and push the image
Manage Jenkins –> Credentials –> global –> add credential
Add DockerHub Username and Password under Global Credentials

Step9. Now we will create version 1 of game
Create Docker file of the application.
# Use the official Node.js 16 image as the base image
FROM node:16

# Set the working directory inside the container
WORKDIR /app

# Copy package.json and package-lock.json (or yarn.lock) to the container
COPY package*.json ./

# Install project dependencies
RUN npm install

# Copy the rest of the application code to the container
COPY . .

# Build the React app
RUN npm run build

# Expose the port that the app will run on (usually 3000 by default)
EXPOSE 3000

# Start the React app when the container starts
CMD [ "npm", "start" ]
Now Create a new item in jenkins:
make sure to change the name of image, name will be like dockerhub_username/image_name

pipeline{
agent any
tools{
jdk 'jdk17'
nodejs 'node16'
}
environment {
SCANNER_HOME=tool 'sonar-scanner'
}
stages {
stage('clean workspace'){
steps{
cleanWs()
}
}
stage('Checkout from Git'){
steps{
git branch: 'main', url: 'https://github.com/Pardeep32/Tetris-V1.git'
}
}
stage("Sonarqube Analysis "){
steps{
withSonarQubeEnv('sonar-server') {
sh ''' $SCANNER_HOME/bin/sonar-scanner -Dsonar.projectName=TetrisVersion1.0 \
-Dsonar.projectKey=TetrisVersion1.0 '''
}
}
}
stage("quality gate"){
steps {
script {
waitForQualityGate abortPipeline: false, credentialsId: 'Sonar-token'
}
}
}
stage('Install Dependencies') {
steps {
sh "npm install"
}
}
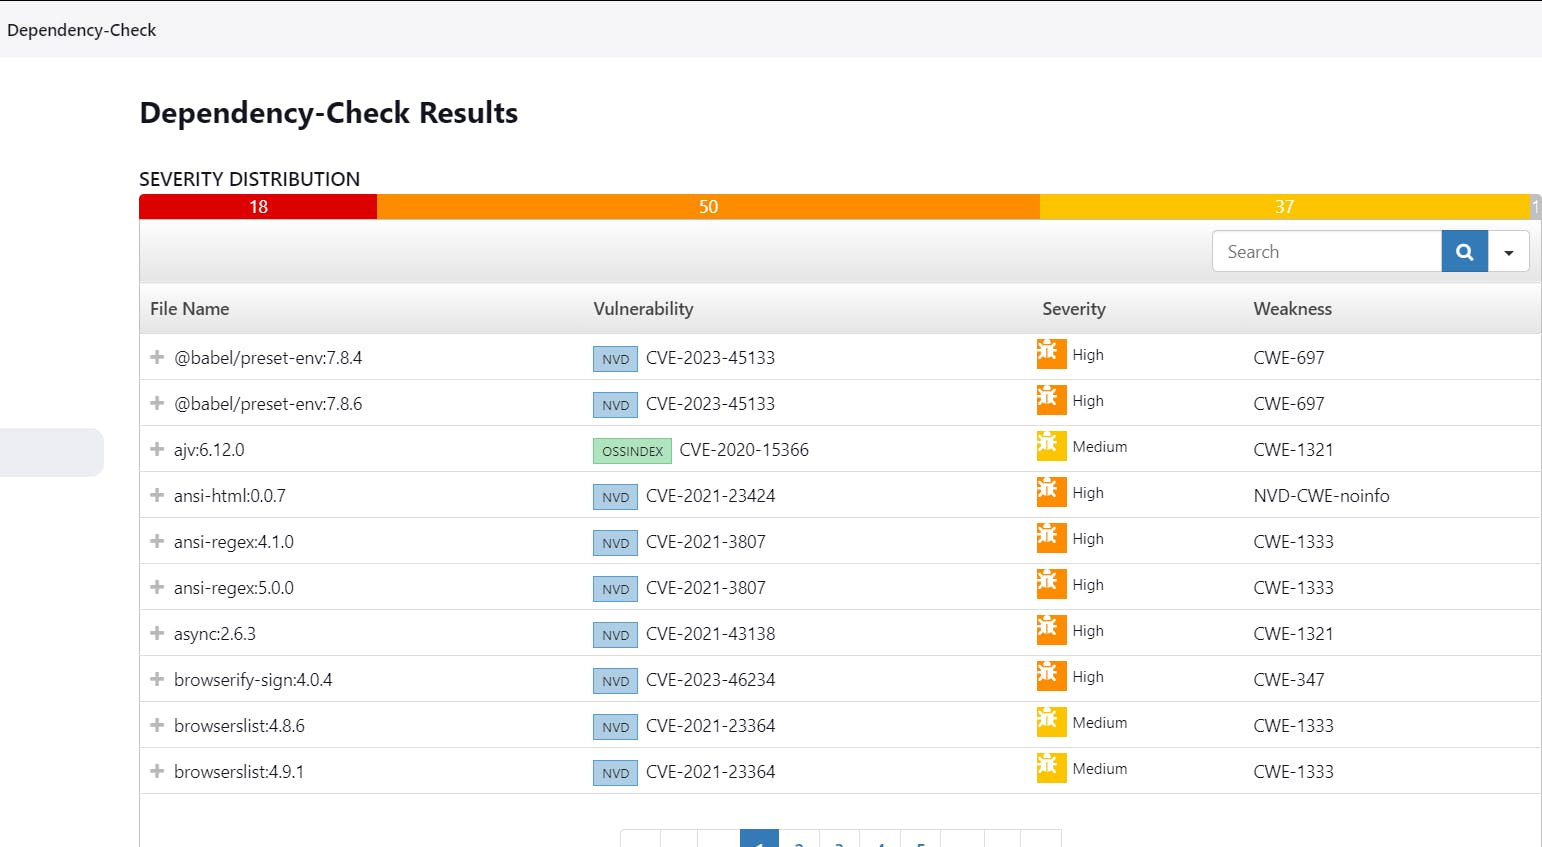
stage('OWASP FS SCAN') {
steps {
dependencyCheck additionalArguments: '--scan ./ --disableYarnAudit --disableNodeAudit', odcInstallation: 'DP-Check'
dependencyCheckPublisher pattern: '**/dependency-check-report.xml'
}
}
stage('TRIVY FS SCAN') {
steps {
sh "trivy fs . > trivyfs.txt"
}
}
stage("Docker Build & Push"){
steps{
script{
withDockerRegistry(credentialsId: 'docker', toolName: 'docker'){
sh "docker build -t tetrisv1 ."
sh "docker tag tetrisv1 pardeepkaur/tetrisv1:latest "
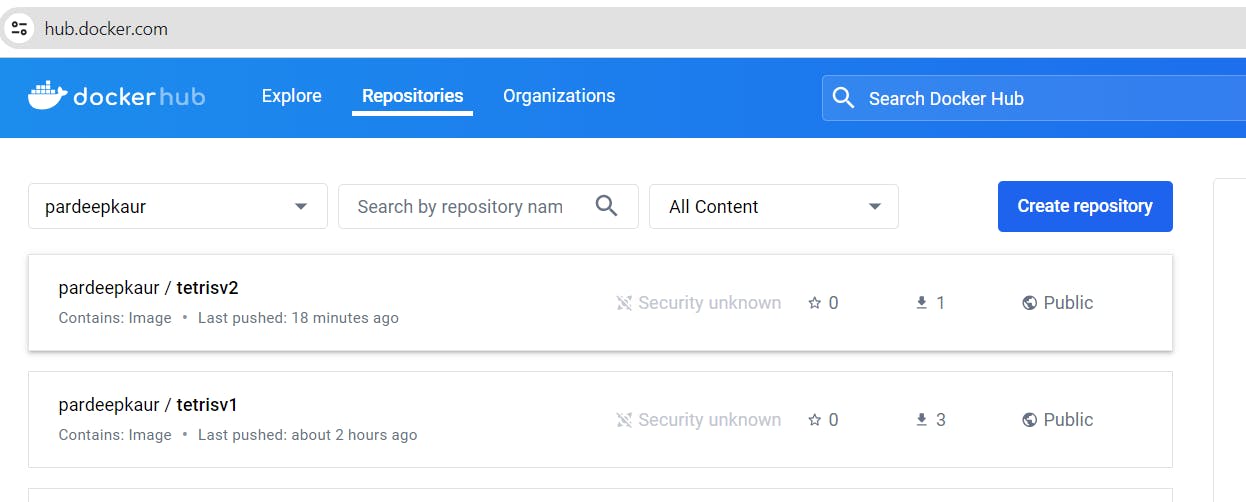
sh "docker push pardeepkaur/tetrisv1:latest "
}
}
}
}
stage("TRIVY"){
steps{
sh "trivy image pardeepkaur/tetrisv1:latest > trivyimage.txt"
}
}
}
}
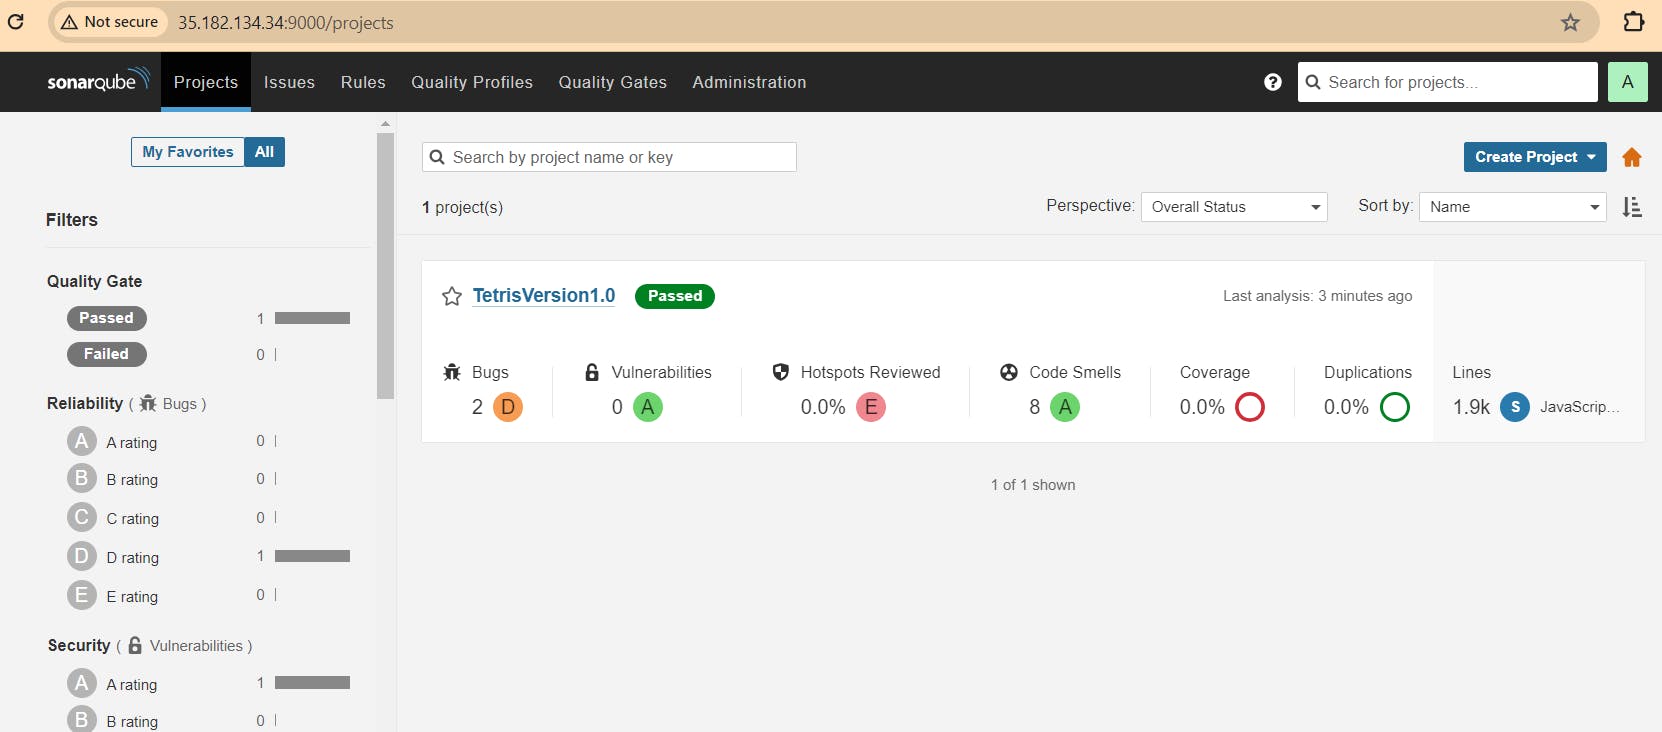
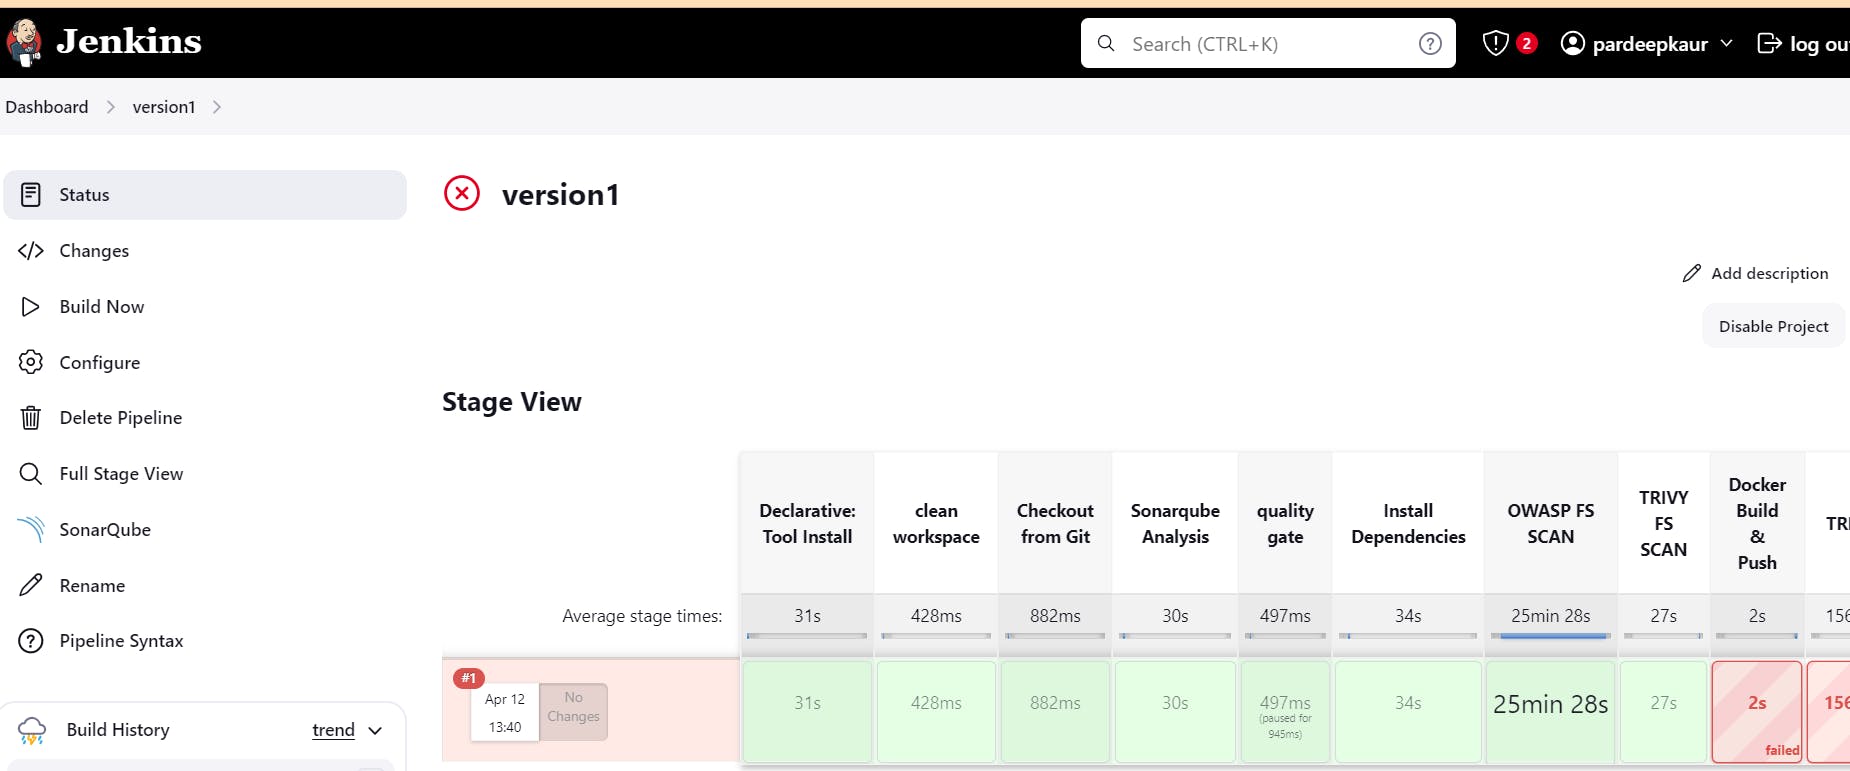
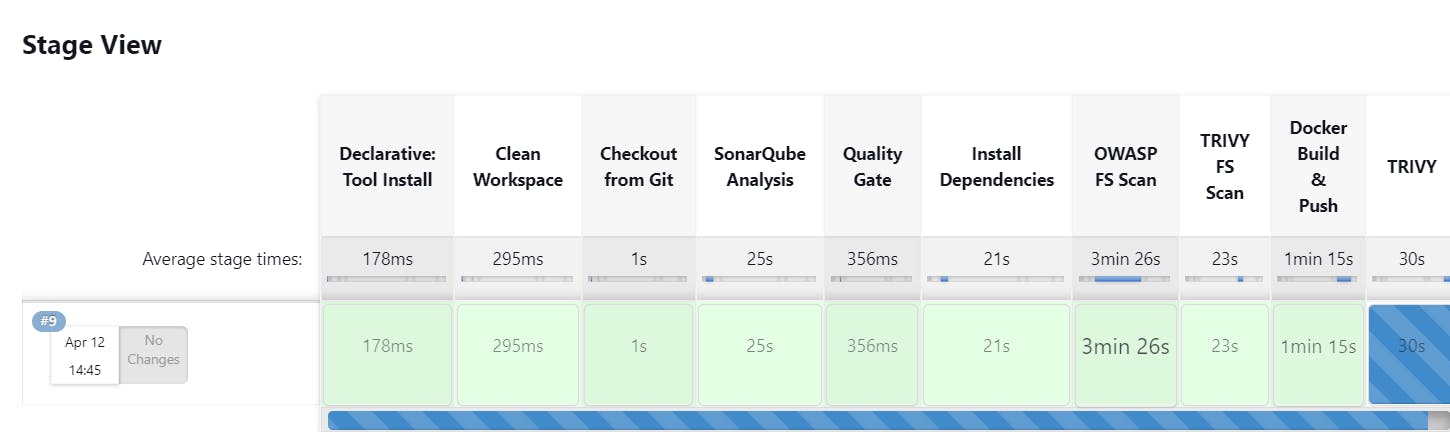
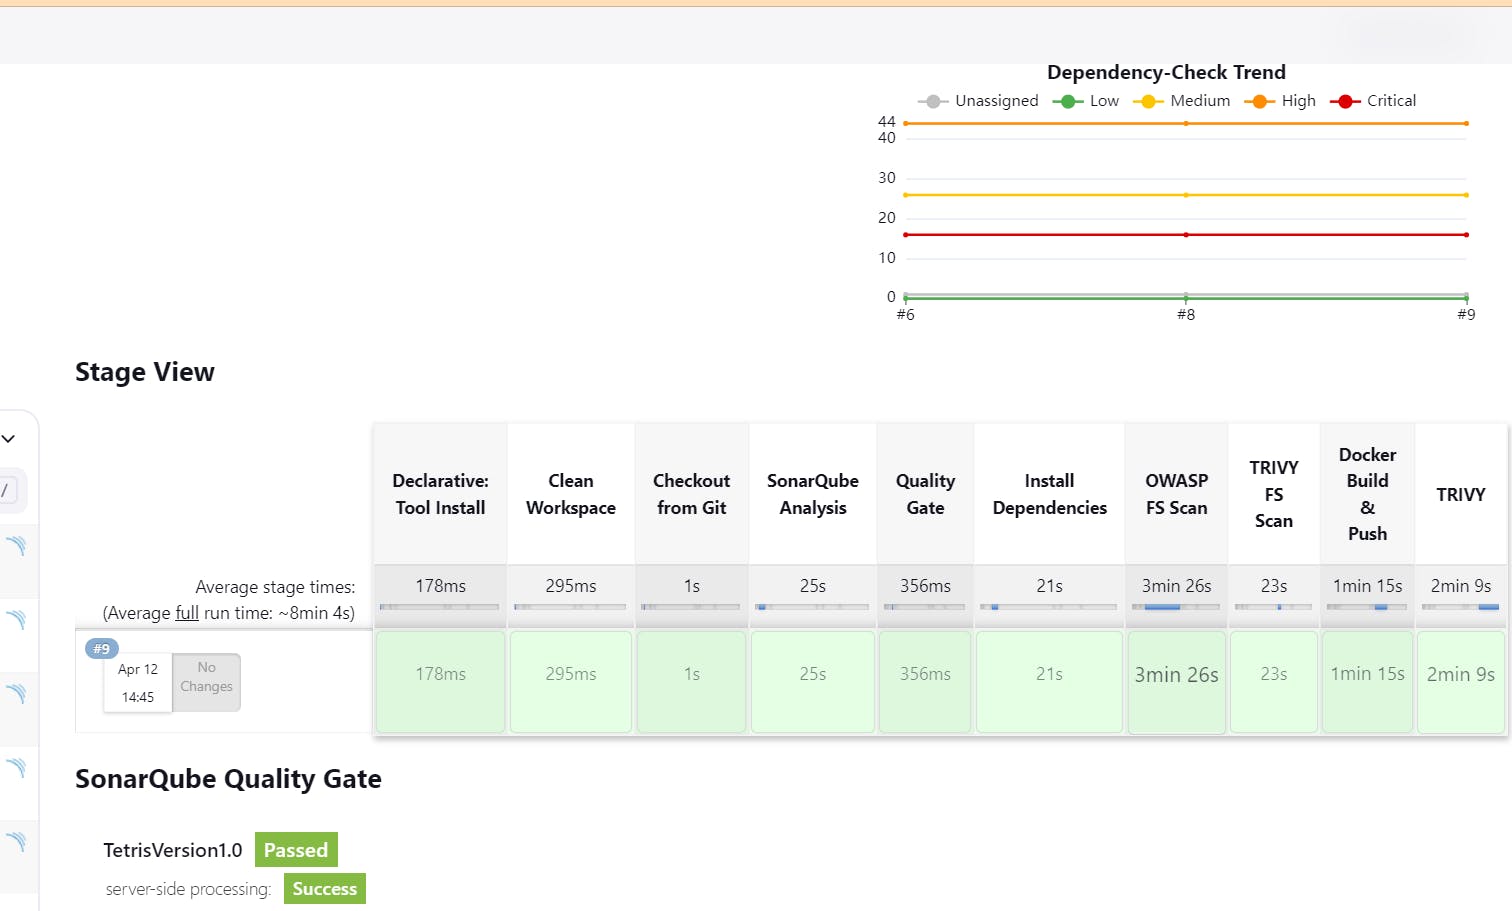
Run the pipeline:
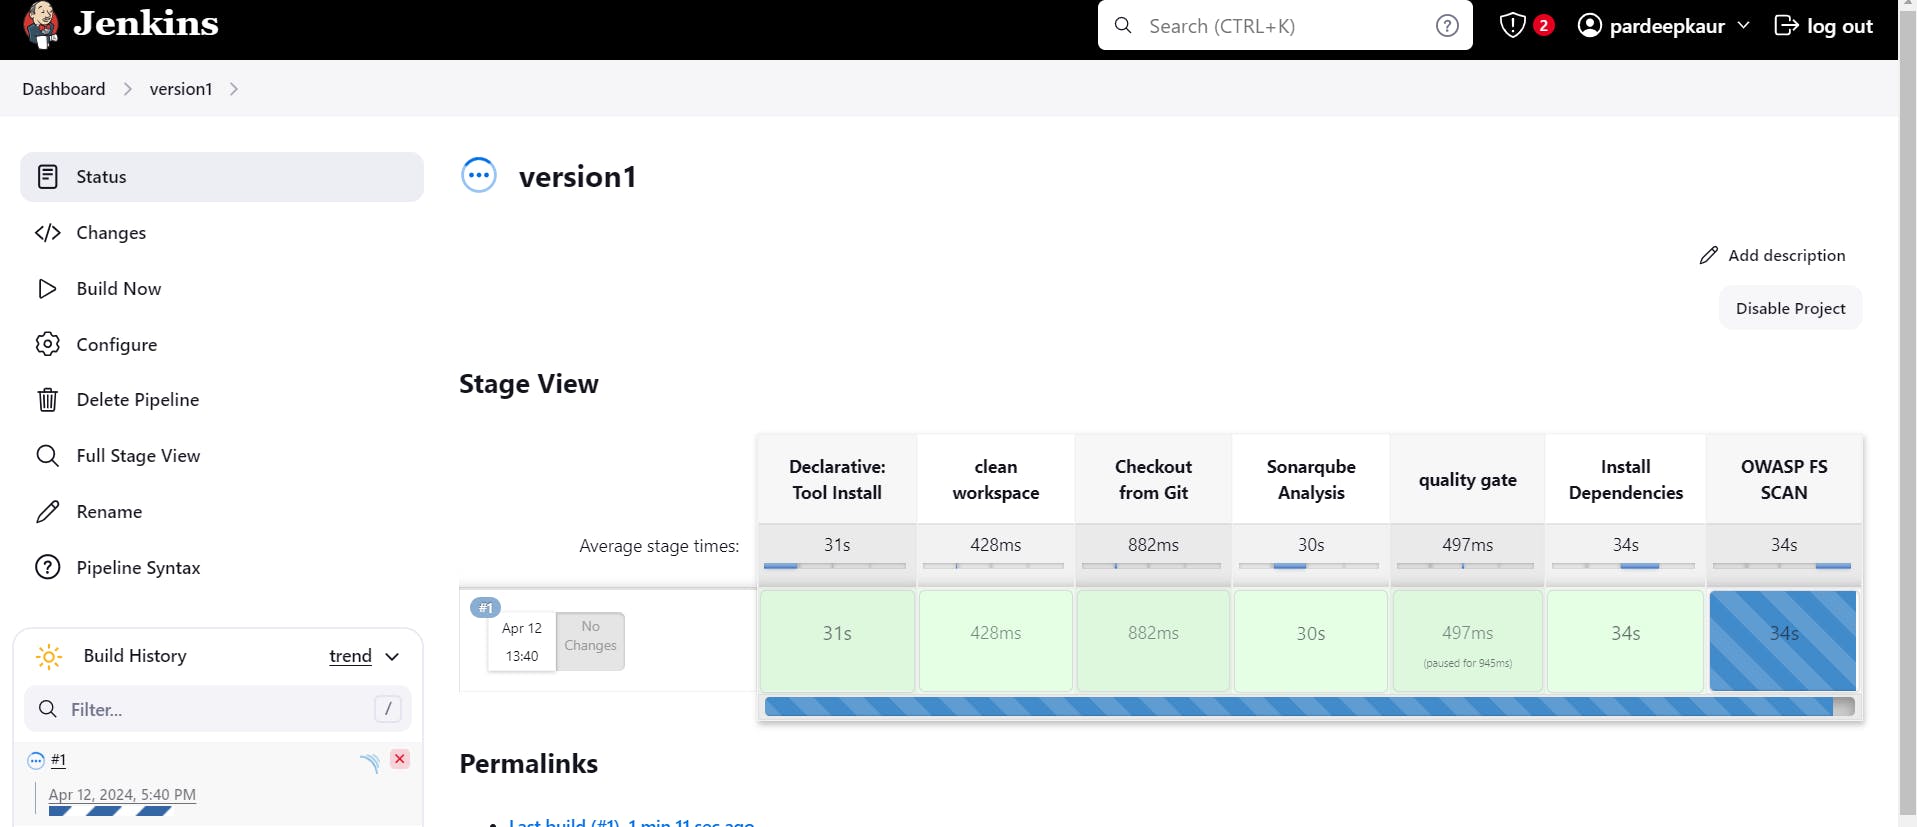
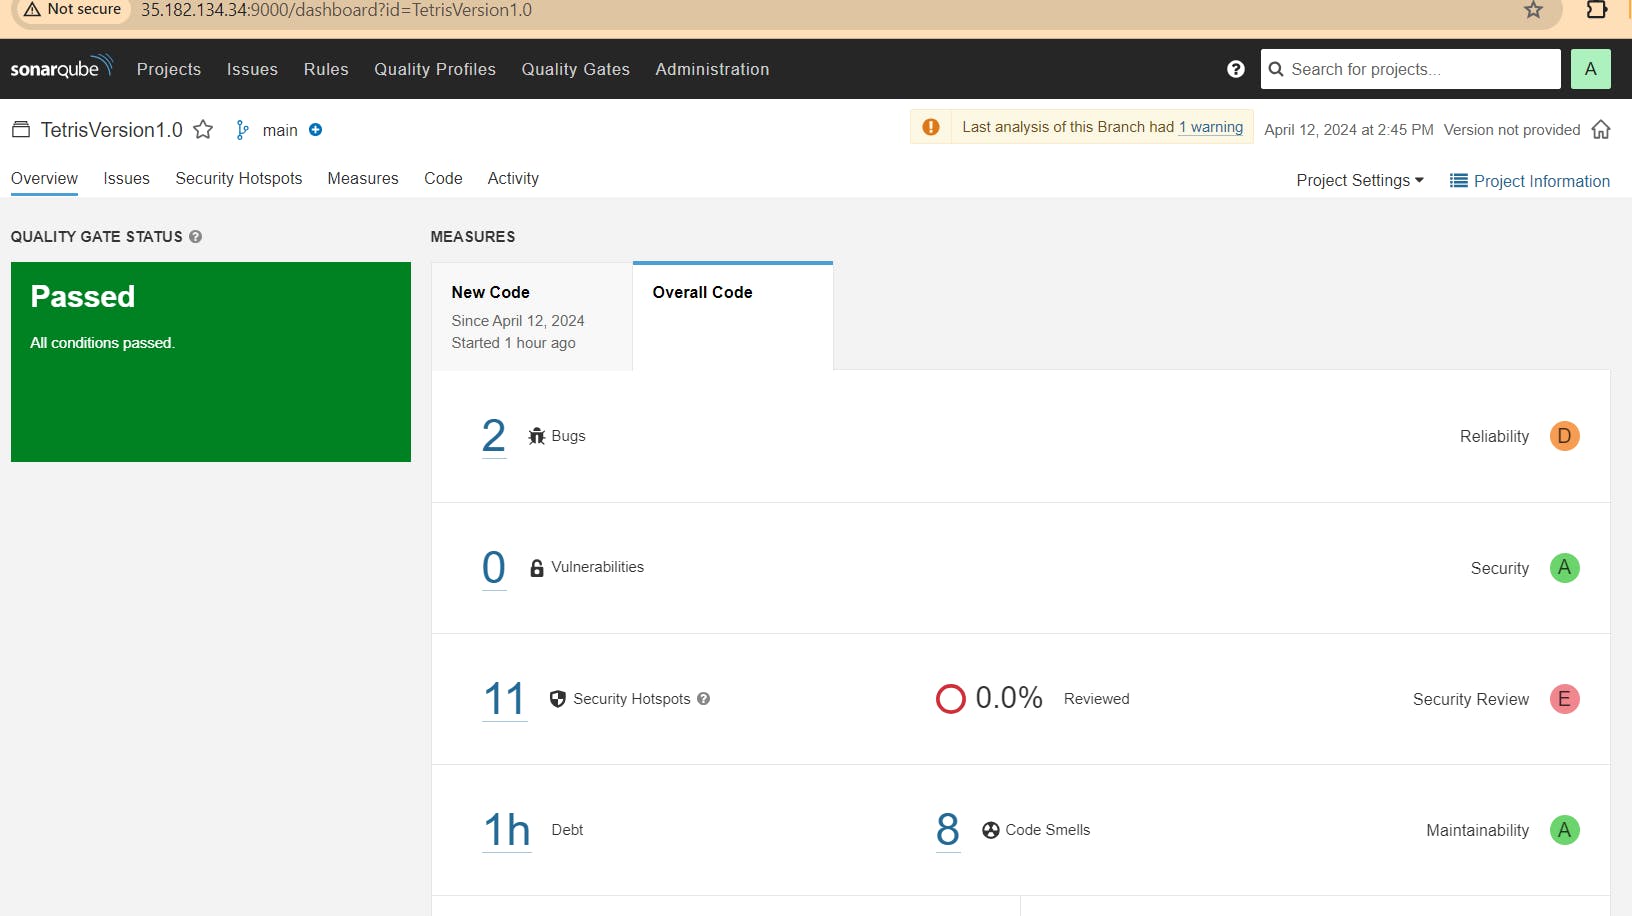
Passed sonarqube analysis:
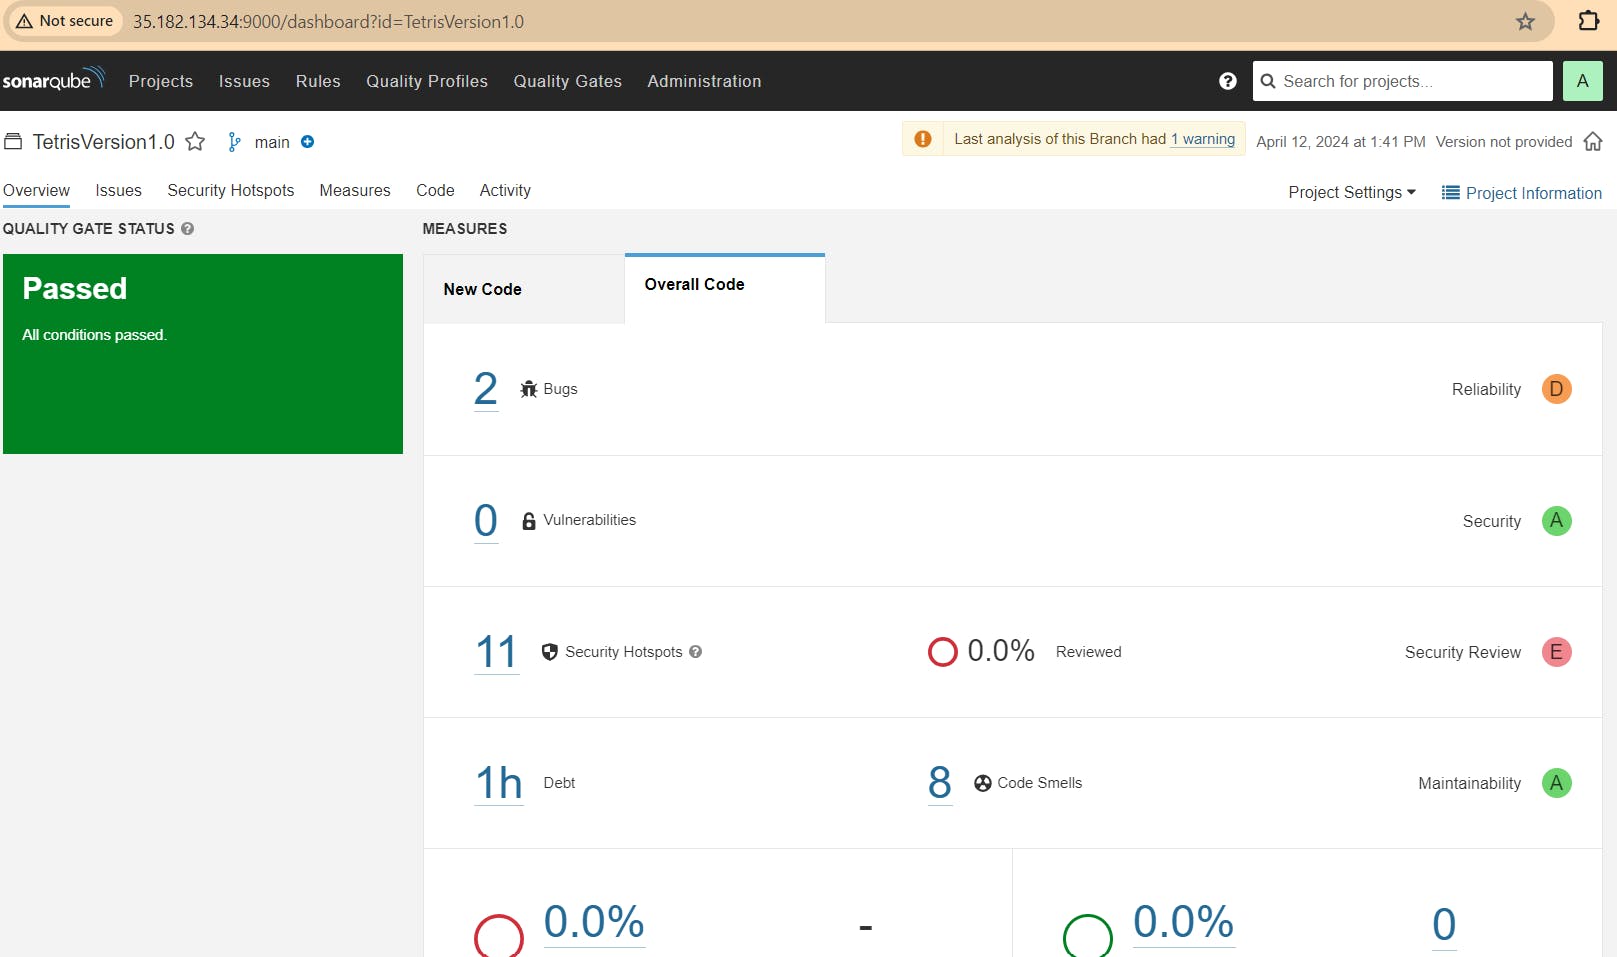
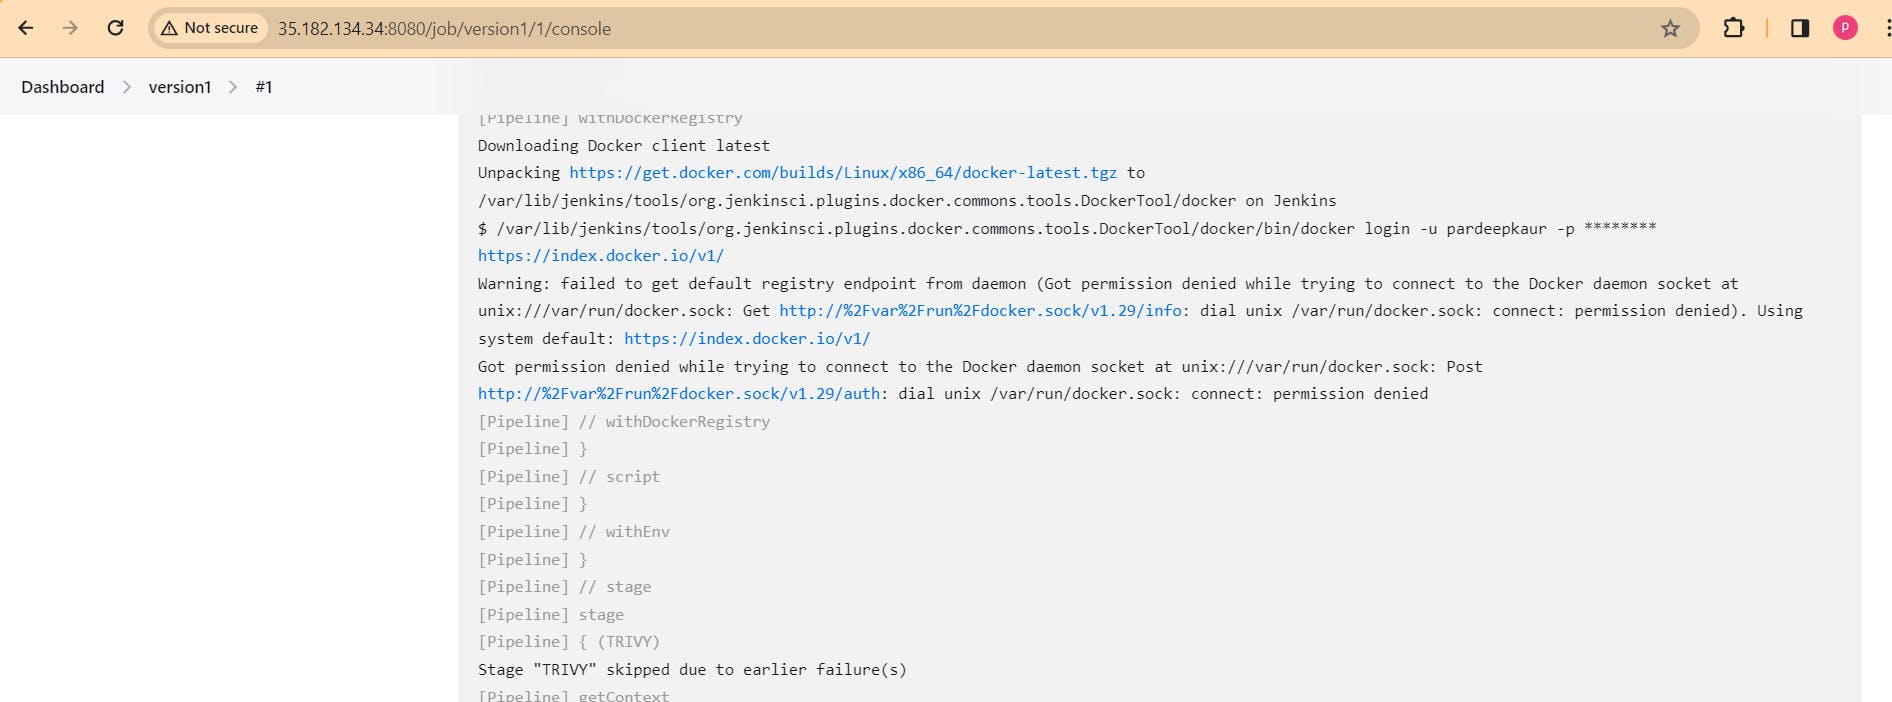
sudo usermod -aG docker jenkins
sudo chown $USER /var/run/docker.sock
 ls -l /var/run/docker.sock

Restart jenkins and run the pipeline:
sudo systemctl restart jenkins

Step 10. Create github token and add that token in jenkins credentials:
Click on Your Profile on the top right -> setting -> developer setting -> personal access token -> generate new token -> select all check boxes:
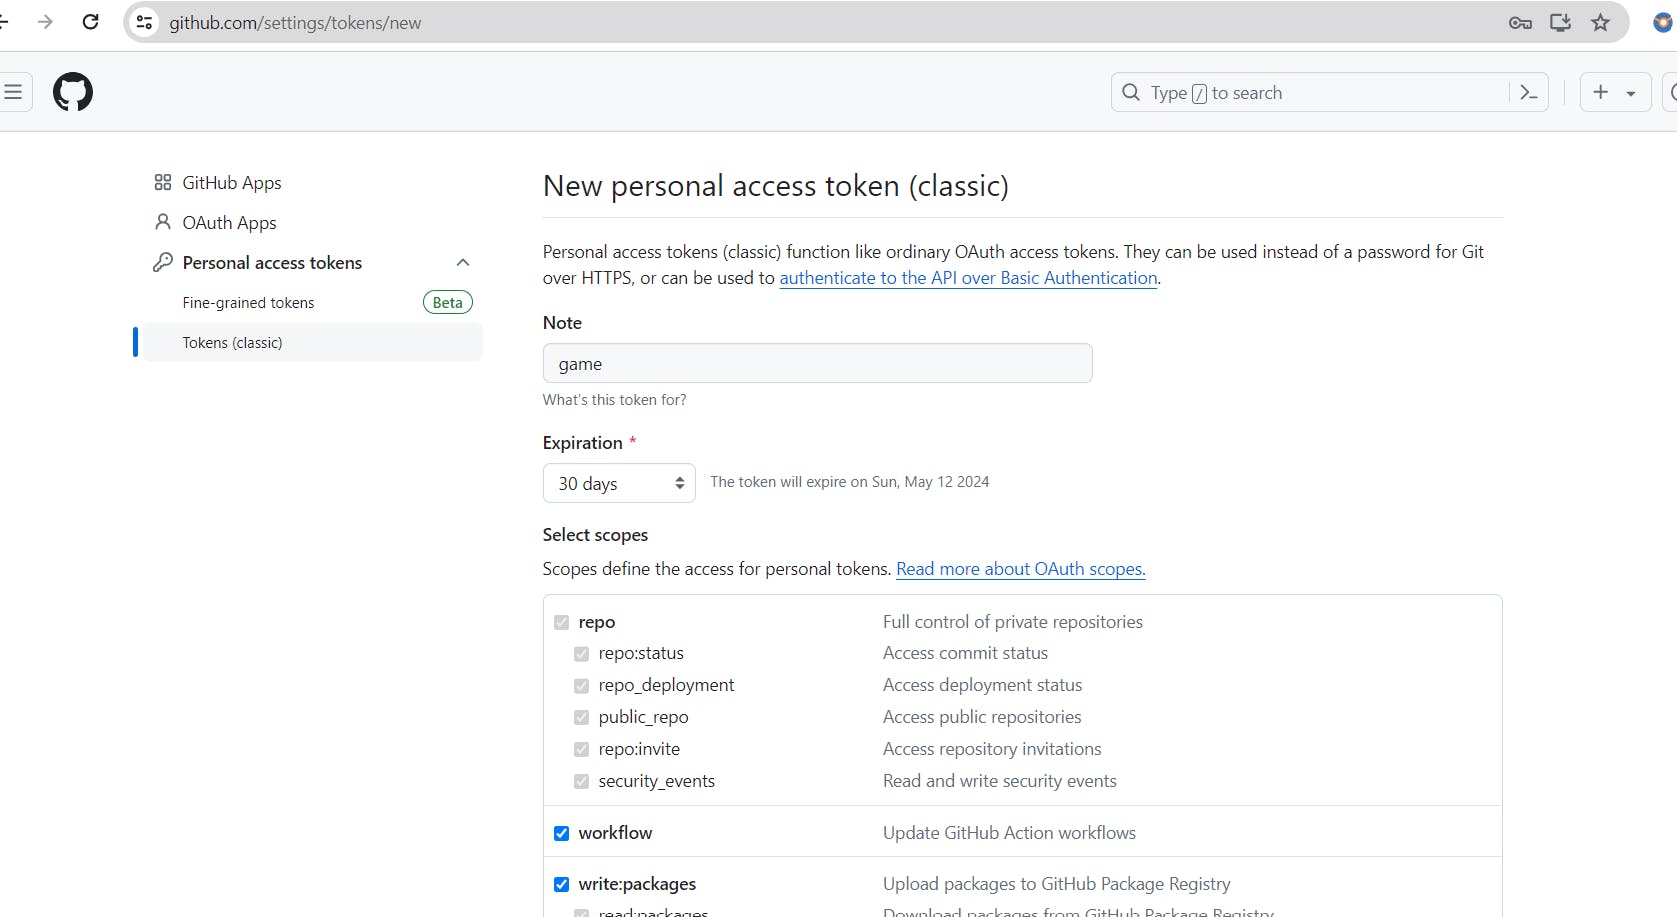
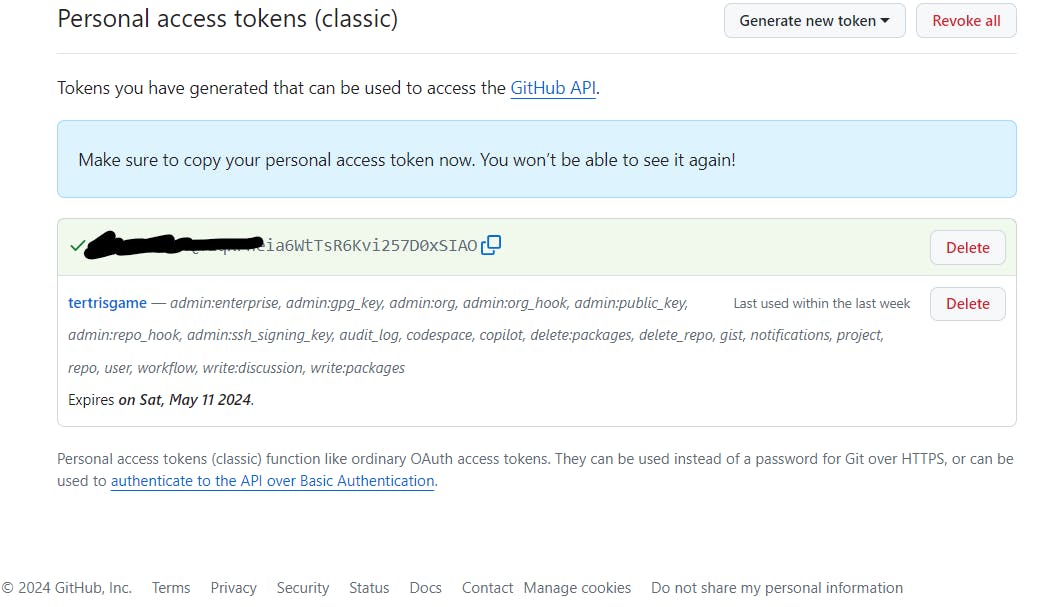
add that token in jenkins credenyials


Let’s add the Image Updater stage to the Pipeline:
#add inside environment
 environment {
    GIT_REPO_NAME = "Tetris-manifest"
    GIT_USER_NAME = "Pardeep32"      # change your  Github Username here
  }

# add these stages after trivy image scan
        stage('Checkout Code') {
            steps {
                git branch: 'main', url: 'https://github.com/Pardeep32/Tetris-manifest.git'  # this is other github repo having deployment.yml file
            }
        }
        stage('Update Deployment File') {
            steps {
                script {
                    withCredentials([string(credentialsId: 'github', variable: 'GITHUB_TOKEN')]) {
                       NEW_IMAGE_NAME = "pardeepkaur/tetrisv1:latest"   #update your image here
                       sh "sed -i 's|image: .*|image: $NEW_IMAGE_NAME|' deployment.yml"
                       sh 'git add deployment.yml'
                       sh "git commit -m 'Update deployment image to $NEW_IMAGE_NAME'"
                       sh "git push https://${GITHUB_TOKEN}@github.com/${GIT_USER_NAME}/${GIT_REPO_NAME} HEAD:main"
                    }
                }
            }
        }
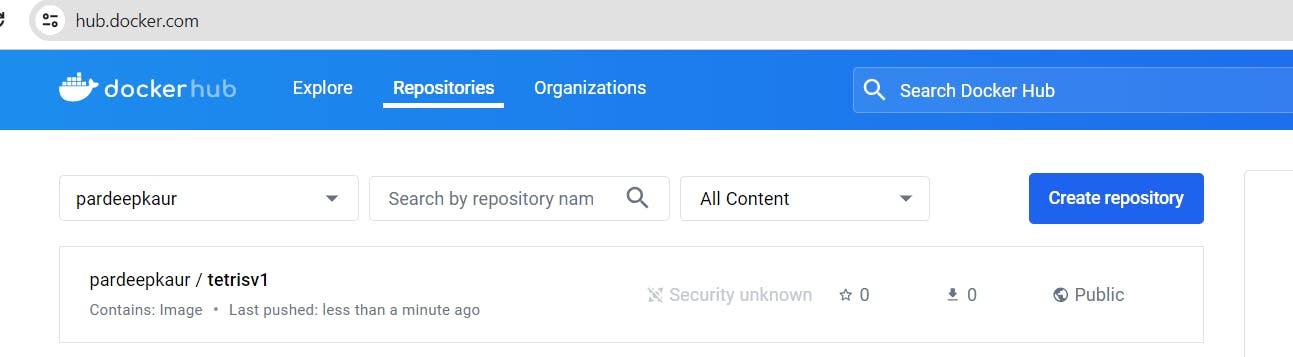
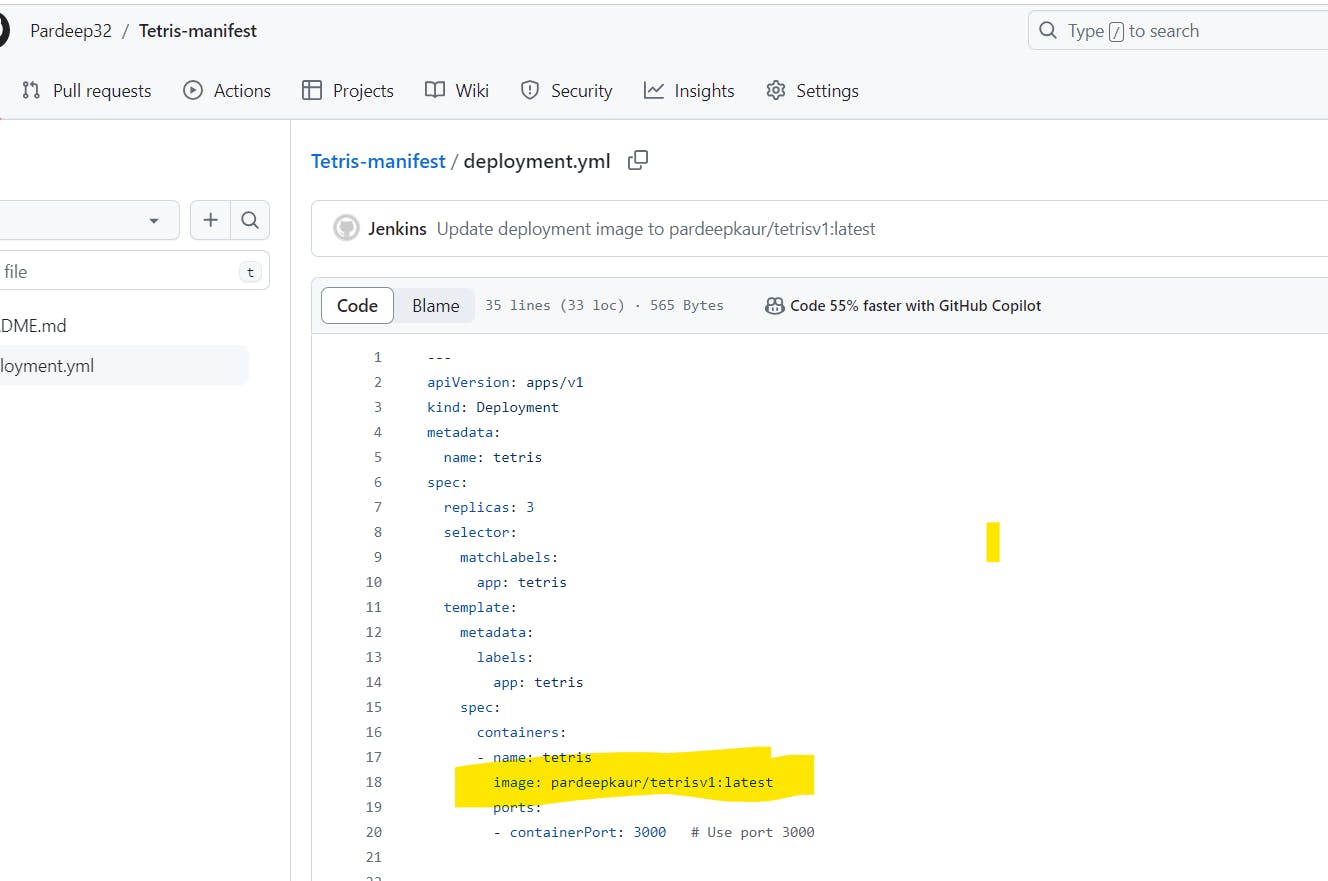
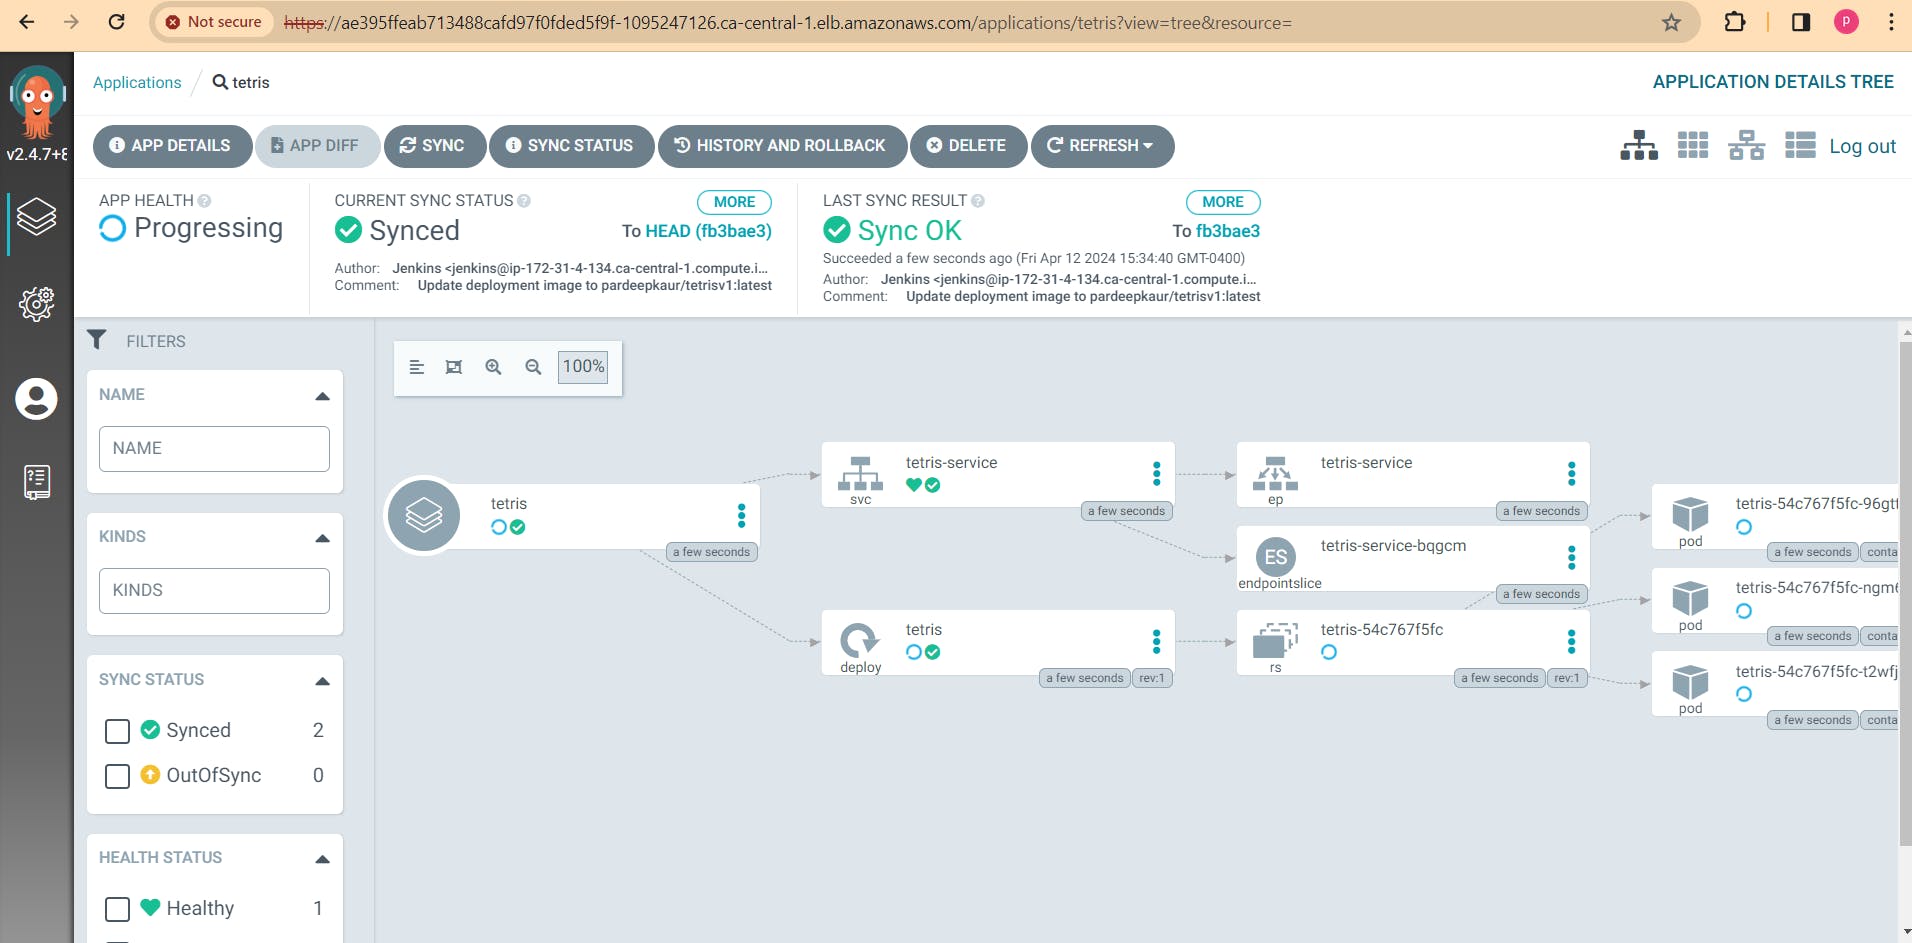
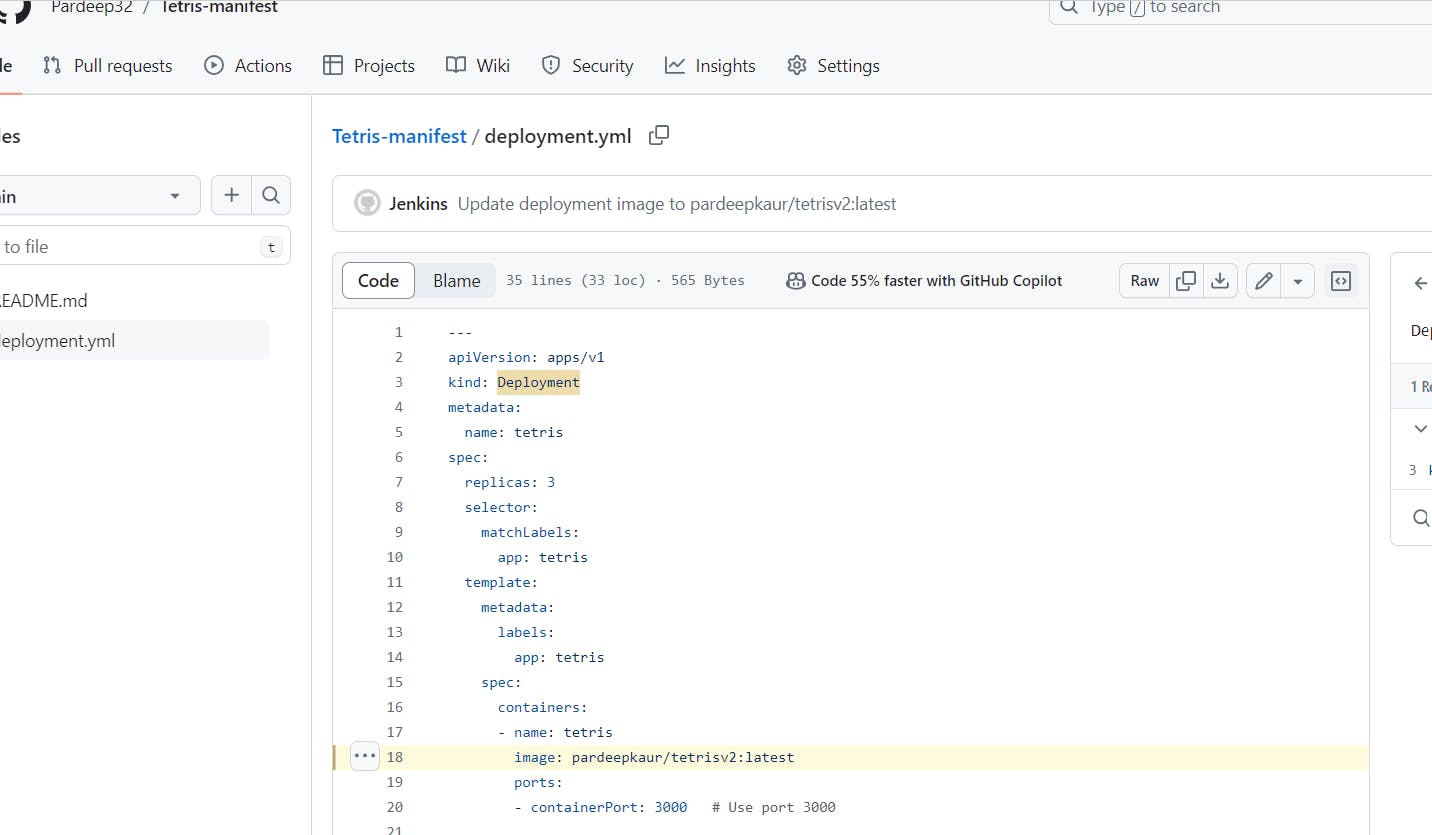
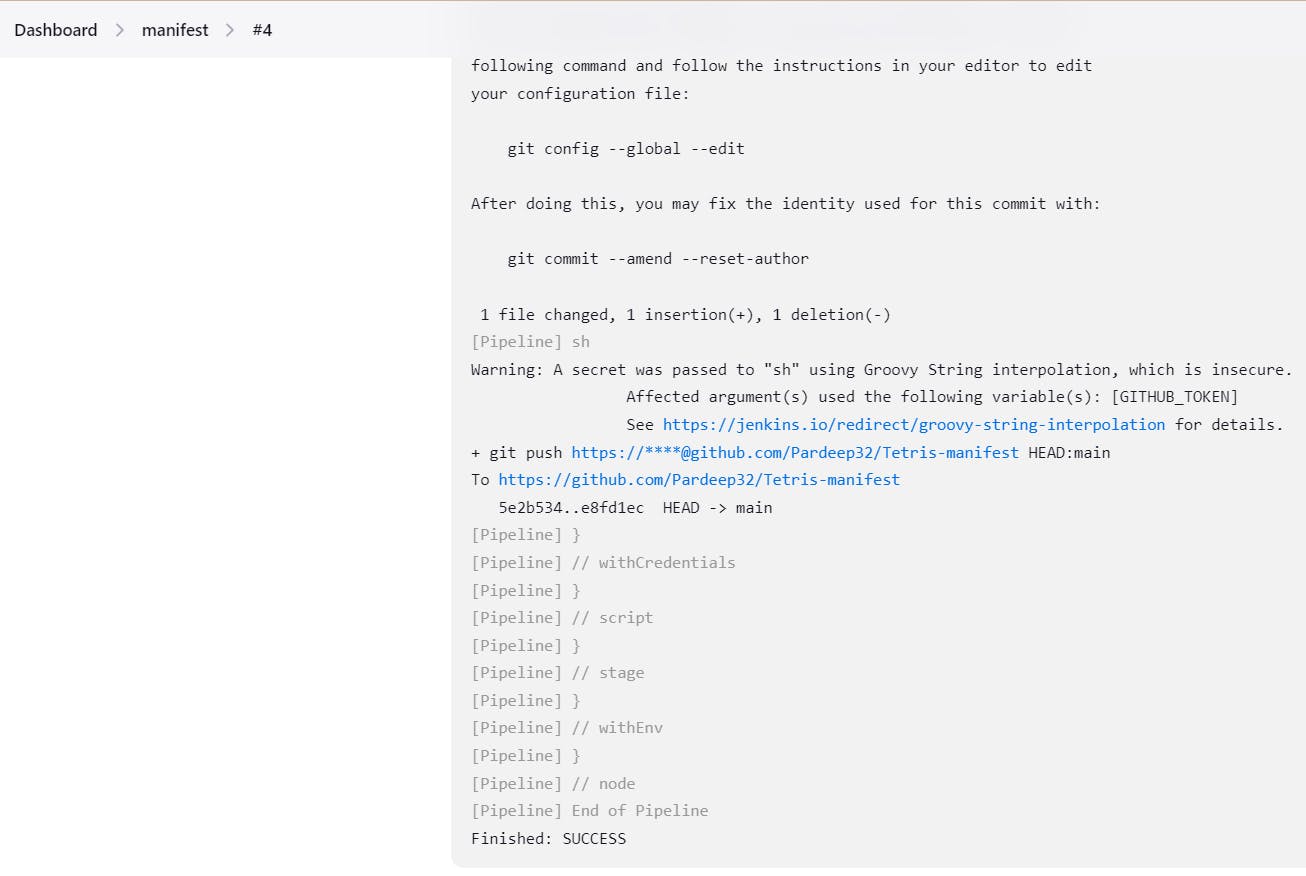
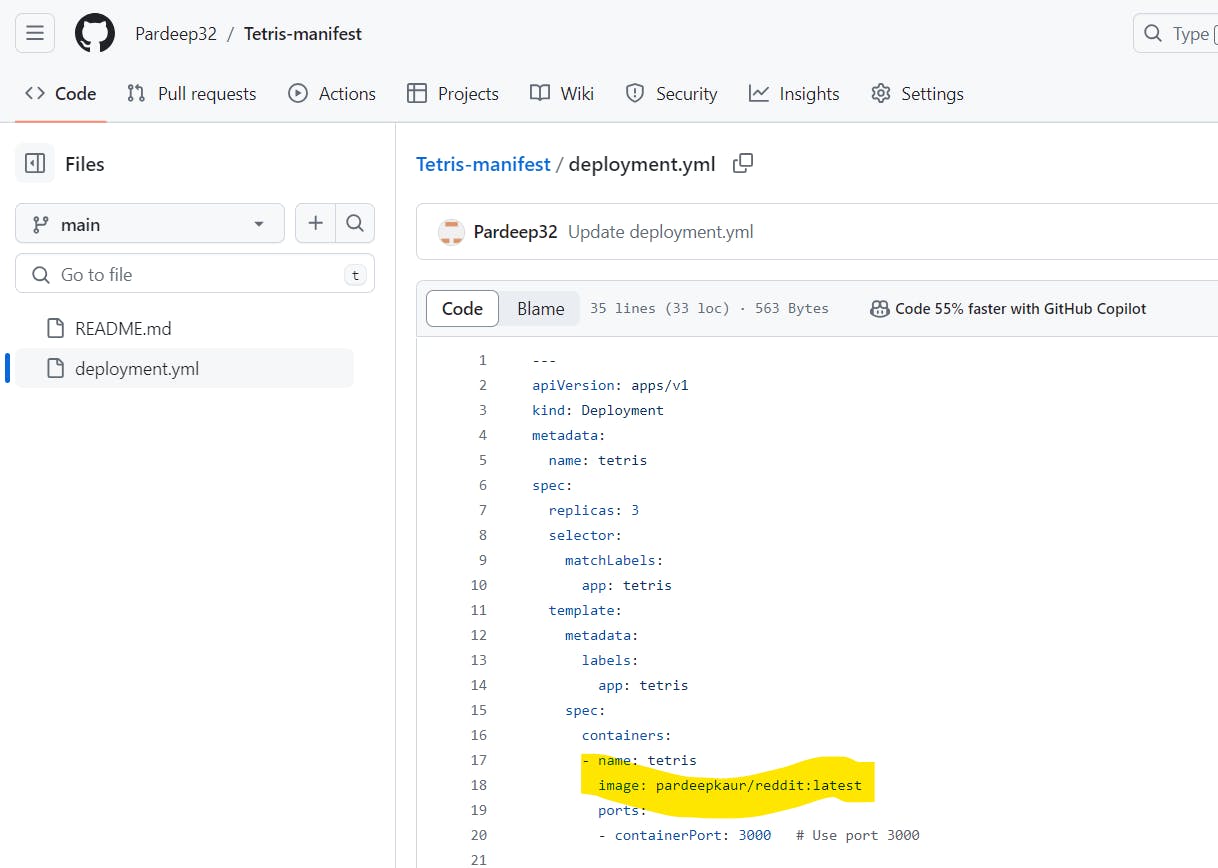
After adding this to pipeline, it will update image in deployment.yml file automatically in this repo github.com/Pardeep32/Tetris-manifest.git:
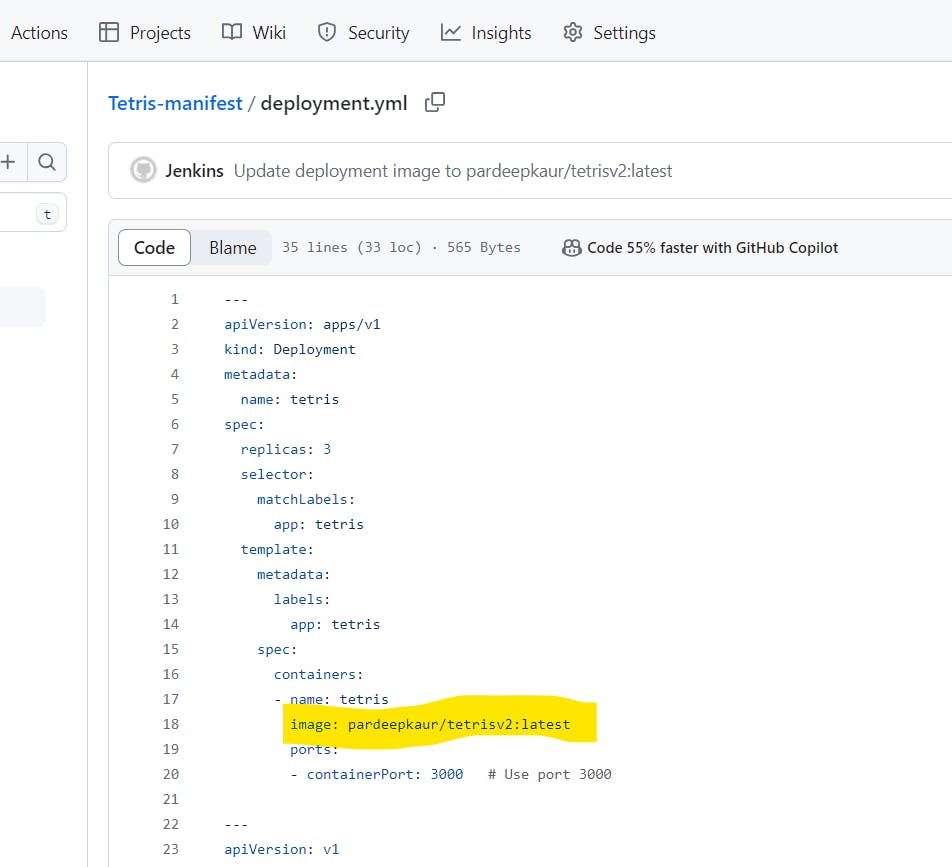
the name of image is updated:
STEP11. Let’s Update the kubeconfig on ec2 server's terminal
aws eks update-kubeconfig --name <CLUSTER NAME> --region <CLUSTER REGION>
aws eks update-kubeconfig --name EKS_CLOUD --region ca-central-1

Let’s see the nodes
kubectl get nodes

STEP 12 : ARGO CD SETUP
Let’s install ArgoCD
You will redirected to this page paste that commands on ec2 server.
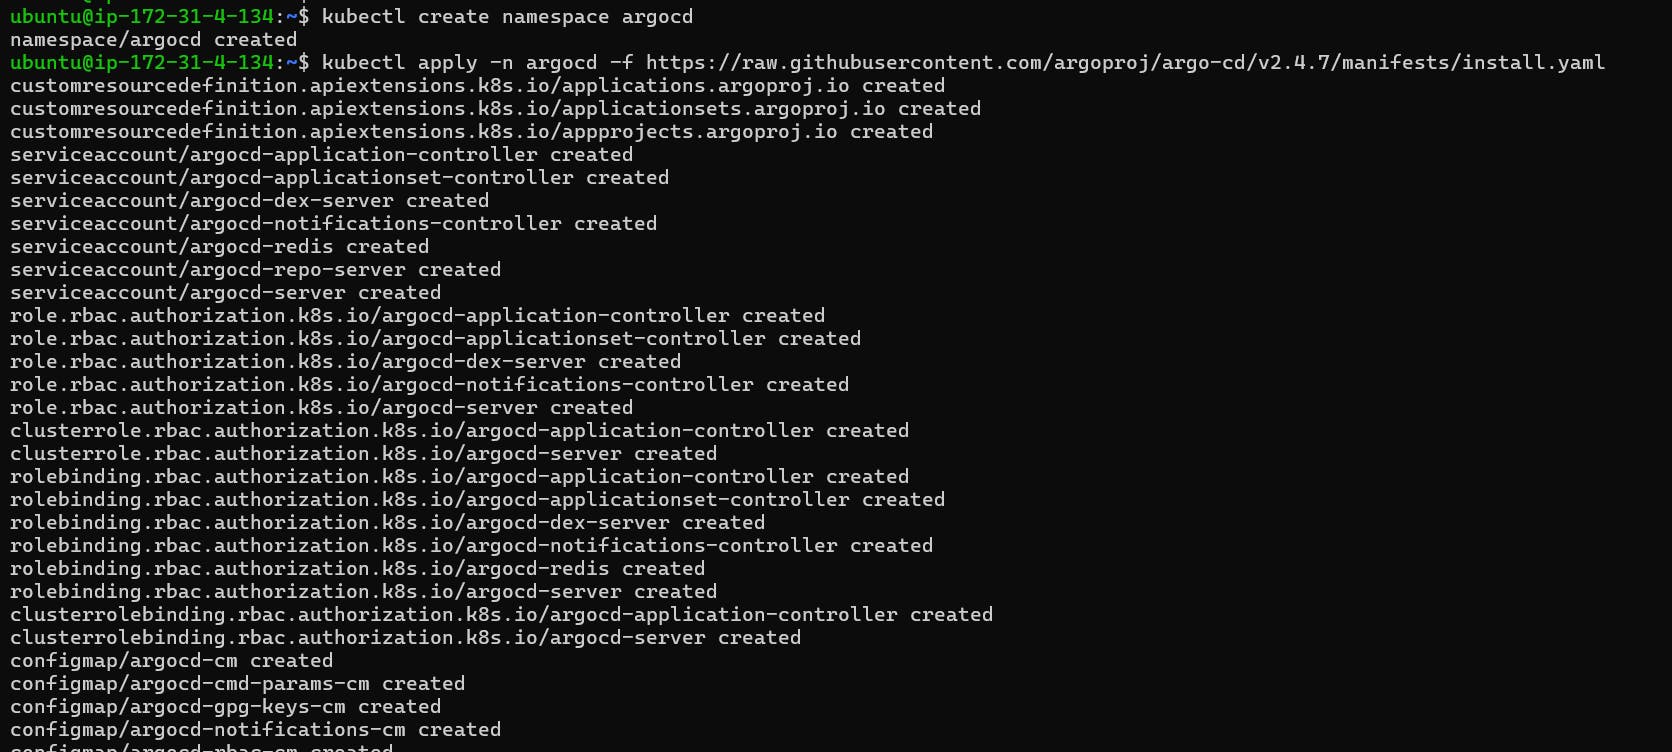
All those components could be installed using a manifest provided by the Argo Project: use the below commands
kubectl create namespace argocd
kubectl apply -n argocd -f https://raw.githubusercontent.com/argoproj/argo-cd/v2.4.7/manifests/install.yaml
By default, argocd-server is not publicly exposed. For this project, we will use a Load Balancer to make it usable:
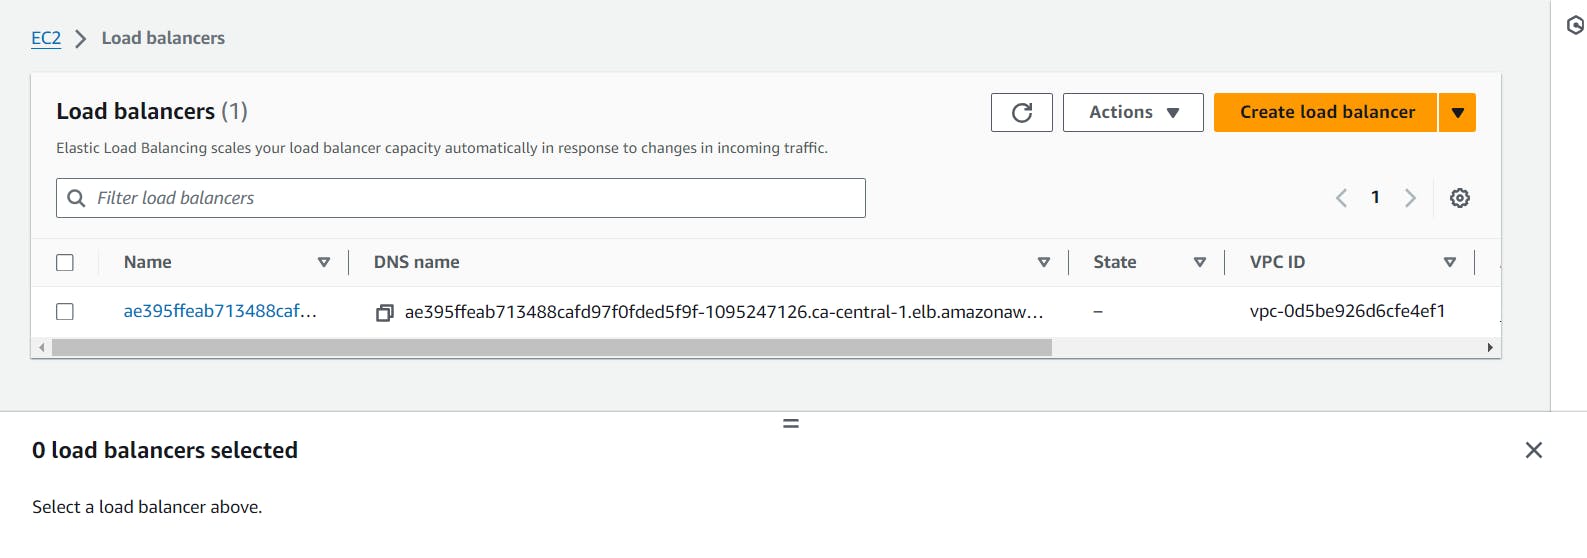
kubectl patch svc argocd-server -n argocd -p '{"spec": {"type": "LoadBalancer"}}'
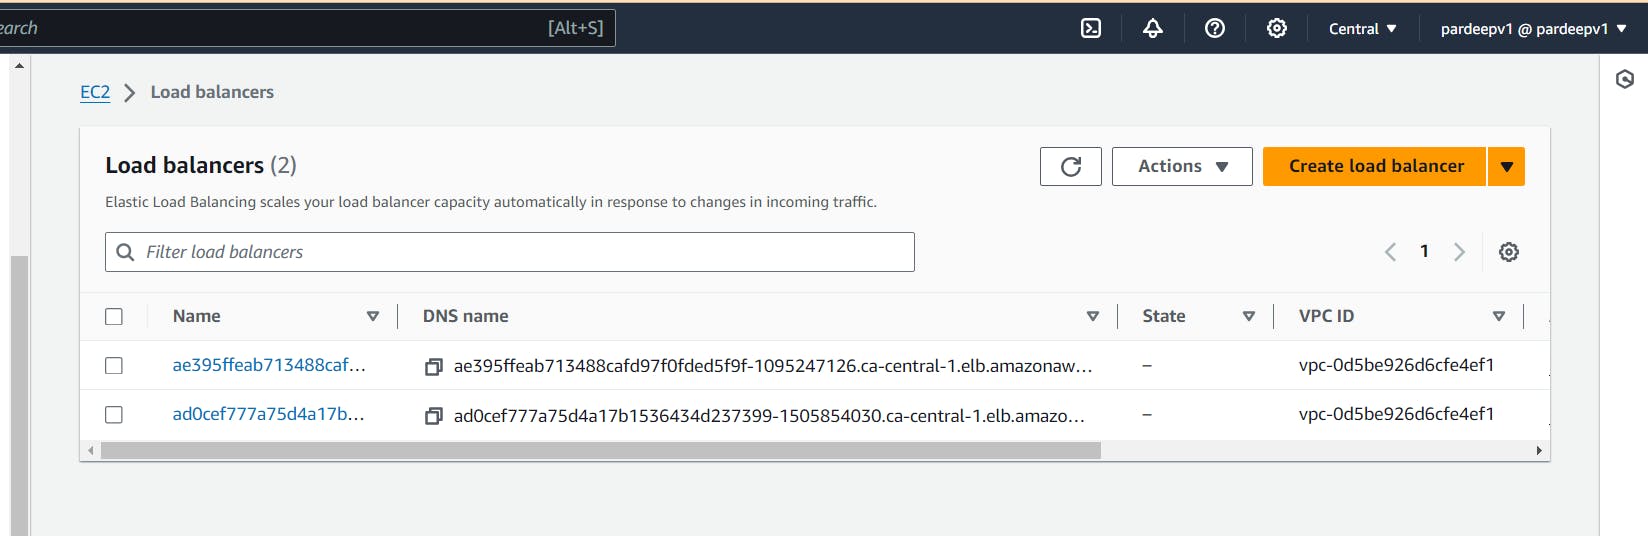
it will create a Loadbalancer:

sudo apt install jq -y
export ARGOCD_SERVER=`kubectl get svc argocd-server -n argocd -o json | jq --raw-output '.status.loadBalancer.ingress[0].hostname'`
when you run this command, it will export the hostname of the ArgoCD server’s load balancer and store it in the ARGOCD_SERVER environment variable, which you can then use in other commands or scripts to interact with the ArgoCD server. This can be useful when you need to access the ArgoCD web UI or interact with the server programmatically.

If run this command you will get the load balancer external IP
echo $ARGOCD_SERVER

Login for argocd
The command you provided is used to extract the password for the initial admin user of ArgoCD, decode it from base64 encoding, and store it in an environment variable named ARGO_PWD.
export ARGO_PWD=`kubectl -n argocd get secret argocd-initial-admin-secret -o jsonpath="{.data.password}" | base64 -d`

If you want to see your password provide the below command
echo $ARGO_PWD

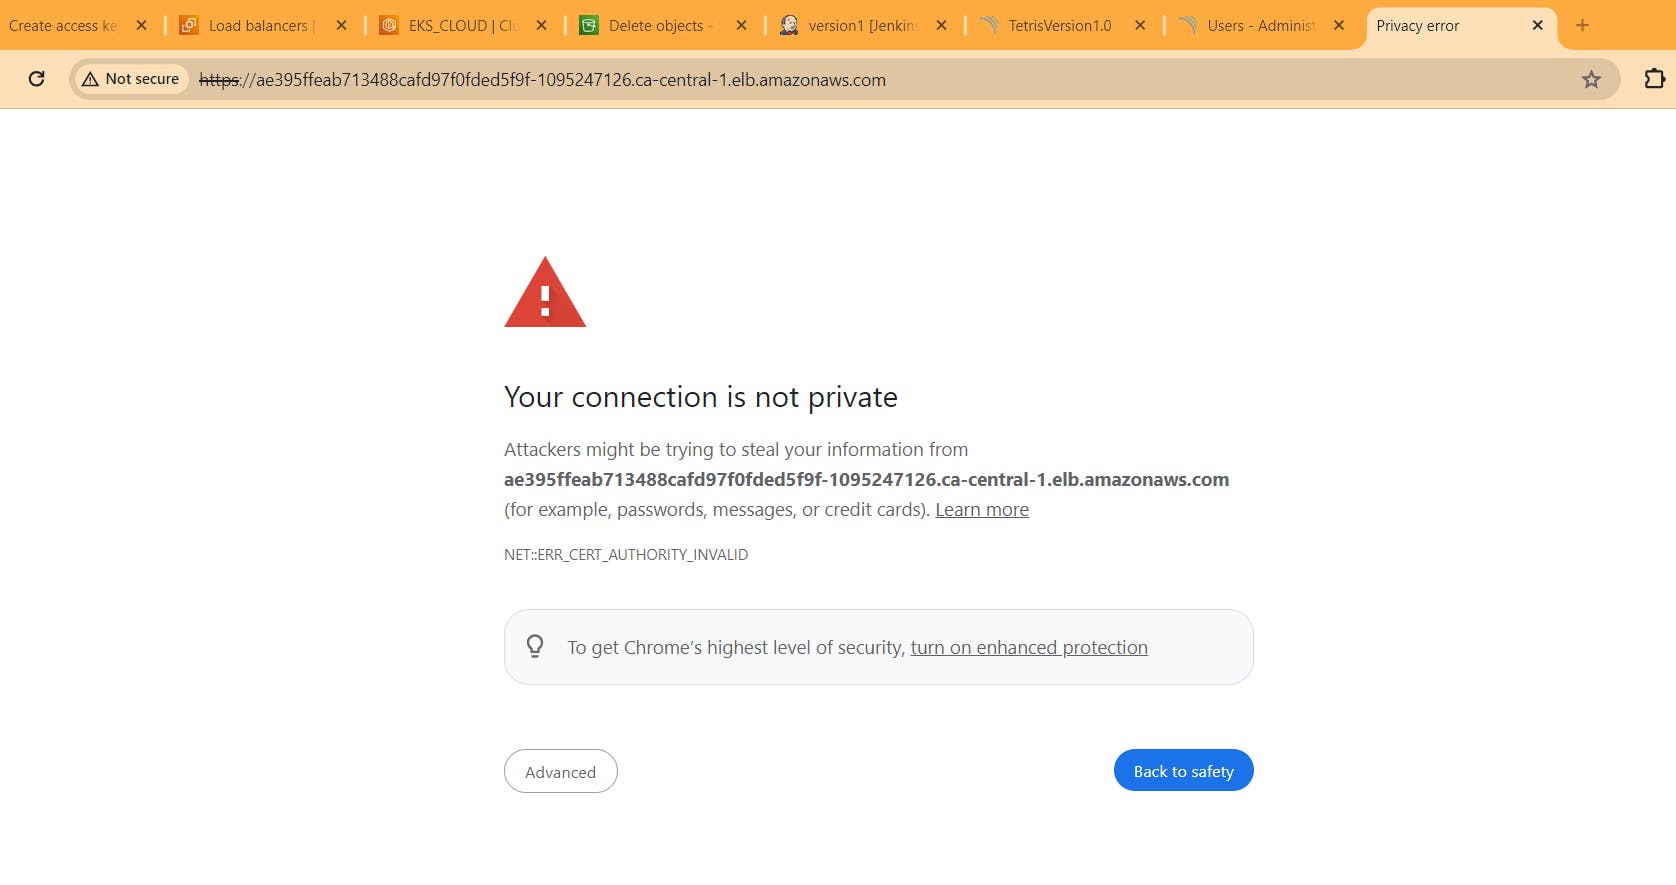
Now copy the load balancer IP and paste it into the browser
echo $ARGOCD_SERVER

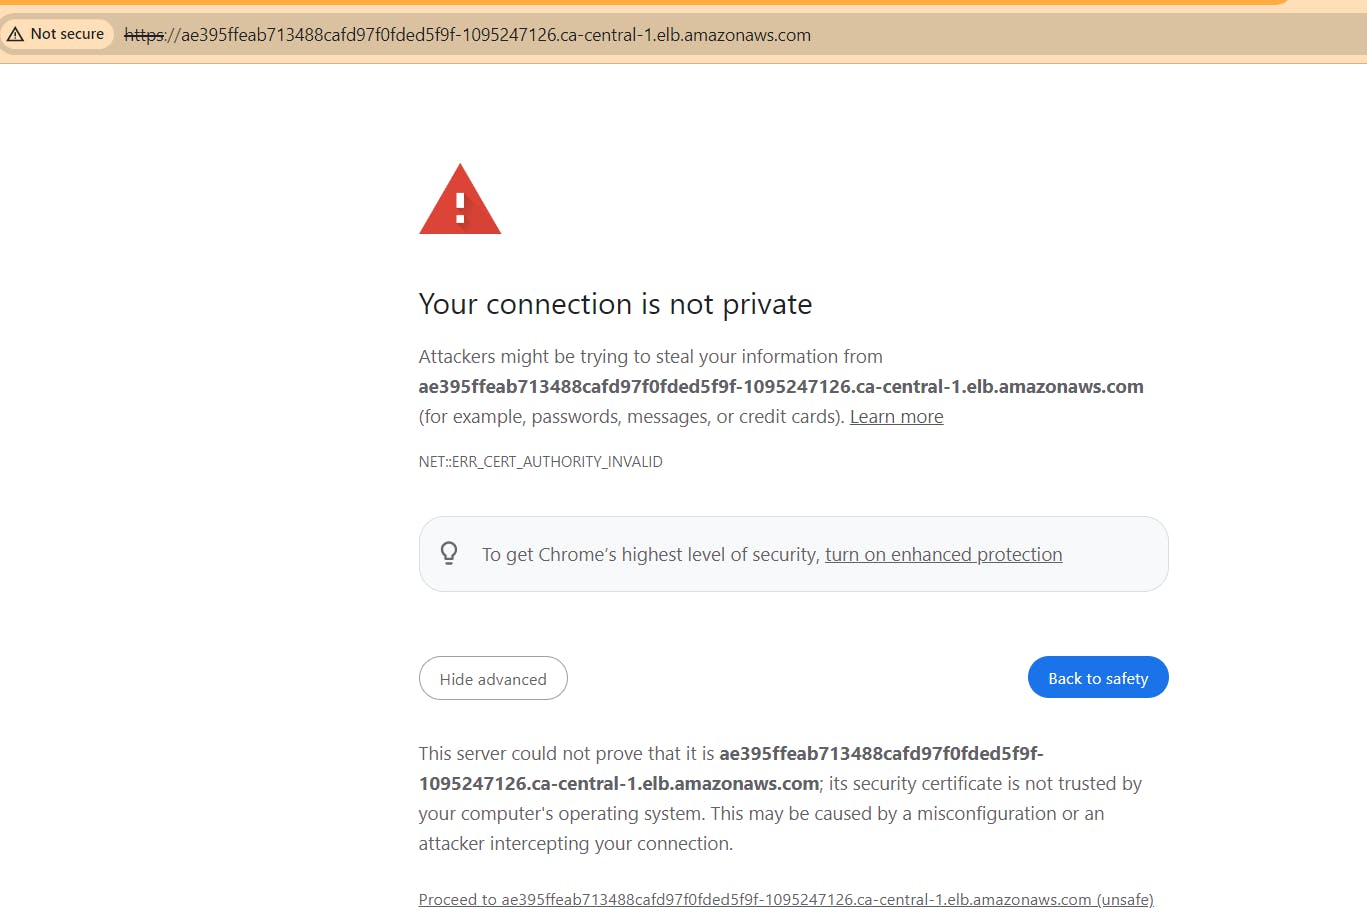
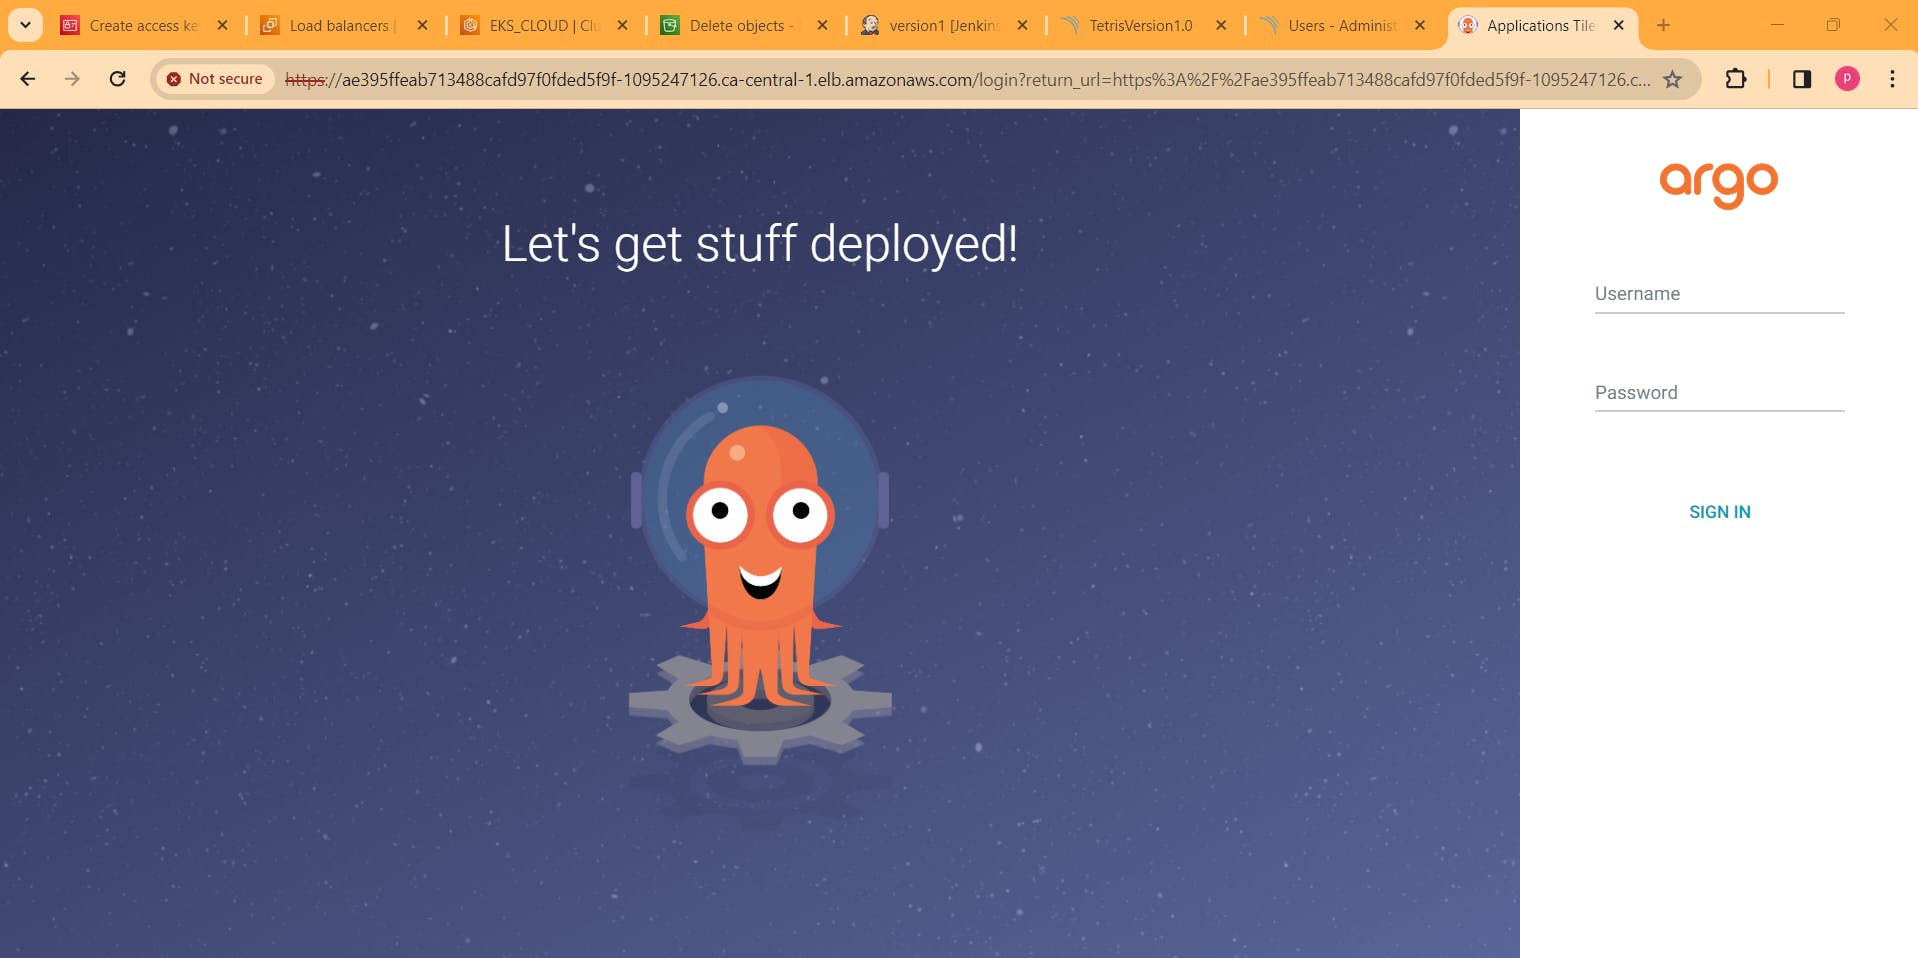
username : admin, password:
echo $ARGO_PWD ## run in terminal of ec2 server provide password
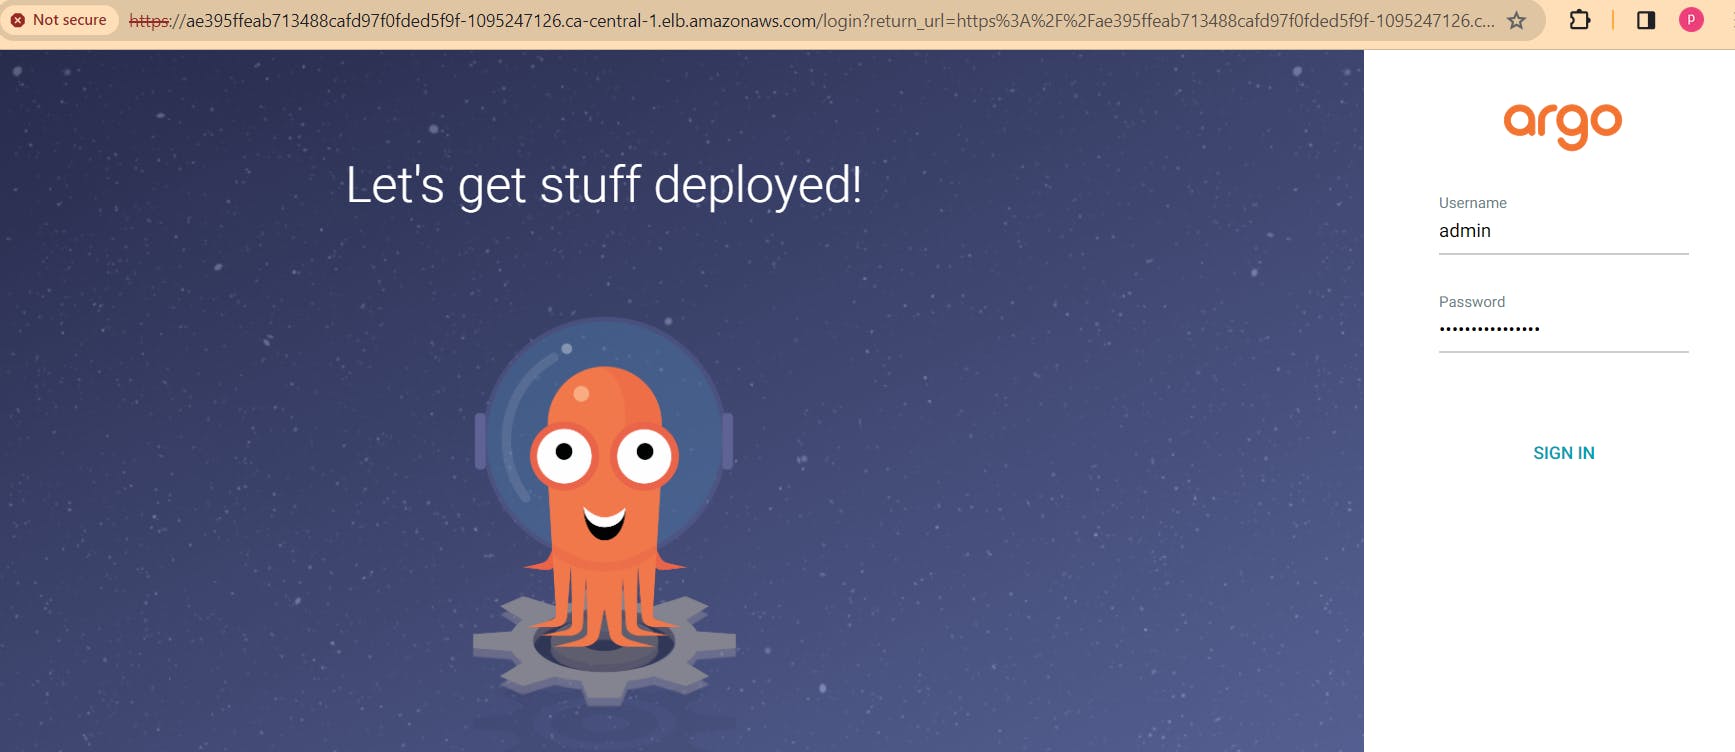

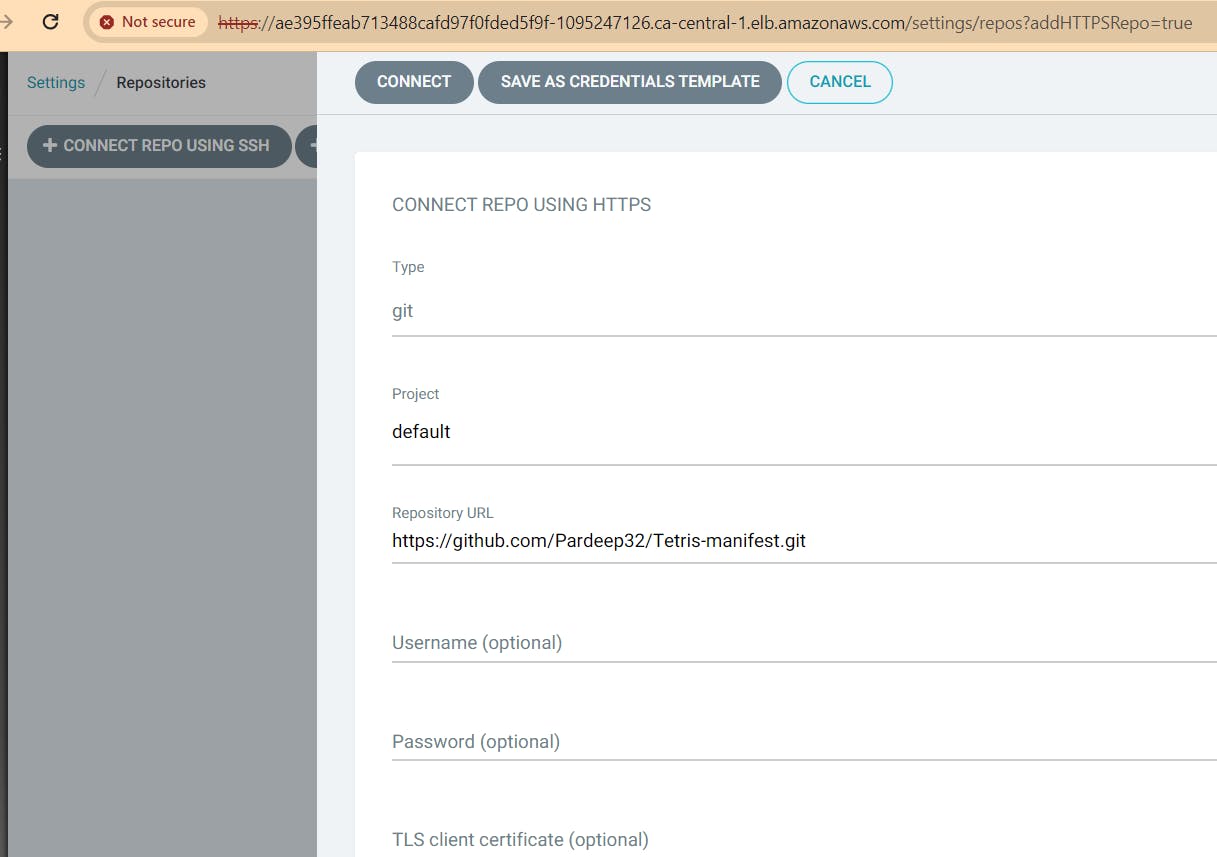
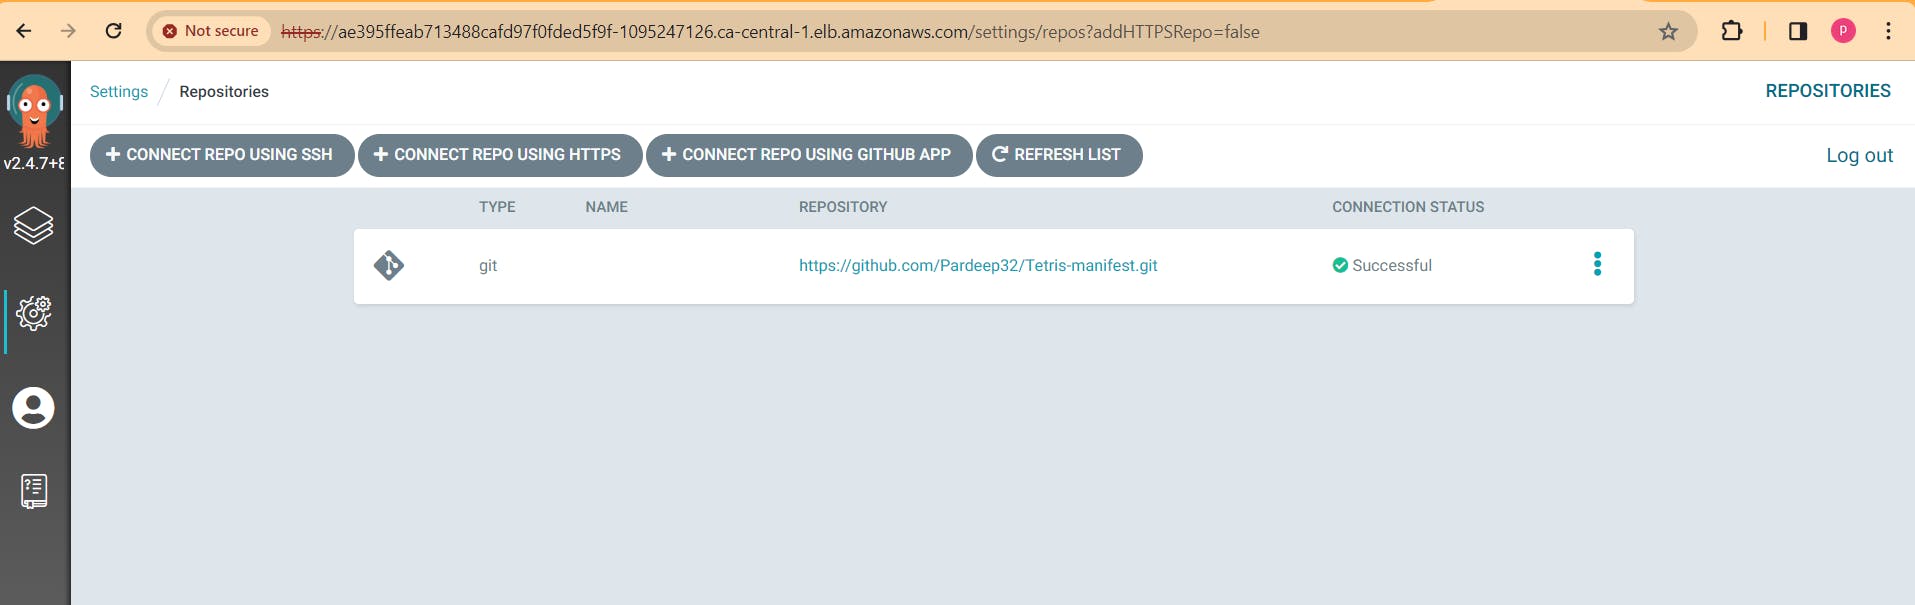
go to settings -> repositories:
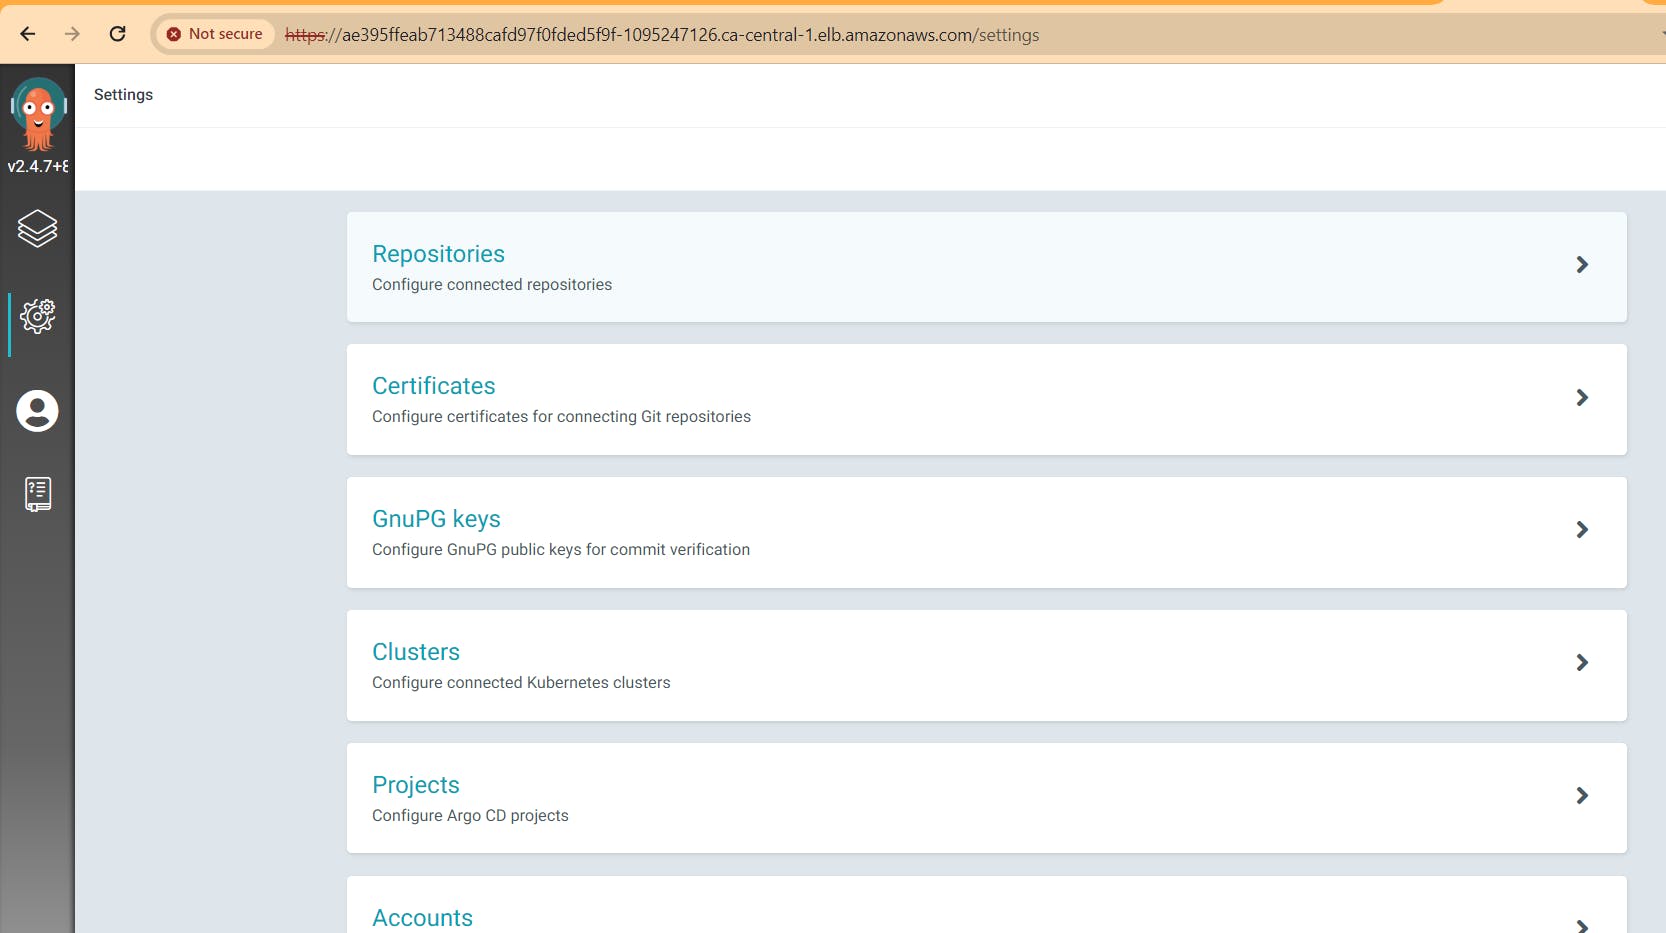
Select Connect repo using HTTPS: provide the follwing details and connect
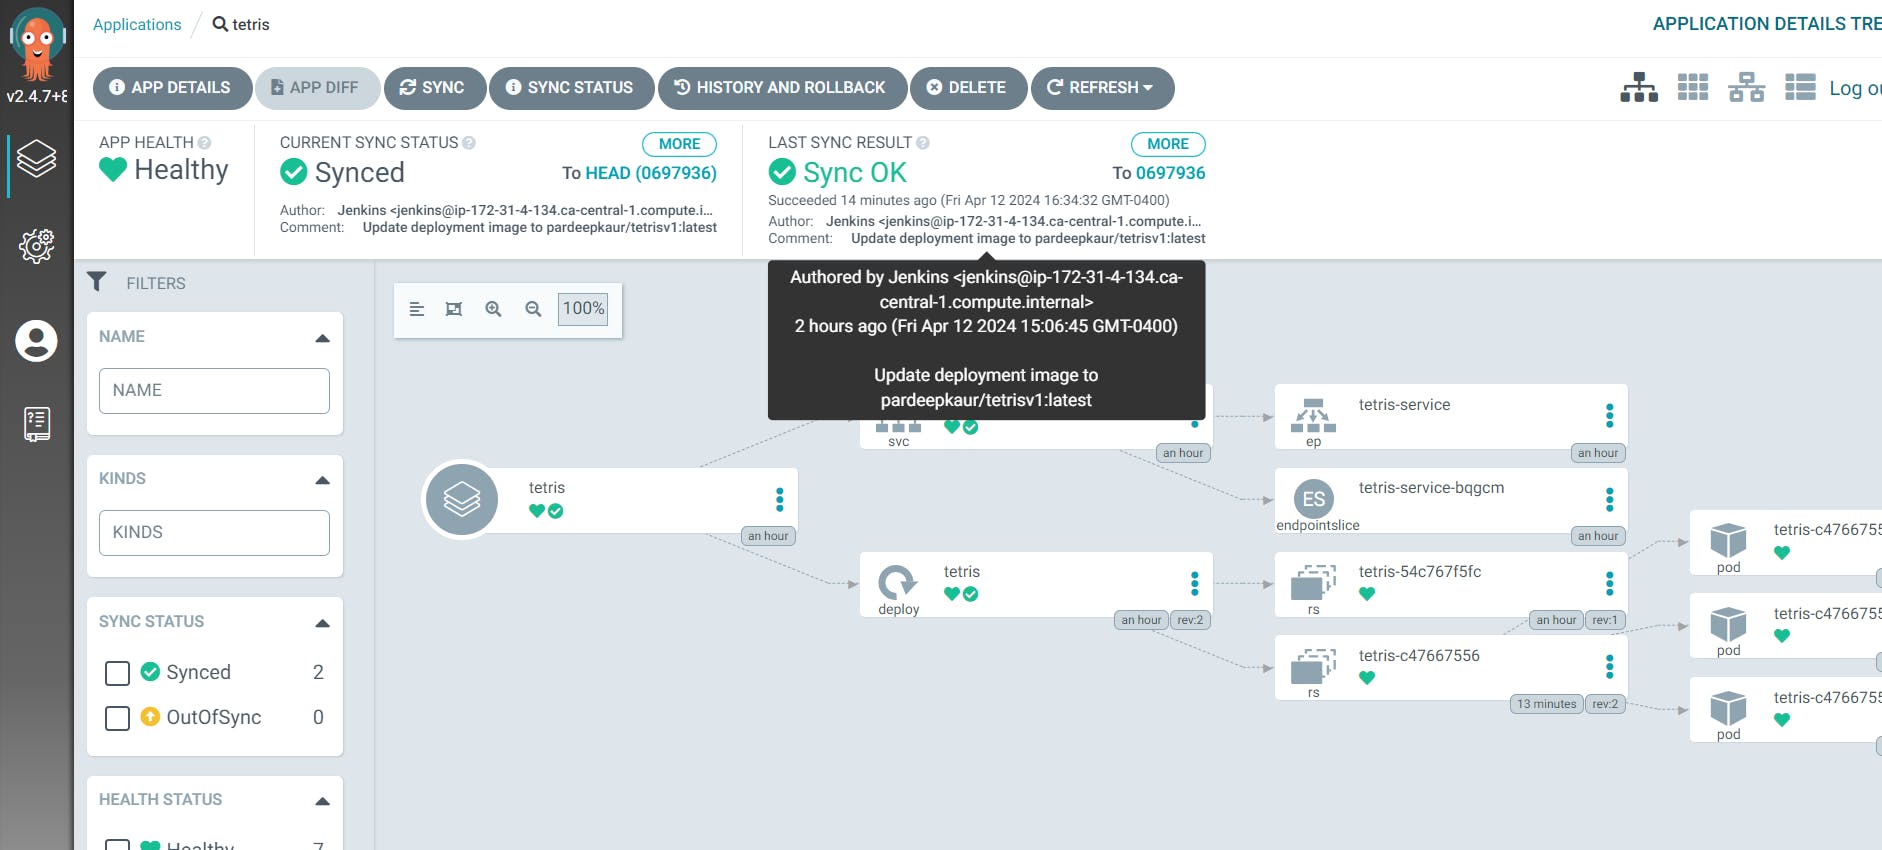
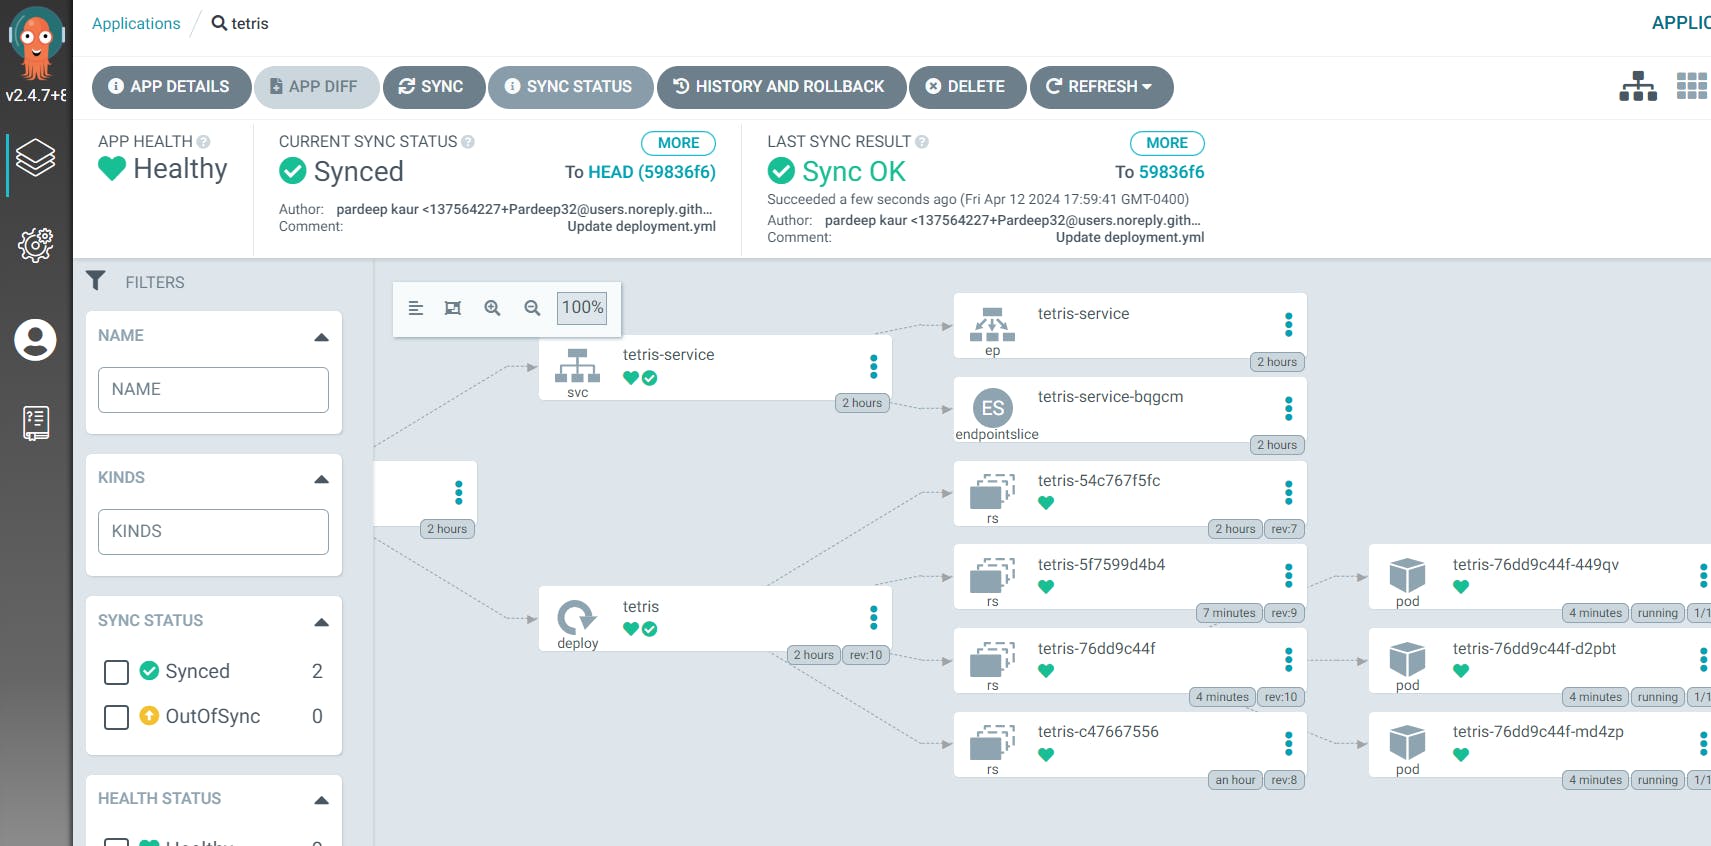
Then go to new app:
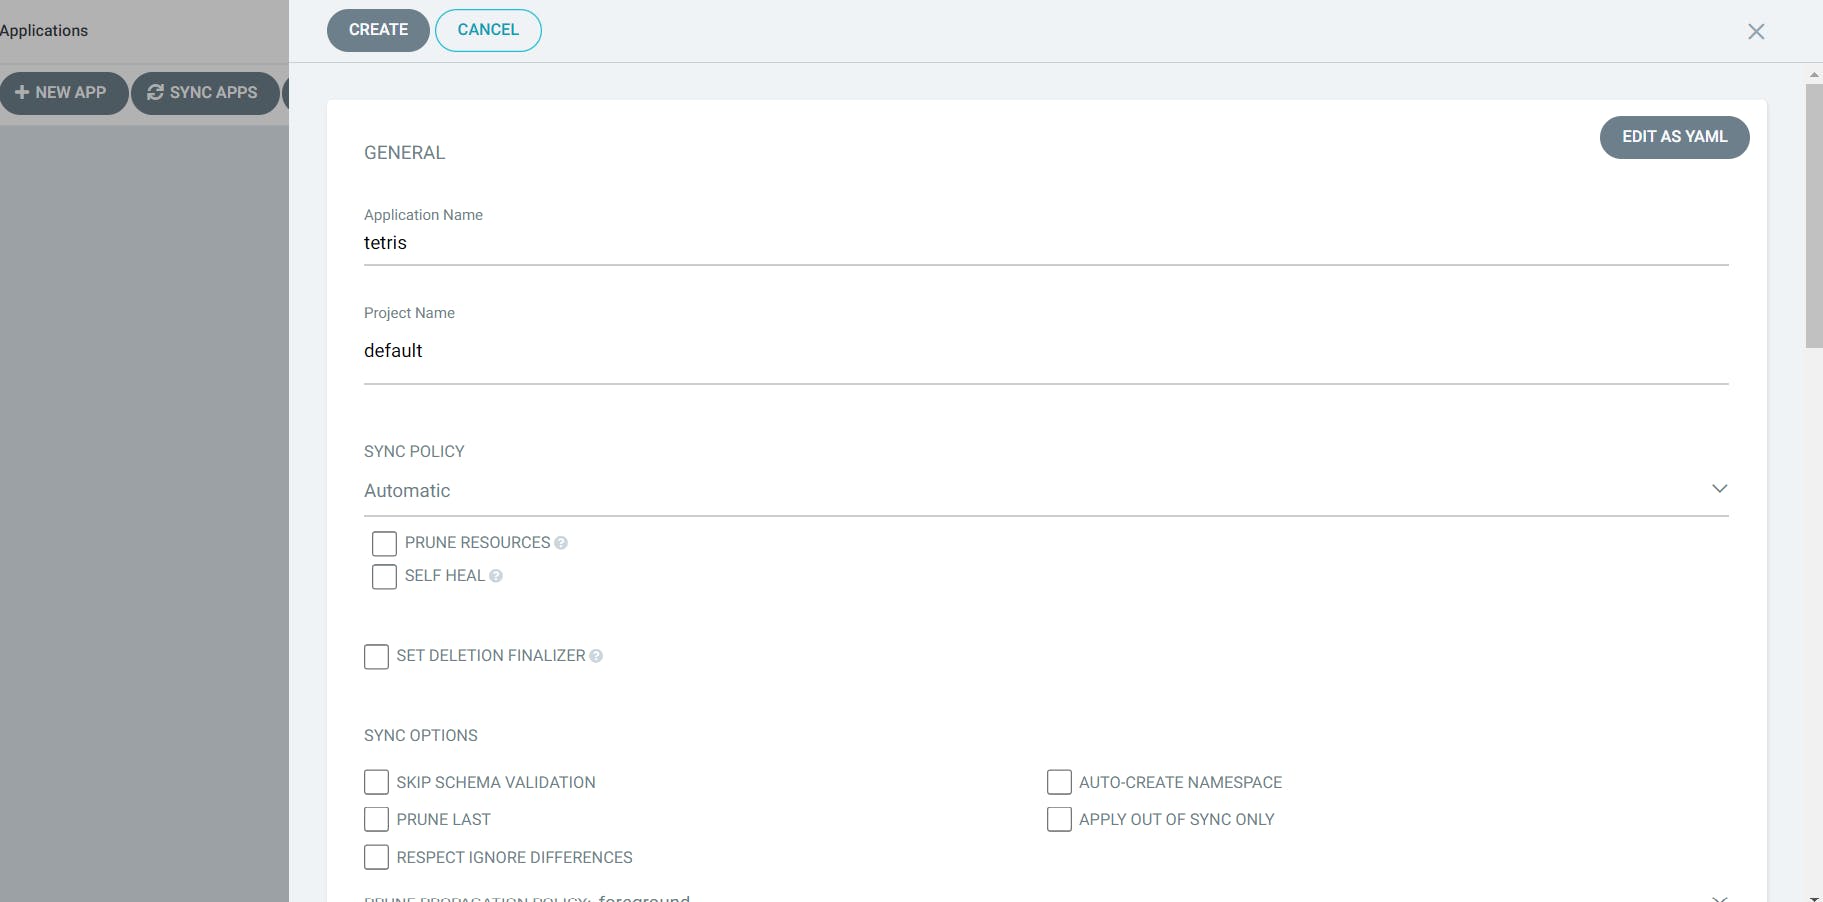
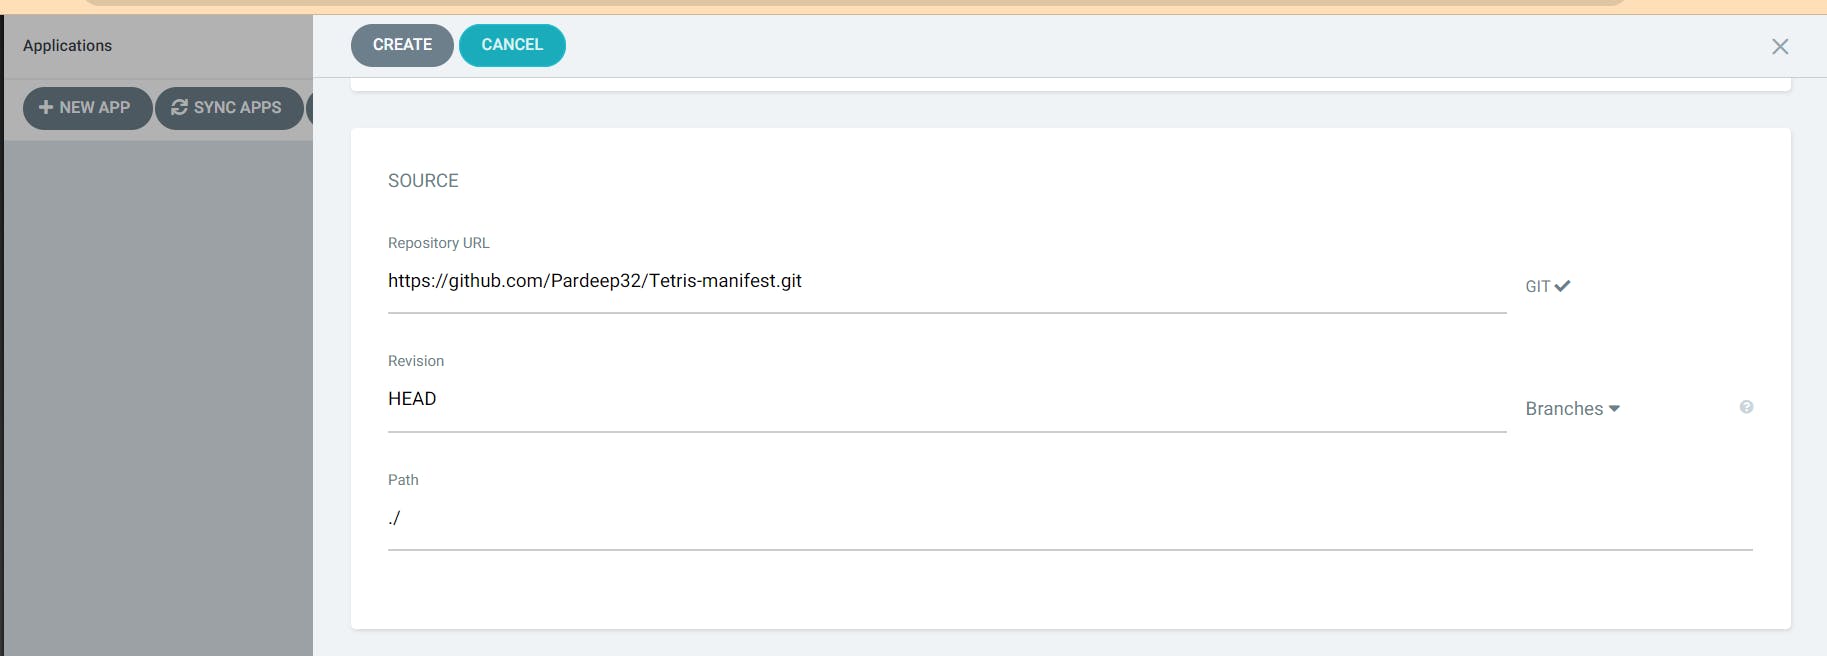
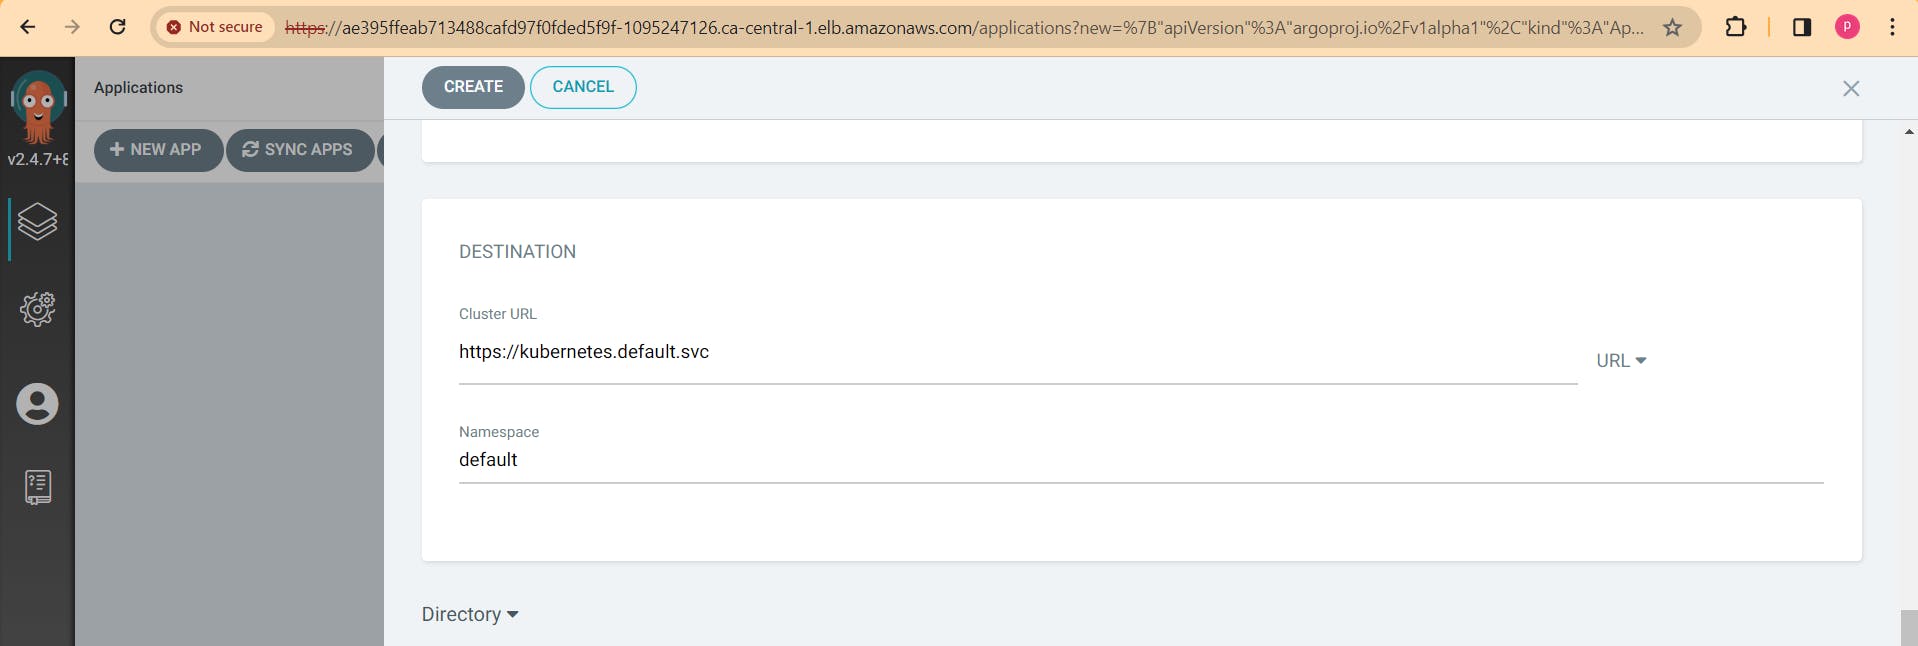
Add all the mentions details and create. Click on tetris and it will create another load balancer in AWS
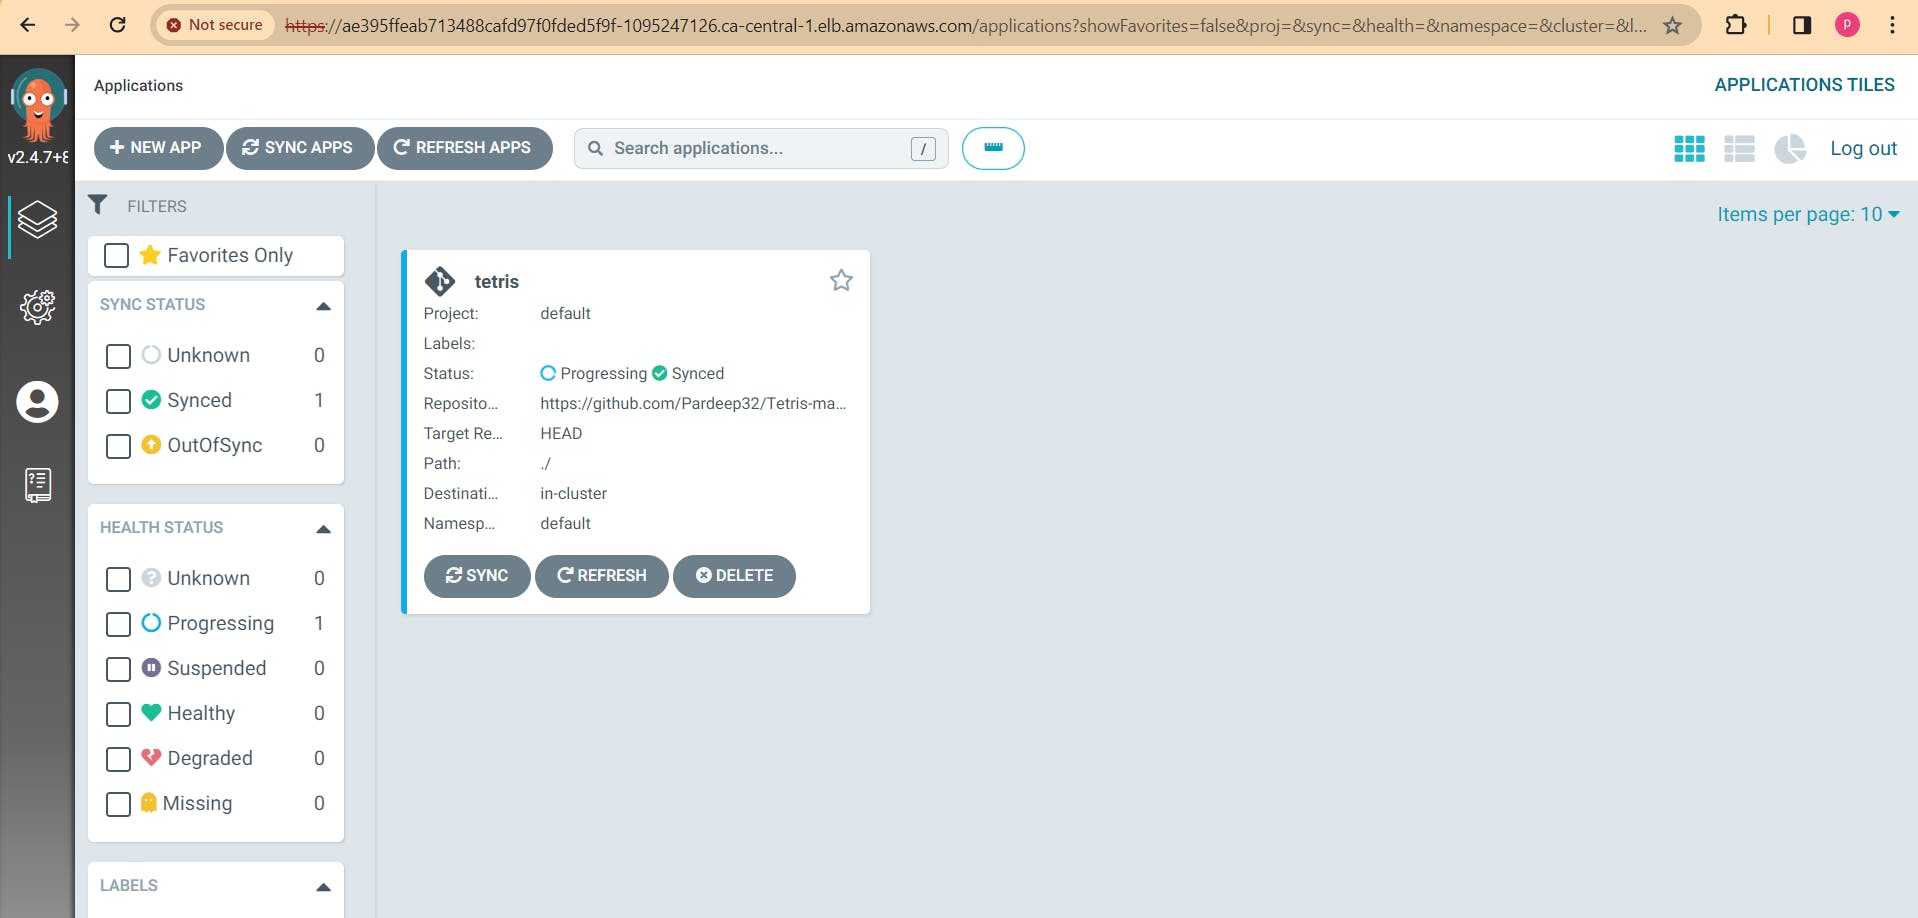
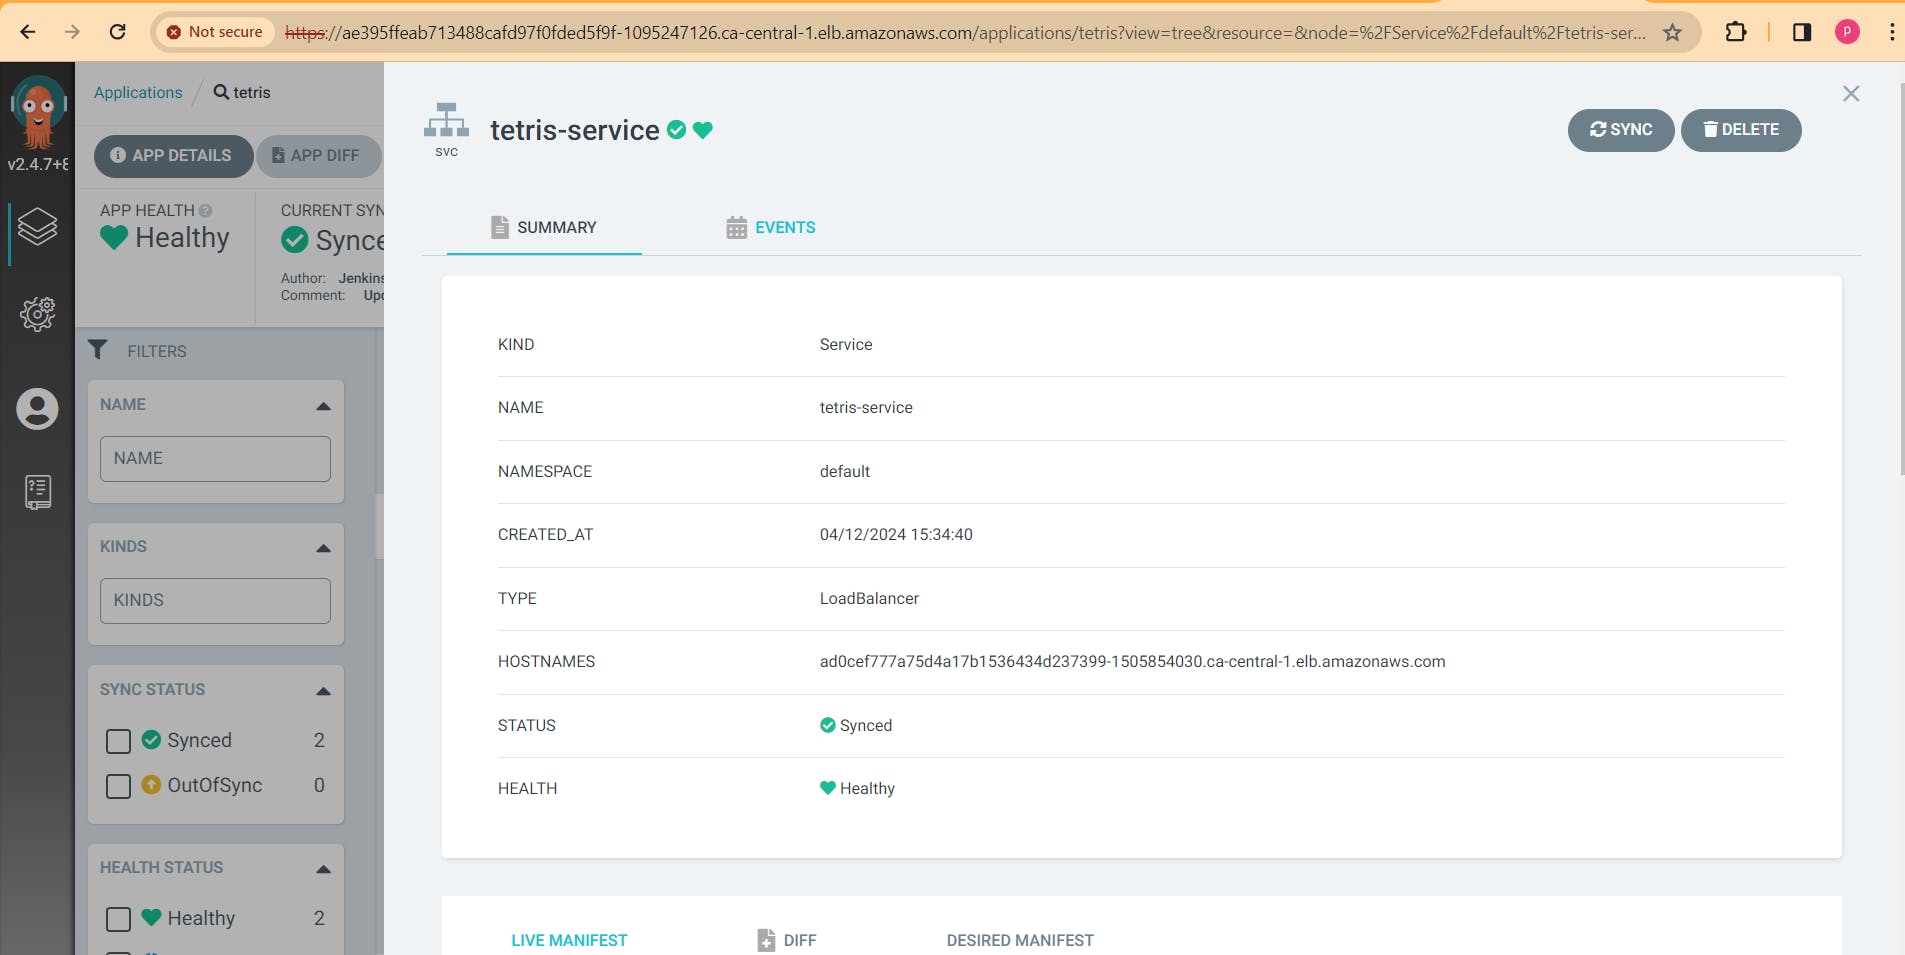
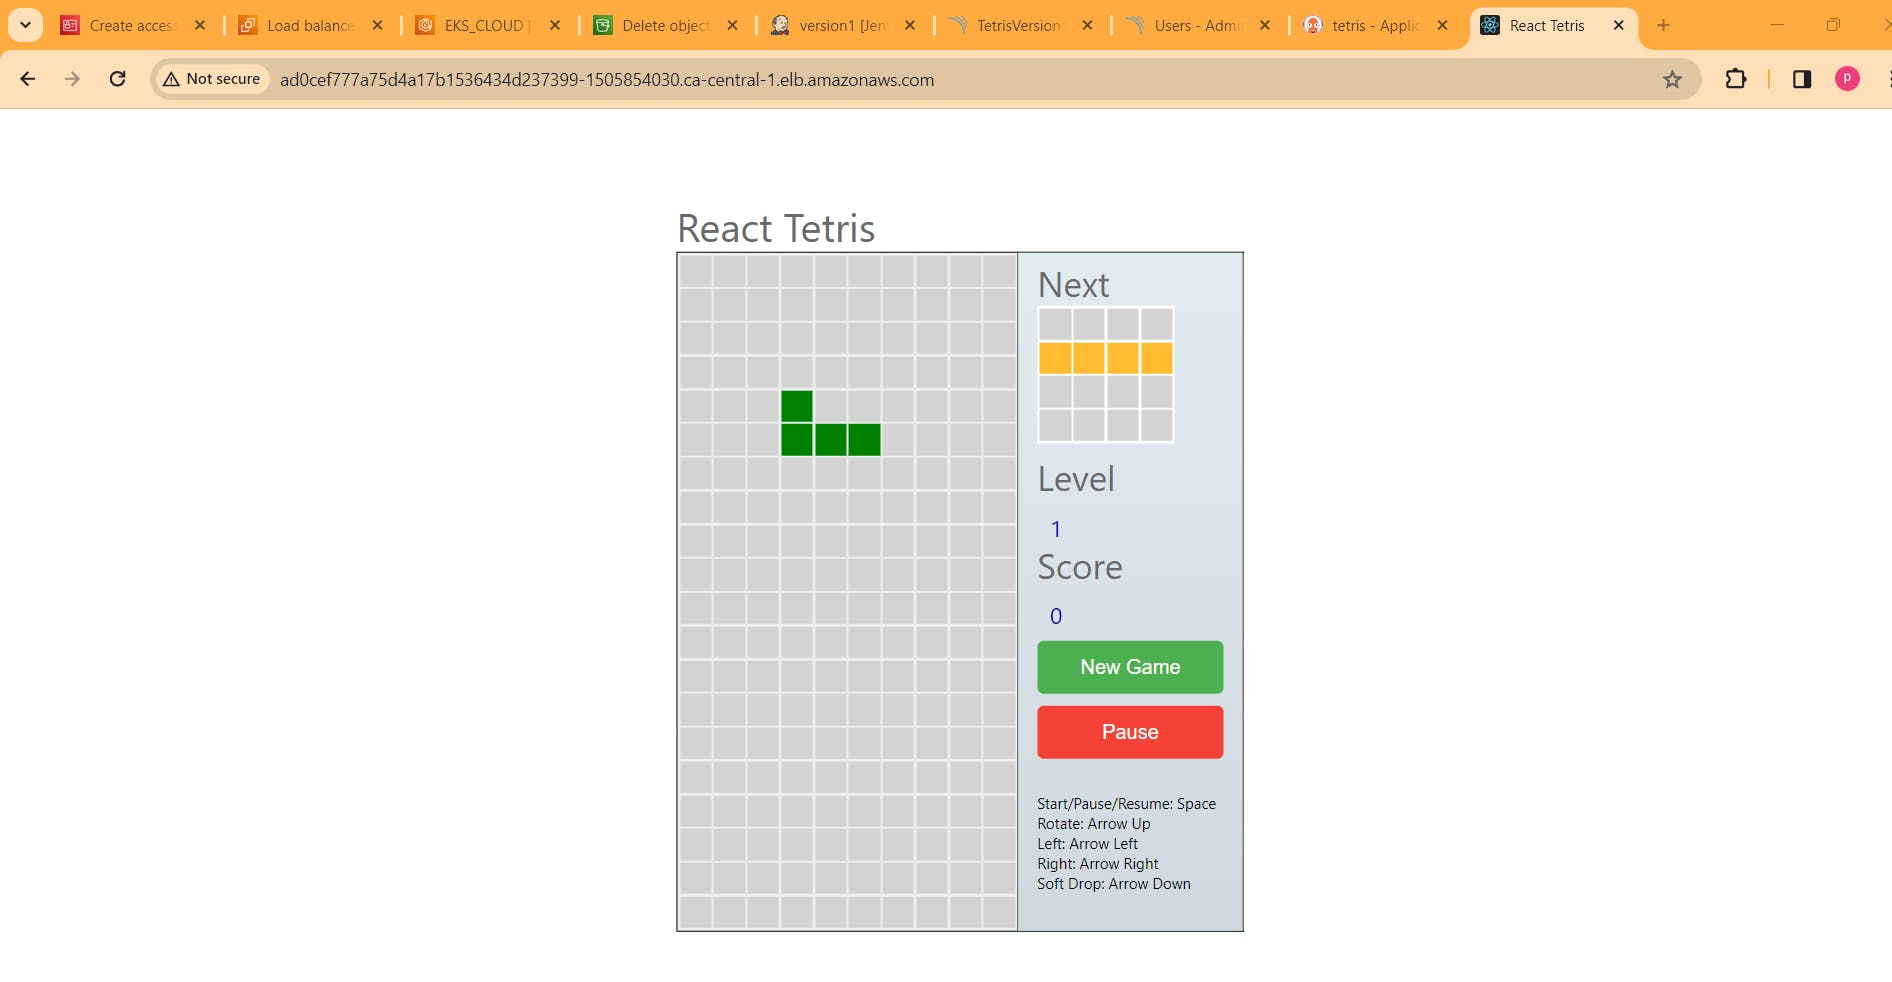
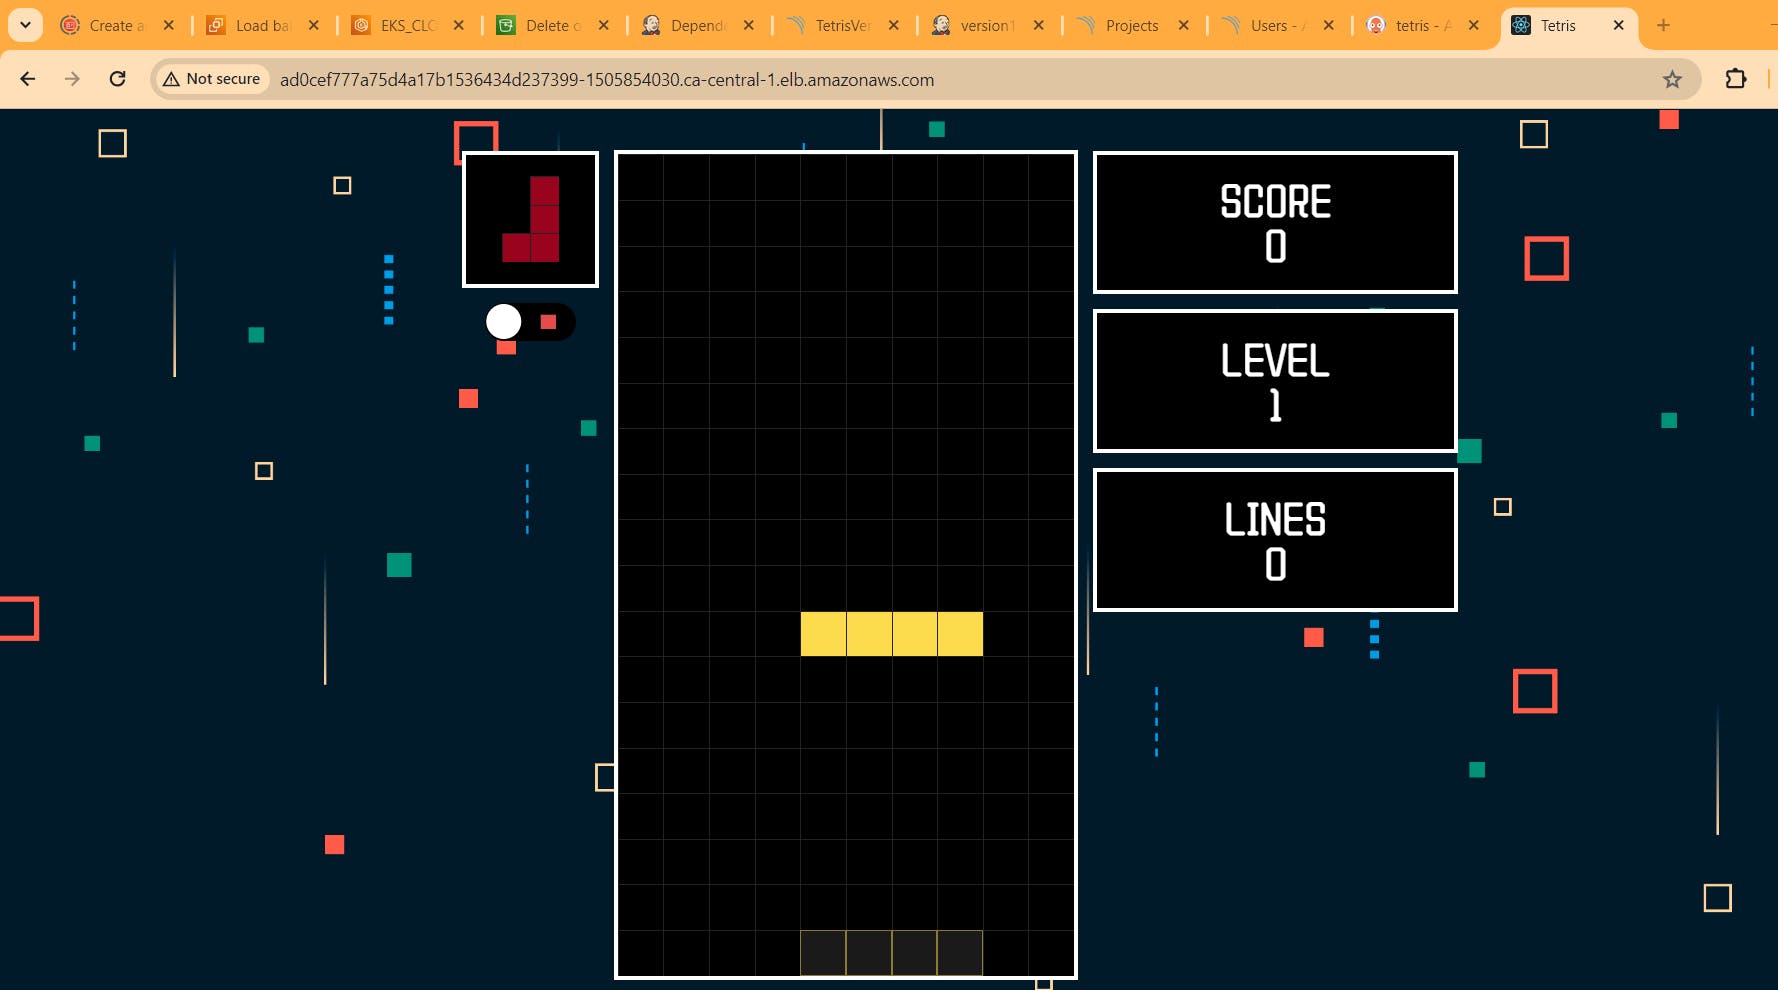
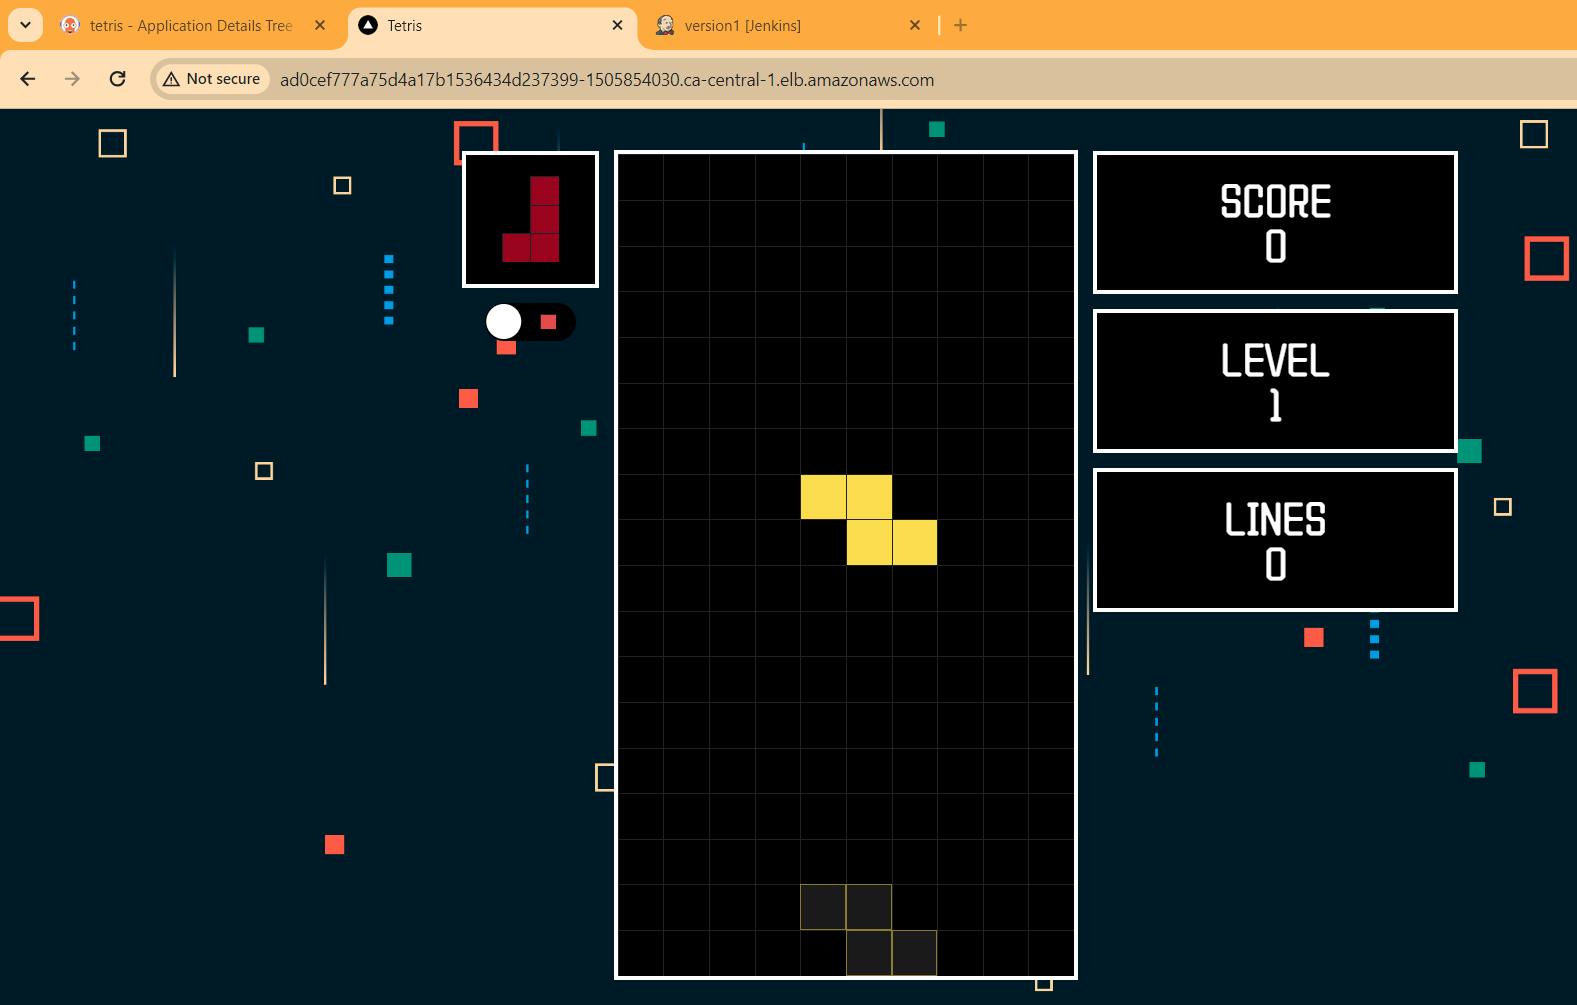
copy the LOadBalancer and paste in browser. Enjoy you game of version1.
kubectl get all
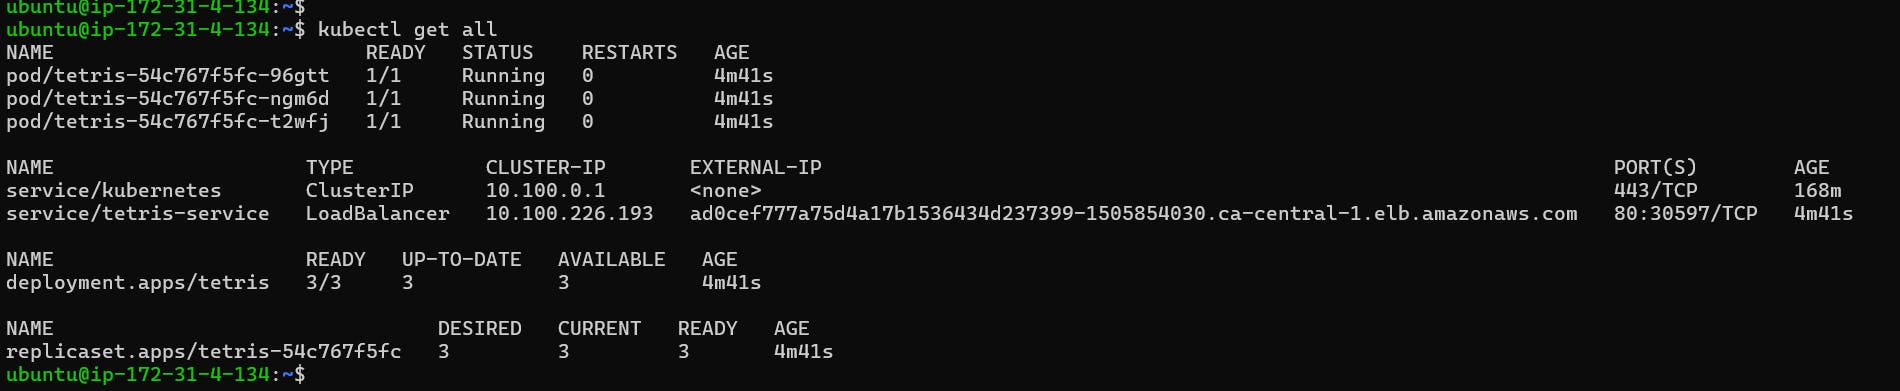
(note: if you load balancer would not work in new browser, then copy the port no 30597 and add this port in cluster's node's security group)
STEP 13.Create 2nd version of application:
Edit version1 pipeline, wherever is version1 convert it into version 2.
pipeline{
    agent any
    tools{
        jdk 'jdk17'
        nodejs 'node16'
    }
    environment {
        SCANNER_HOME=tool 'sonar-scanner'
        GIT_REPO_NAME = "Tetris-manifest"
        GIT_USER_NAME = "Pardeep32"
    }
    stages {
        stage('clean workspace'){
            steps{
                cleanWs()
            }
        }
        stage('Checkout from Git'){
            steps{
                git branch: 'main', url: 'https://github.com/Pardeep32/Tetris-V2.git'
            }
        }
        stage("Sonarqube Analysis "){
            steps{
                withSonarQubeEnv('sonar-server') {
                    sh ''' $SCANNER_HOME/bin/sonar-scanner -Dsonar.projectName=TetrisVersion2.0 \
                    -Dsonar.projectKey=TetrisVersion2.0 '''
                }
            }
        }
        stage("quality gate"){
           steps {
                script {
                    waitForQualityGate abortPipeline: false, credentialsId: 'Sonar-token'
                }
            }
        }
        stage('Install Dependencies') {
            steps {
                sh "npm install"
            }
        }
        stage('OWASP FS SCAN') {
            steps {
                dependencyCheck additionalArguments: '--scan ./ --disableYarnAudit --disableNodeAudit', odcInstallation: 'DP-Check'
                dependencyCheckPublisher pattern: '**/dependency-check-report.xml'
            }
        }
        stage('TRIVY FS SCAN') {
            steps {
                sh "trivy fs . > trivyfs.txt"
            }
        }
        stage("Docker Build & Push"){
            steps{
                script{
                   withDockerRegistry(credentialsId: 'docker', toolName: 'docker'){
                       sh "docker build -t tetrisv1 ."
                       sh "docker tag tetrisv1 pardeepkaur/tetrisv2:latest "
                       sh "docker push pardeepkaur/tetrisv2:latest "
                    }
                }
            }
        }
        stage("TRIVY"){
            steps{
                sh "trivy image pardeepkaur/tetrisv2:latest > trivyimage.txt"
            }
        }
        stage('Checkout Code') {
            steps {
                git branch: 'main', url: 'https://github.com/Pardeep32/Tetris-manifest.git'
            }
        }
        stage('Update Deployment File') {
            steps {
                script {
                    withCredentials([string(credentialsId: 'github', variable: 'GITHUB_TOKEN')]) {
                       NEW_IMAGE_NAME = "pardeepkaur/tetrisv2:latest"
                       sh "sed -i 's|image: .*|image: $NEW_IMAGE_NAME|' deployment.yml"
                       sh 'git add deployment.yml'
                       sh "git commit -m 'Update deployment image to $NEW_IMAGE_NAME'"
                       sh "git push https://${GITHUB_TOKEN}@github.com/${GIT_USER_NAME}/${GIT_REPO_NAME} HEAD:main"
                    }
                }
            }
        }

    }
}
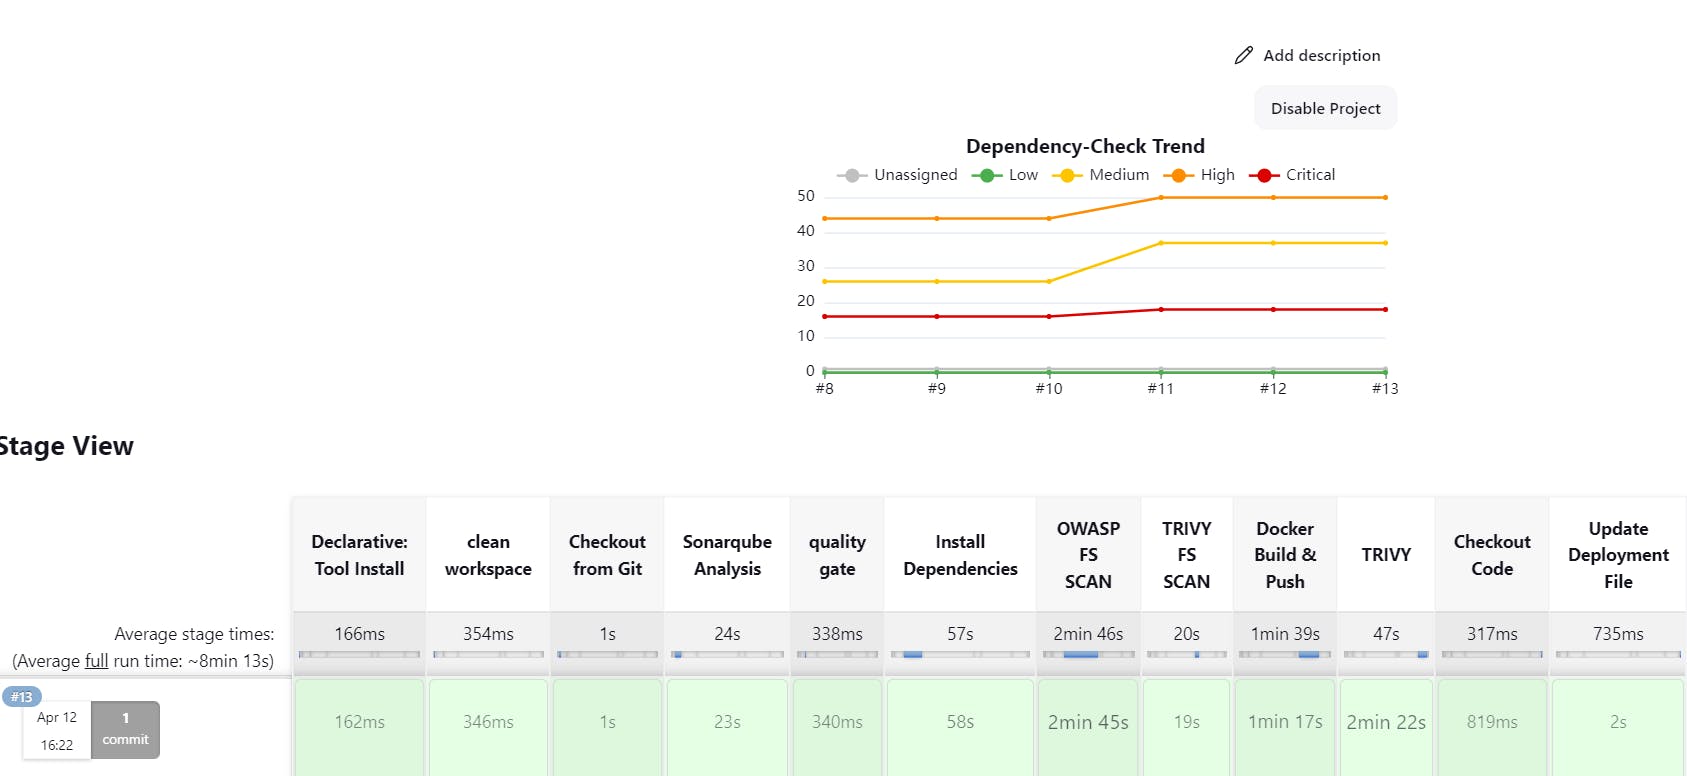
The dependency check has been updated to verify dependencies for version 2 instead of version 1.

deployment.yml file is updated from v1 to v2.
If you go to Argo CD Now it will automatically update the image and you can play the version 2 game

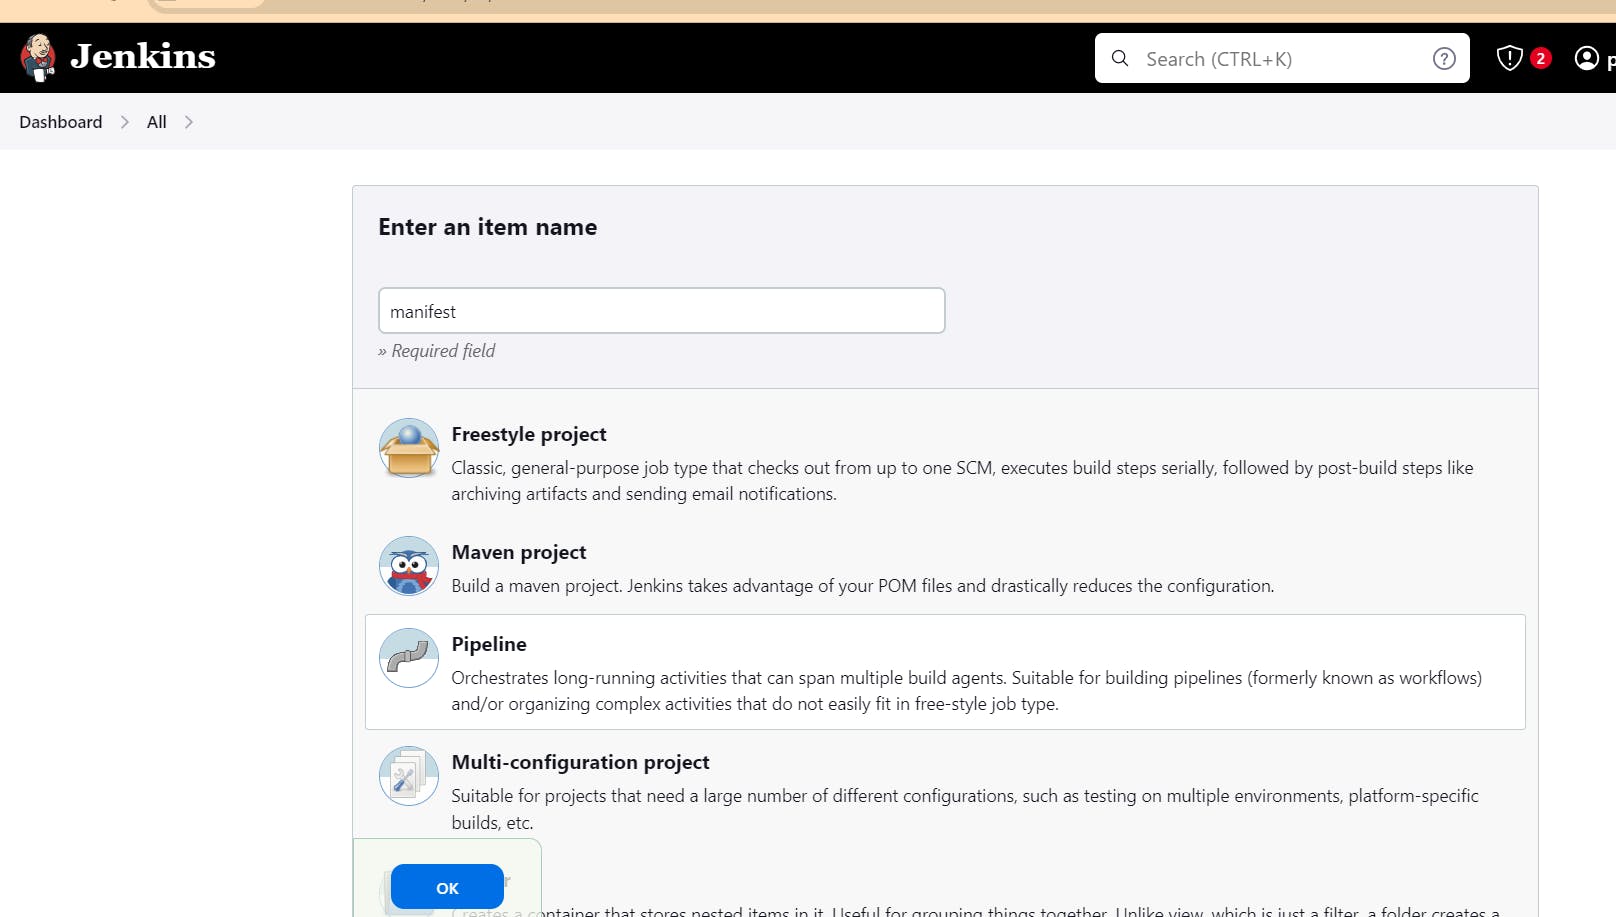
Step 14: create a job for manifest (I mean image updater)
instead of doing all code in one pipeline execute in sepearte pipeline.
pipeline {
    agent any

    environment {
        GIT_REPO_NAME = "Tetris-manifest"
        GIT_USER_NAME = "Pardeep32"
    }

    stages {
        stage('Checkout Code') {
            steps {
                git branch: 'main', url: 'https://github.com/Pardeep32/Tetris-manifest.git'
            }
        }

        stage('Update Deployment File') {
            steps {
                script {
                    withCredentials([string(credentialsId: 'github', variable: 'GITHUB_TOKEN')]) {
                        NEW_IMAGE_NAME = "pardeepkaur/tetrisv2:latest"
                        echo "Updating deployment image to: $NEW_IMAGE_NAME"
                        sh "sed -i 's|image: .*|image: $NEW_IMAGE_NAME|' deployment.yml"
                        sh 'git add deployment.yml'
                        sh "git status"
                        sh "git commit -m 'Update deployment image to $NEW_IMAGE_NAME'"
                        sh "git push https://${GITHUB_TOKEN}@github.com/${GIT_USER_NAME}/${GIT_REPO_NAME} HEAD:main"
                    }
                }
            }
        }
    }
}
make changes to version1 pipeline to as follow: here i added a new stage which will trigger manifest build job automatically.
pipeline{
    agent any
    tools{
        jdk 'jdk17'
        nodejs 'node16'
    }
    environment {
        SCANNER_HOME=tool 'sonar-scanner'
        GIT_REPO_NAME = "Tetris-manifest"
        GIT_USER_NAME = "Pardeep32"
    }
    stages {
        stage('clean workspace'){
            steps{
                cleanWs()
            }
        }
        stage('Checkout from Git'){
            steps{
                git branch: 'main', url: 'https://github.com/Pardeep32/Tetris-V2.git'
            }
        }
        stage("Sonarqube Analysis "){
            steps{
                withSonarQubeEnv('sonar-server') {
                    sh ''' $SCANNER_HOME/bin/sonar-scanner -Dsonar.projectName=TetrisVersion2.0 \
                    -Dsonar.projectKey=TetrisVersion2.0 '''
                }
            }
        }
        stage("quality gate"){
           steps {
                script {
                    waitForQualityGate abortPipeline: false, credentialsId: 'Sonar-token'
                }
            }
        }
        stage('Install Dependencies') {
            steps {
                sh "npm install"
            }
        }
        stage('OWASP FS SCAN') {
            steps {
                dependencyCheck additionalArguments: '--scan ./ --disableYarnAudit --disableNodeAudit', odcInstallation: 'DP-Check'
                dependencyCheckPublisher pattern: '**/dependency-check-report.xml'
            }
        }
        stage('TRIVY FS SCAN') {
            steps {
                sh "trivy fs . > trivyfs.txt"
            }
        }
        stage("Docker Build & Push"){
            steps{
                script{
                   withDockerRegistry(credentialsId: 'docker', toolName: 'docker'){
                       sh "docker build -t tetrisv1 ."
                       sh "docker tag tetrisv1 pardeepkaur/tetrisv2:latest "
                       sh "docker push pardeepkaur/tetrisv2:latest "
                    }
                }
            }
        }
        stage("TRIVY"){
            steps{
                sh "trivy image pardeepkaur/tetrisv2:latest > trivyimage.txt"
            }
        }
        stage('Checkout Code') {
            steps {
                git branch: 'main', url: 'https://github.com/Pardeep32/Tetris-manifest.git'
            }
        }
        stage('Update Deployment File') {
            steps {
                script {
                    withCredentials([string(credentialsId: 'github', variable: 'GITHUB_TOKEN')]) {
                       NEW_IMAGE_NAME = "pardeepkaur/tetrisv2:latest"
                       sh "sed -i 's|image: .*|image: $NEW_IMAGE_NAME|' deployment.yml"
                       sh 'git add deployment.yml'
                       sh "git commit -m 'Update deployment image to $NEW_IMAGE_NAME'"
                       sh "git push https://${GITHUB_TOKEN}@github.com/${GIT_USER_NAME}/${GIT_REPO_NAME} HEAD:main"
                    }
                }
            }
        }
        stage('Trigger manifest') {
            steps {
                build job: 'manifest', wait:true
            }
        }
    }
}
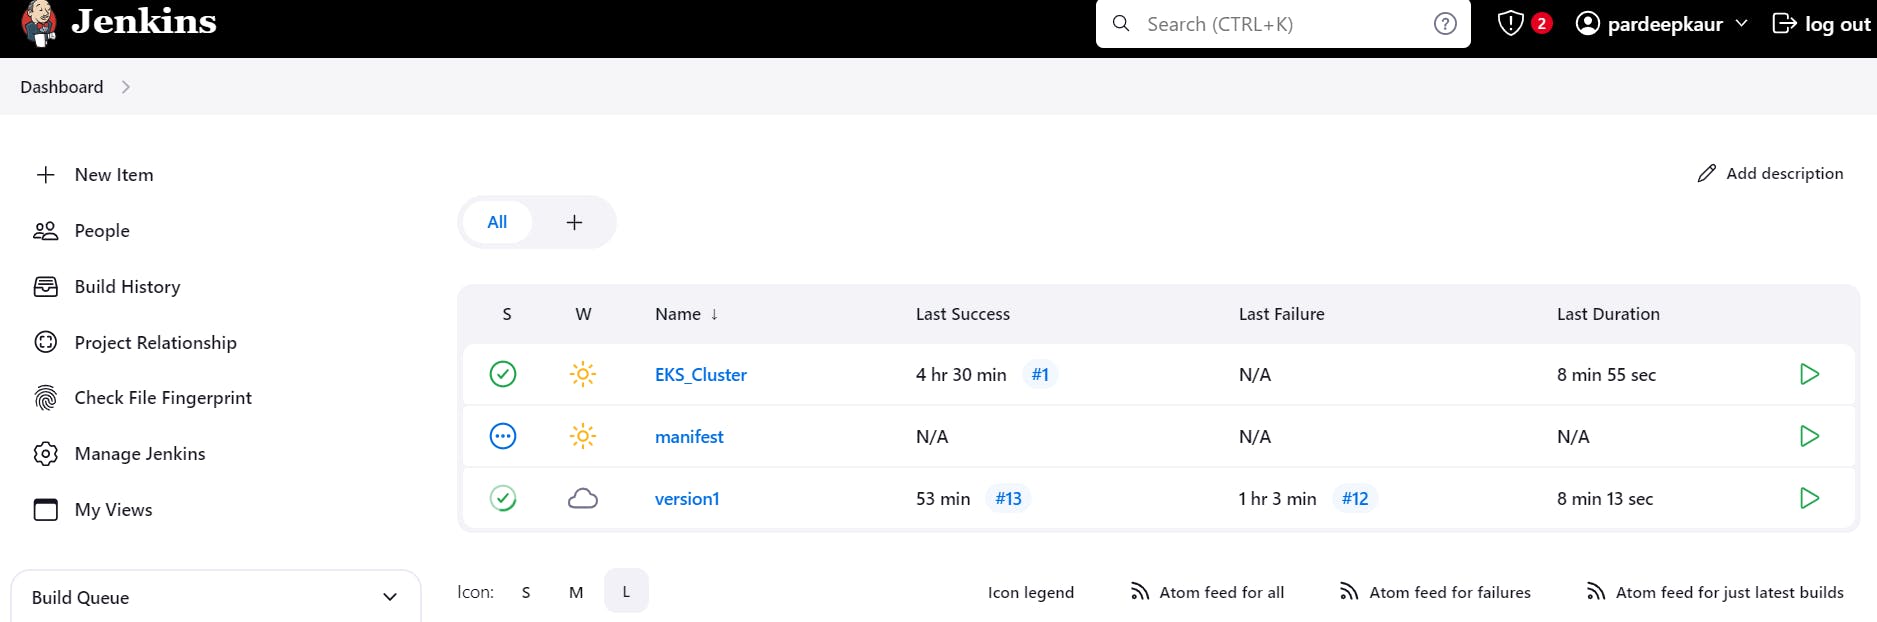
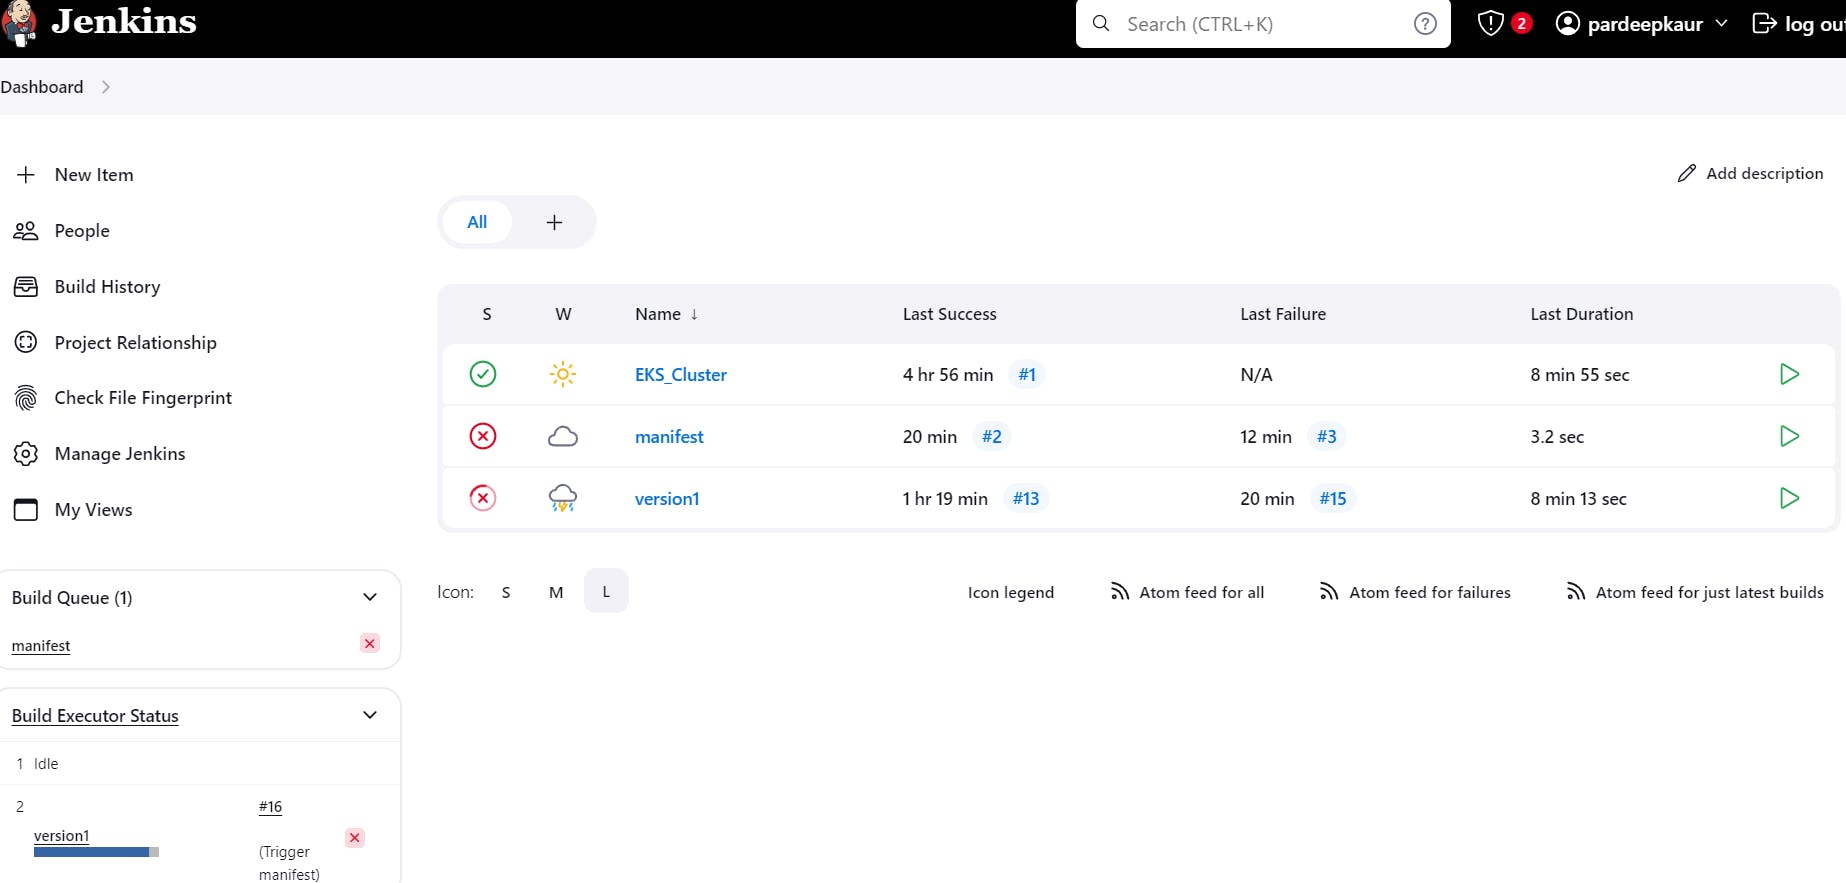
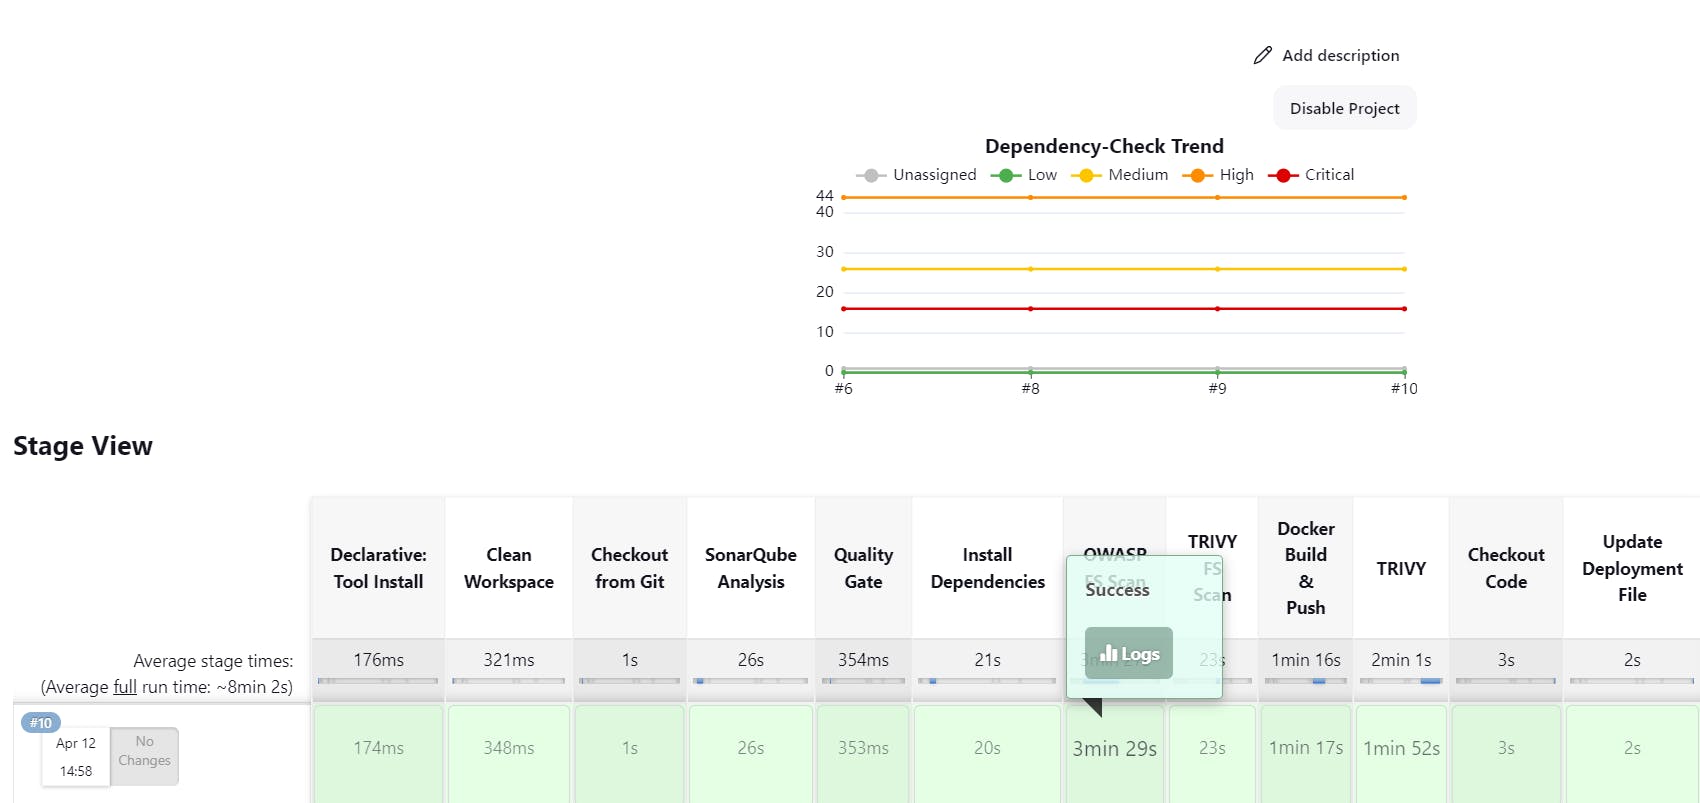
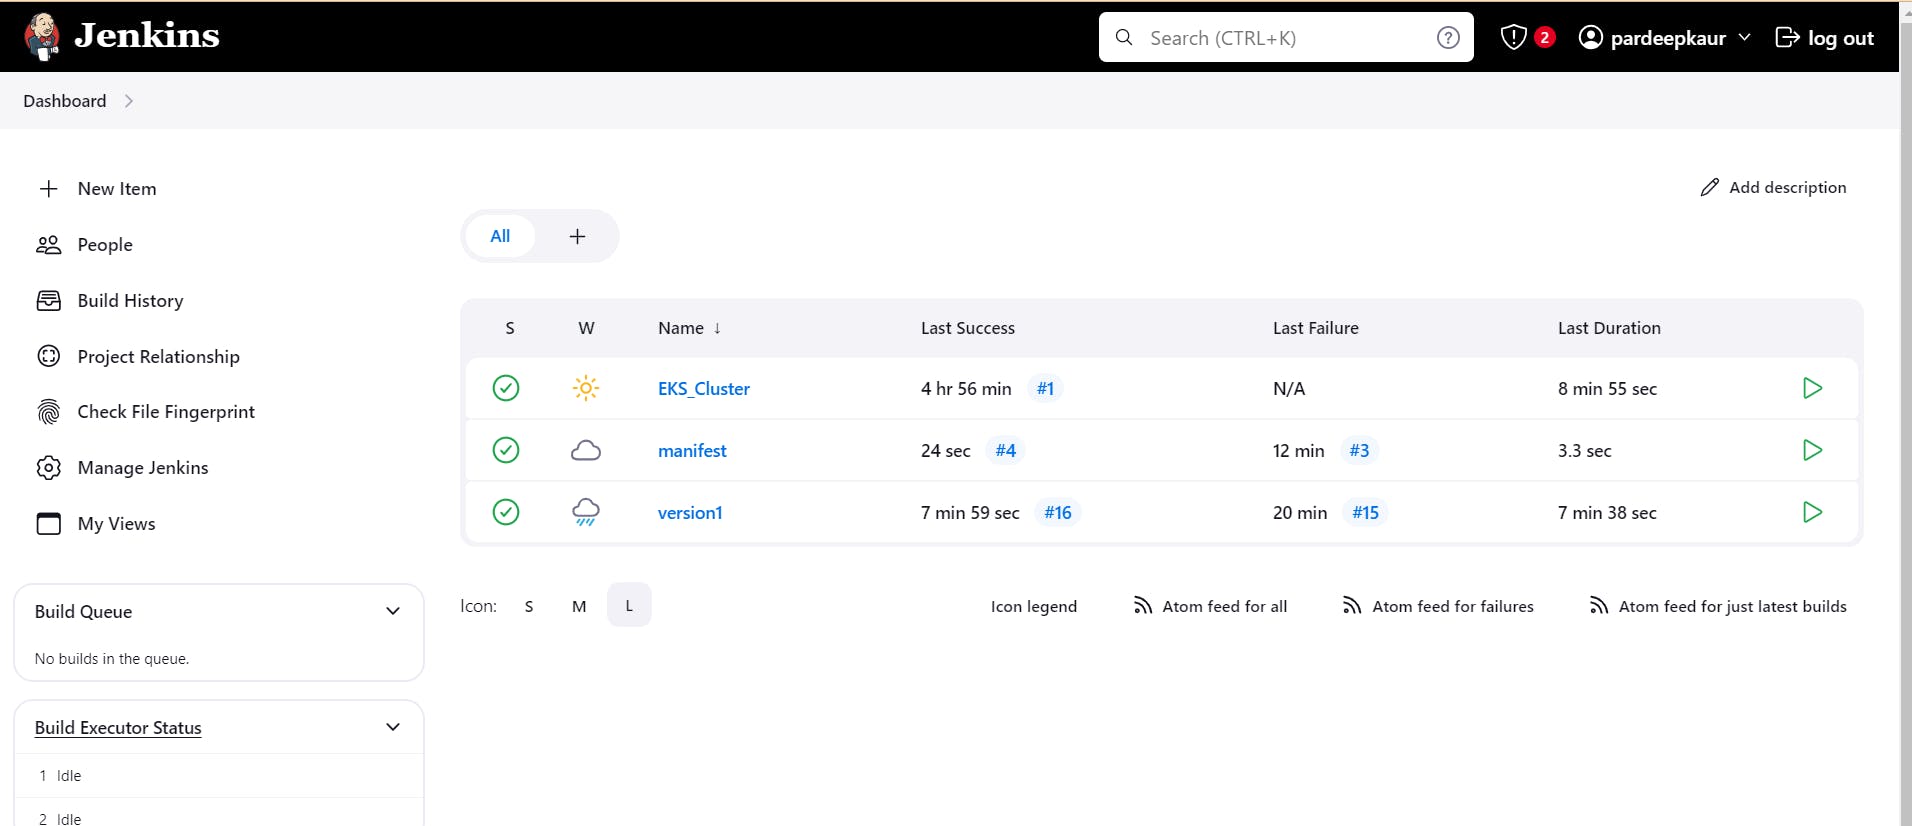
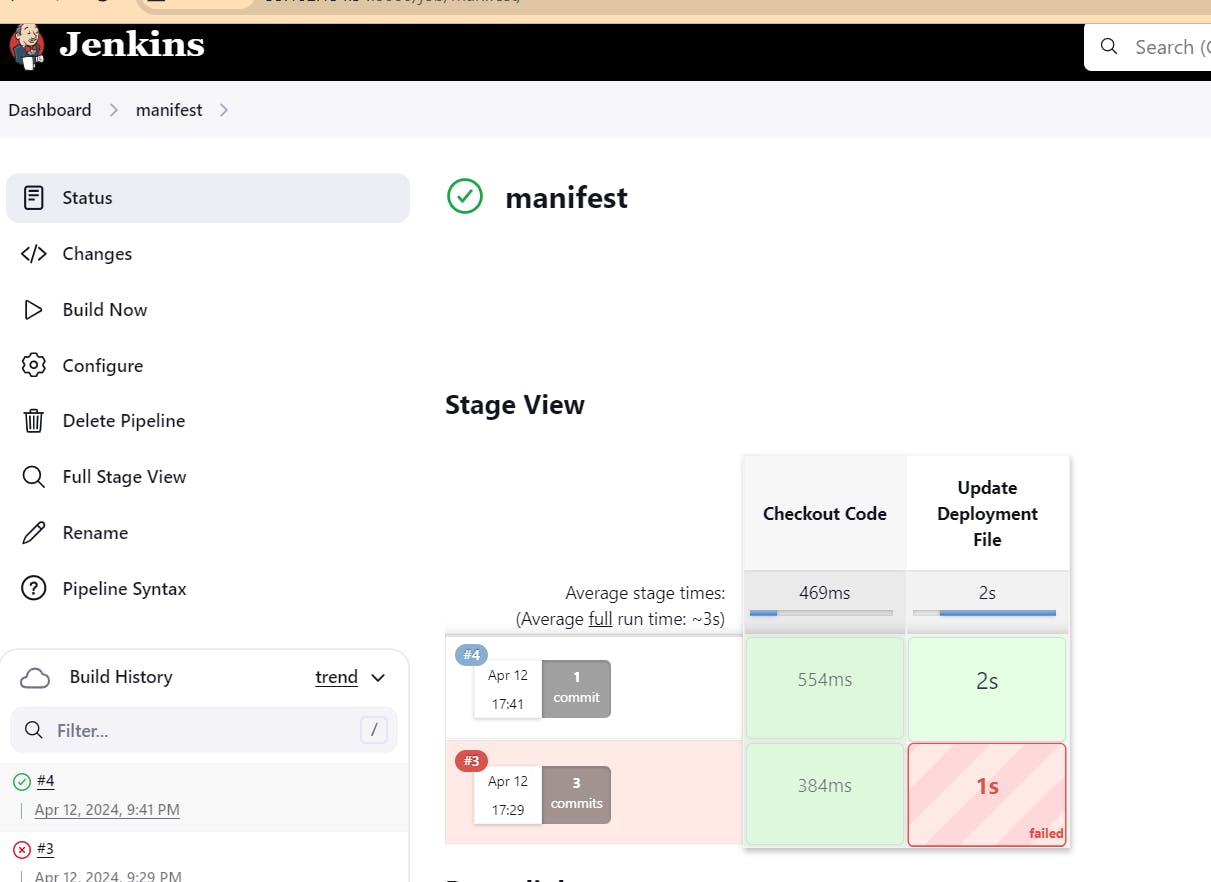
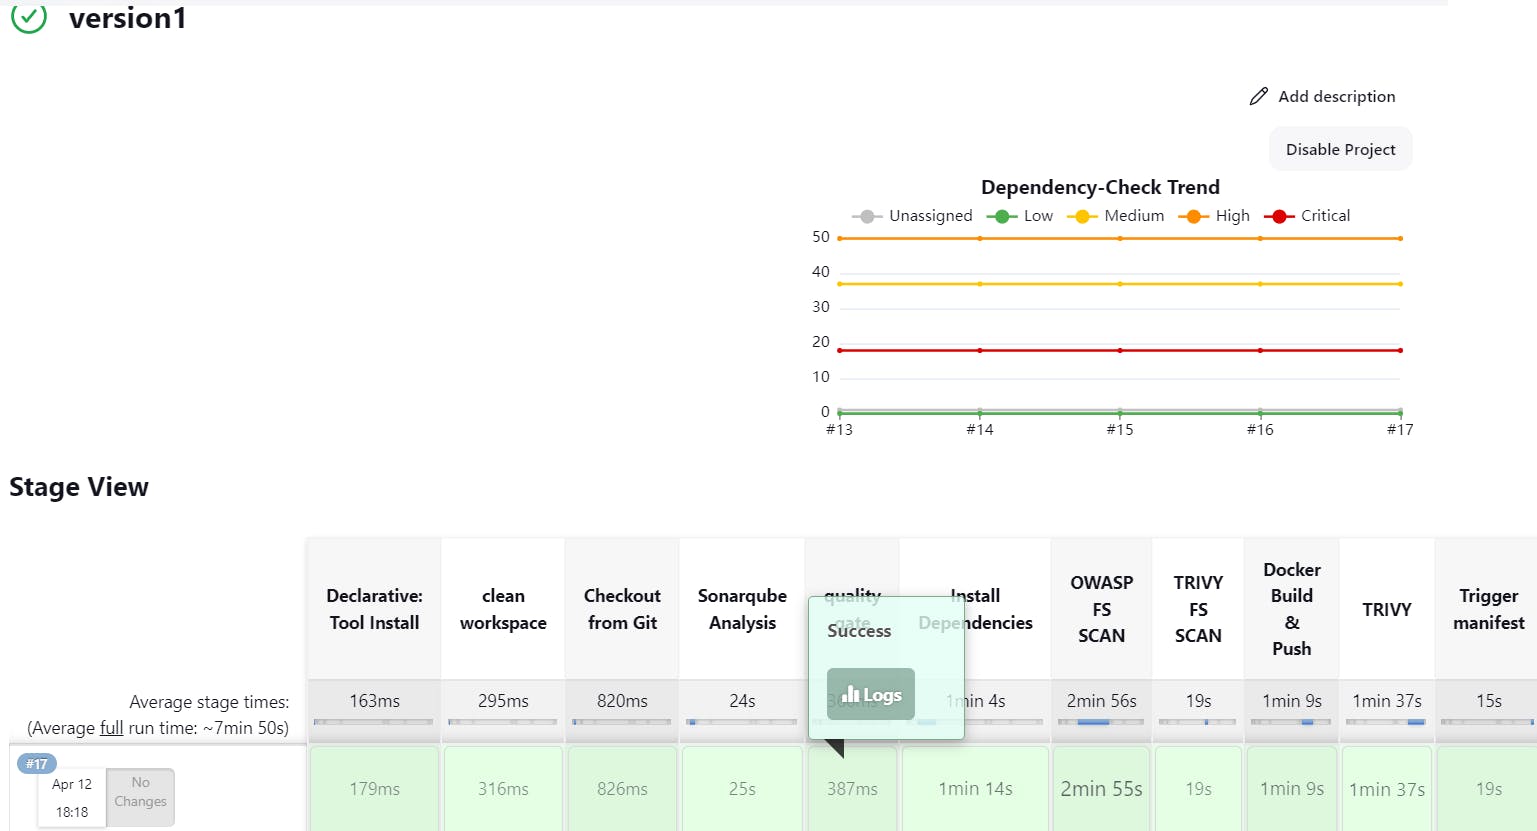
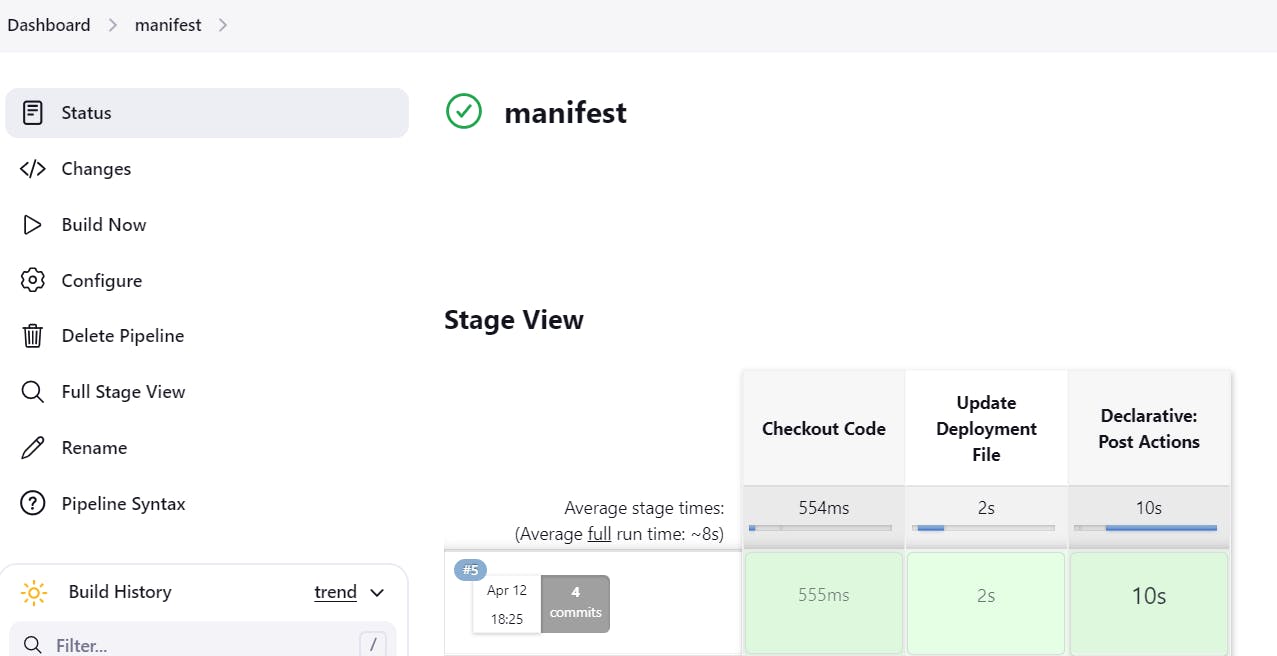
it automatically triger manifest.


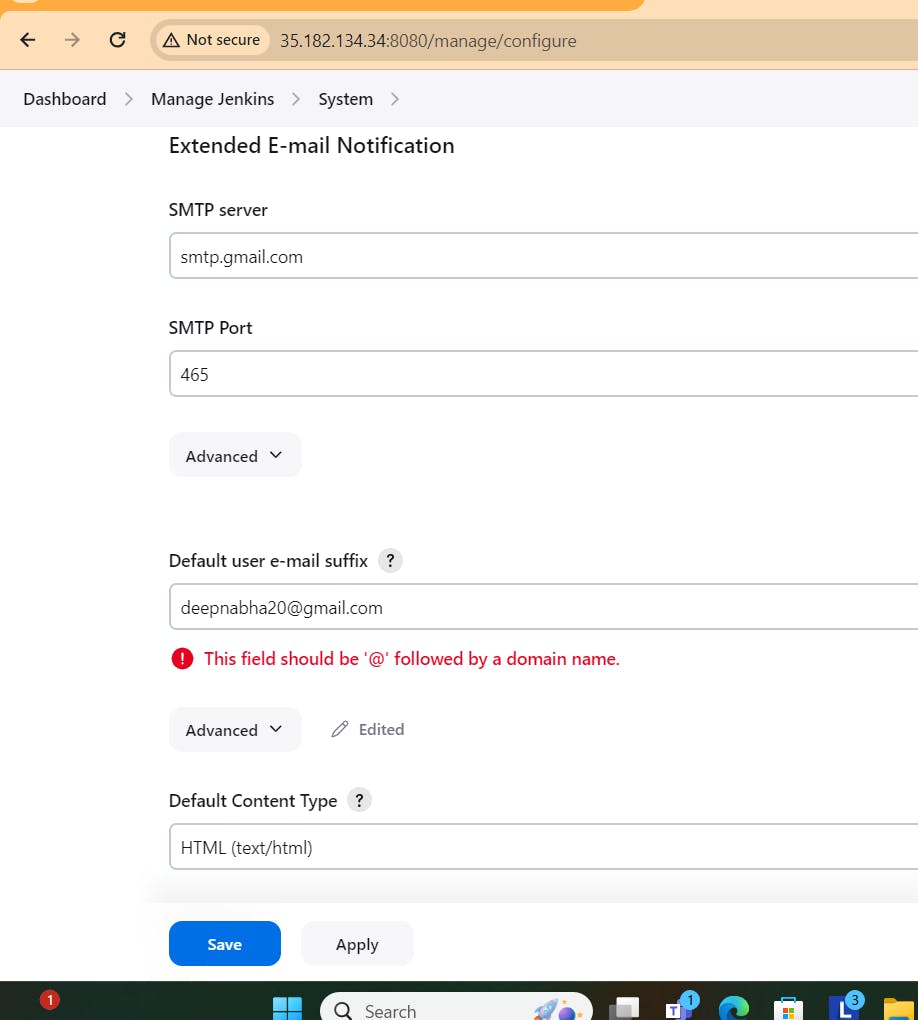
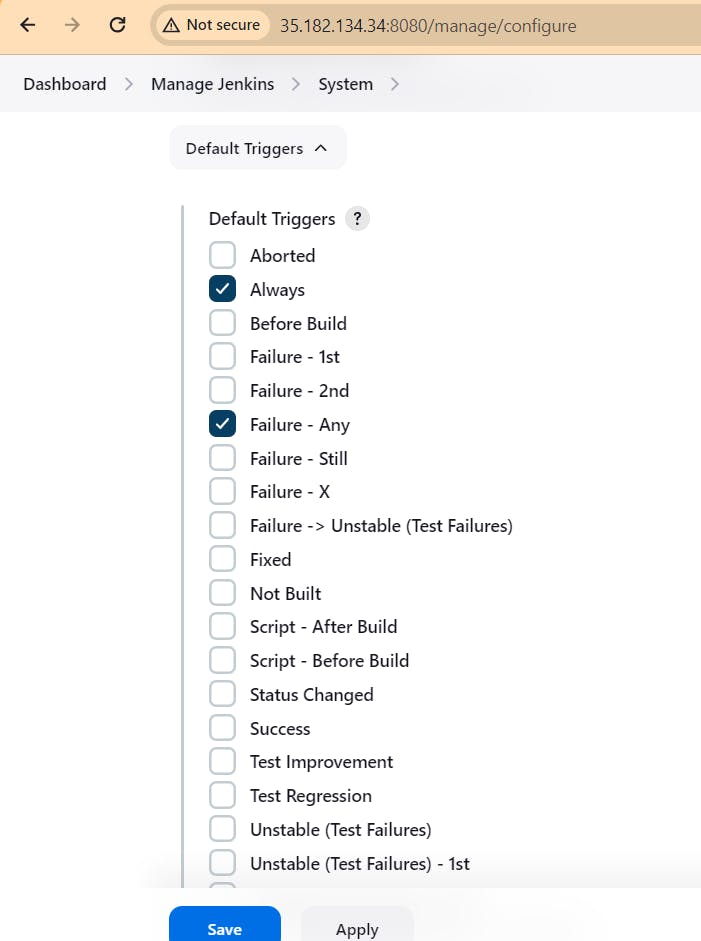
Step14.Configure mailintergration:
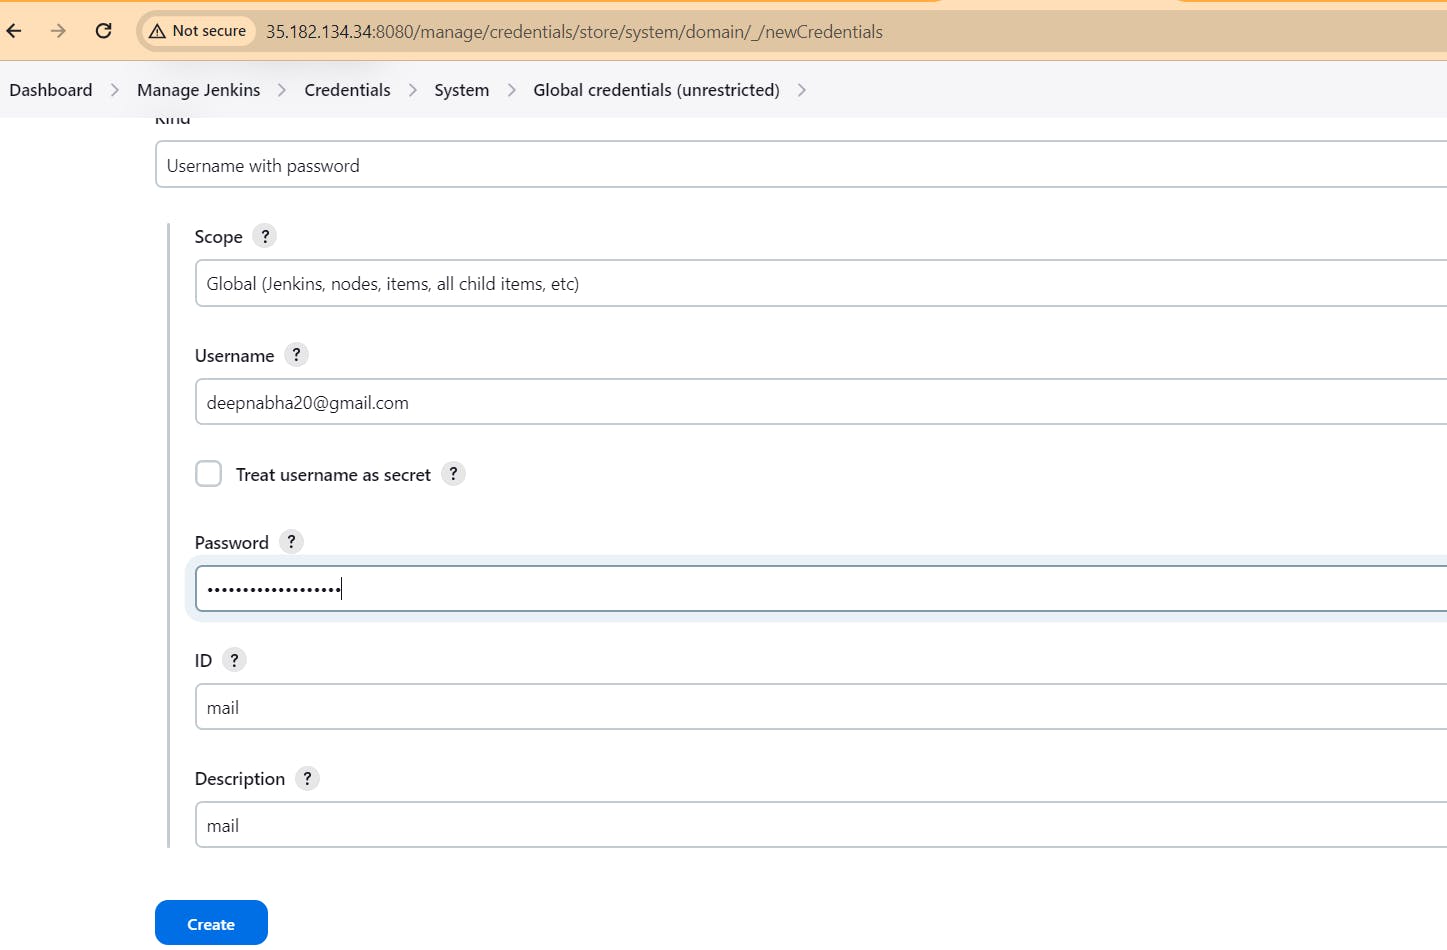
Configure Jenkins SMTP Server:
Navigate to your Jenkins dashboard and click on "Manage Jenkins" in the sidebar.
Select "Configure System".
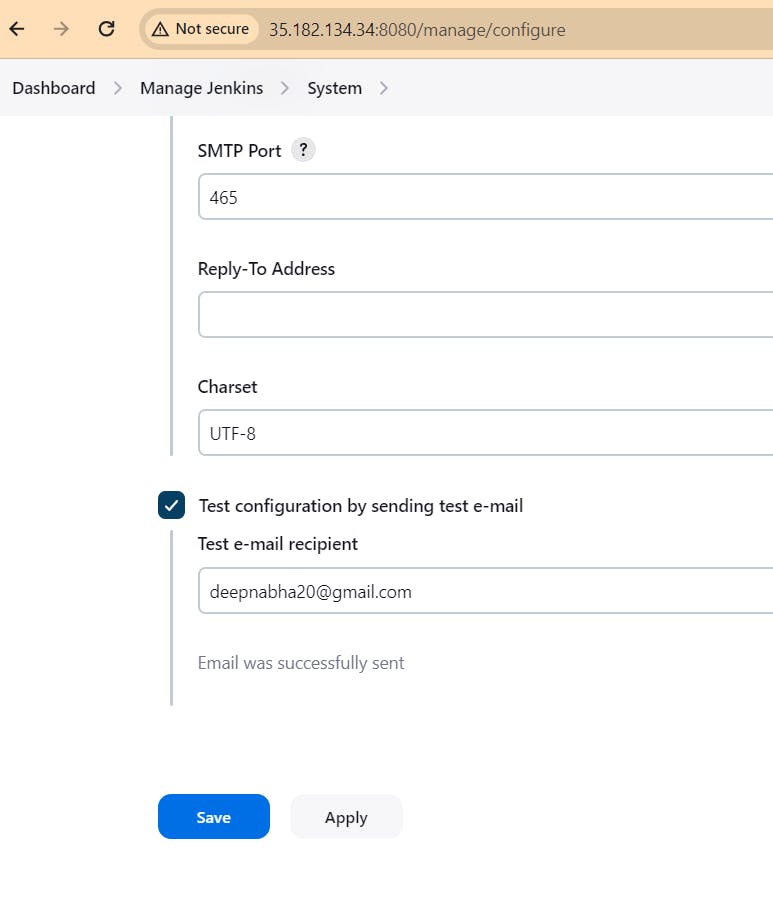
Scroll down to the "E-mail Notification" section.
Enter the SMTP server details provided by your email provider. This includes the SMTP server host, port, and credentials (username and password).
You can also configure advanced settings such as SSL/TLS encryption and response timeout.


update manifest pipeline as follow:
  pipeline {
      agent any

      environment {
          GIT_REPO_NAME = "Tetris-manifest"
          GIT_USER_NAME = "Pardeep32"
      }

      stages {
          stage('Checkout Code') {
              steps {
                  git branch: 'main', url: 'https://github.com/Pardeep32/Tetris-manifest.git'
              }
          }

          stage('Update Deployment File') {
              steps {
                  script {
                      withCredentials([string(credentialsId: 'github', variable: 'GITHUB_TOKEN')]) {
                          NEW_IMAGE_NAME = "pardeepkaur/tetrisv2:latest"
                          echo "Updating deployment image to: $NEW_IMAGE_NAME"
                          sh "sed -i 's|image: .*|image: $NEW_IMAGE_NAME|' deployment.yml"
                          sh 'git add deployment.yml'
                          sh "git status"
                          sh "git diff"  // Add this line to show the difference
                          sh "git commit -m 'Update deployment image to $NEW_IMAGE_NAME'"
                          sh "git push https://${GITHUB_TOKEN}@github.com/${GIT_USER_NAME}/${GIT_REPO_NAME} HEAD:main"
                      }
                  }
              }
          }
      }
      post {
          always {
              emailext attachLog: true,
                  subject: "'${currentBuild.result}'",
                  body: "Project: ${env.JOB_NAME}<br/>" +
                        "Build Number: ${env.BUILD_NUMBER}<br/>" +
                        "URL: ${env.BUILD_URL}<br/>",
                  to: 'deepnabha20@gmail.com', // Fixed typo in email address
                  attachmentsPattern: 'trivyfs.txt,trivyimage.txt'
          }
      }

  }

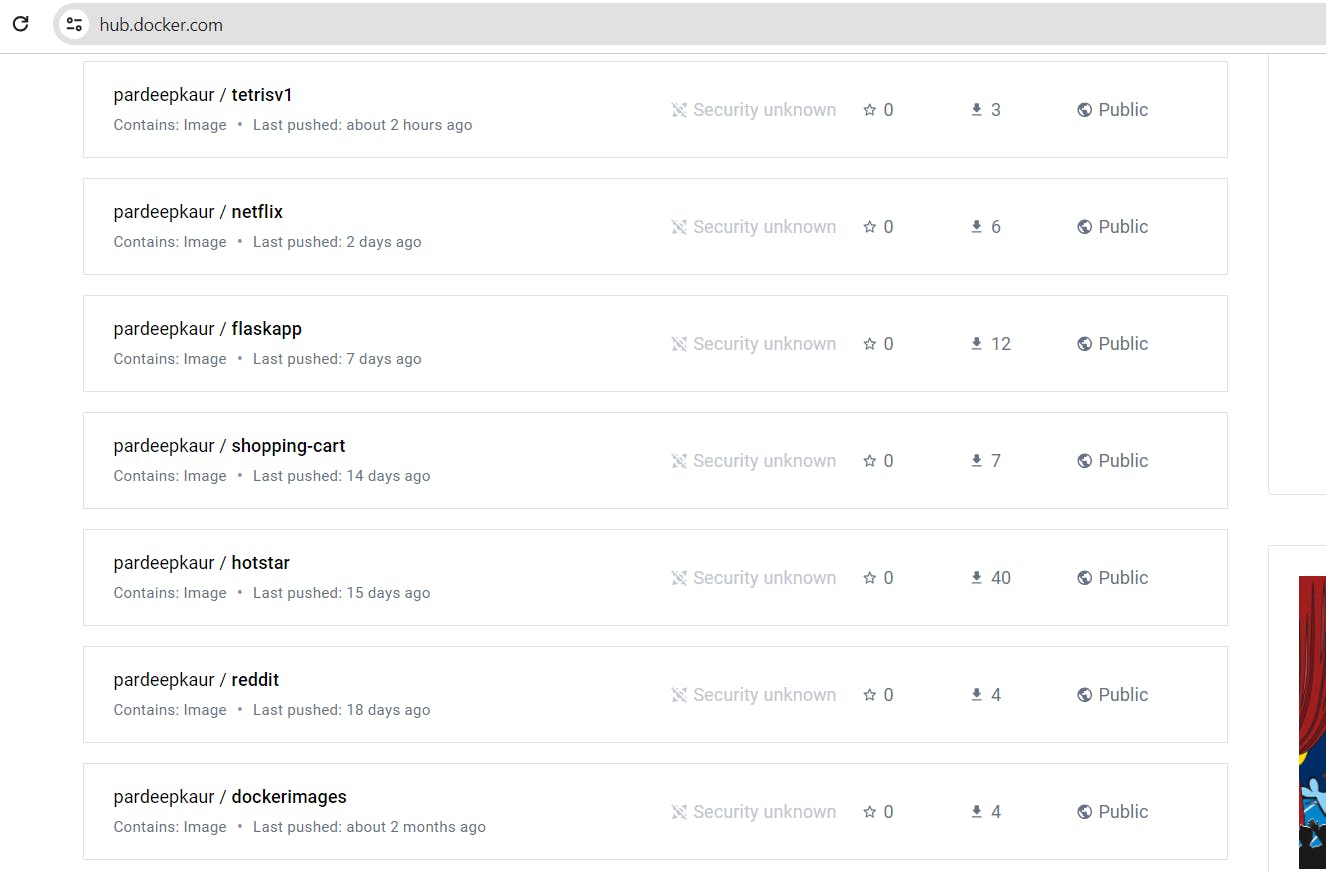
Step15: just for an exampleSuppose i make change in deployment.yml file, i took docker image from my dockerhub and edit deployment.yml manually:
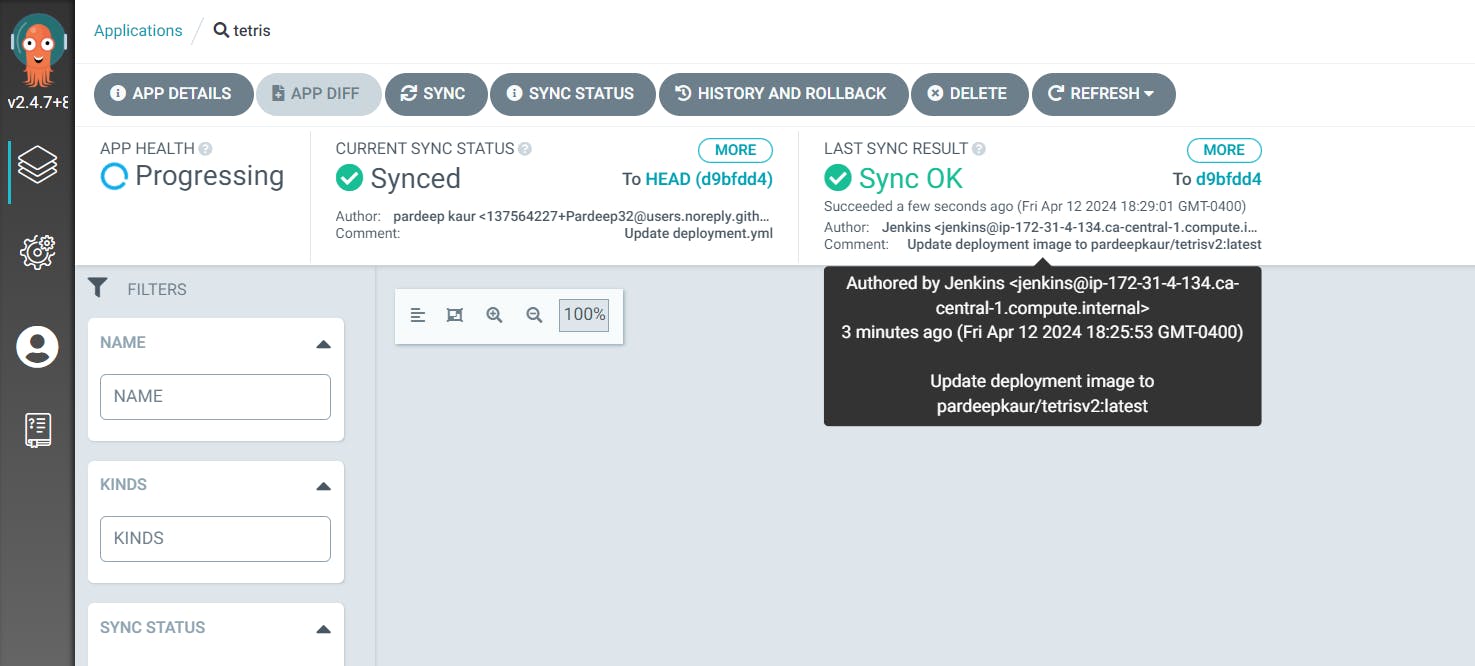
go to ArgoCD ,click on sync: argocd will automatically deploy pod for reddit image and delete pod for tetris image.
it will create pod of reddit
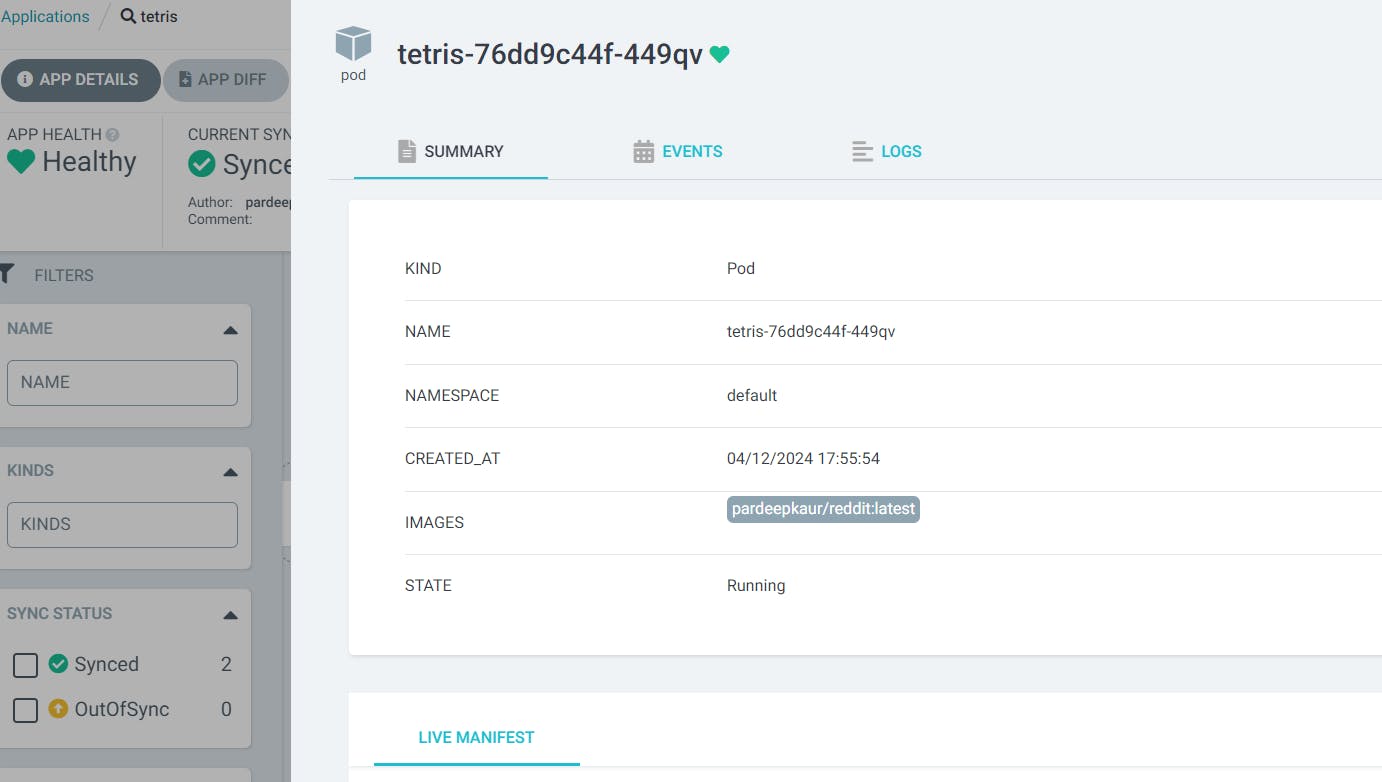
now that load balnacer will load reddit image.

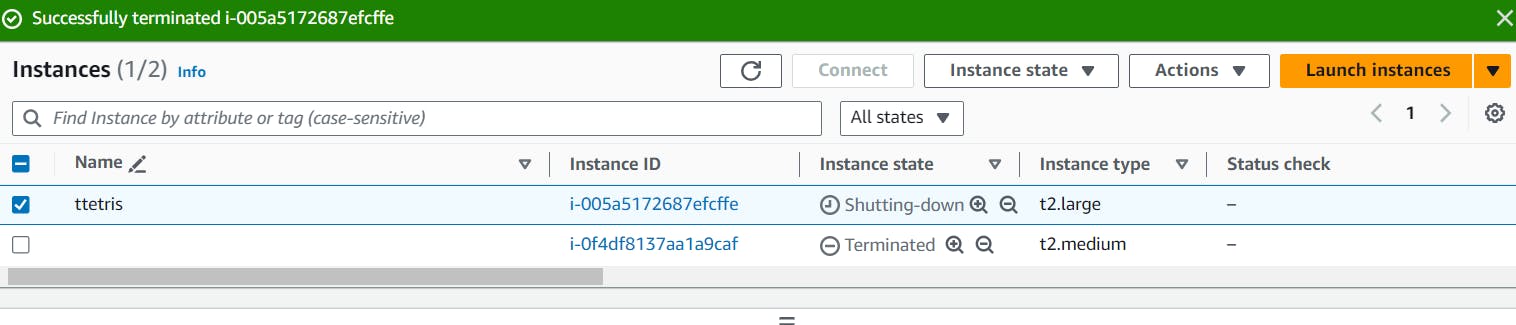
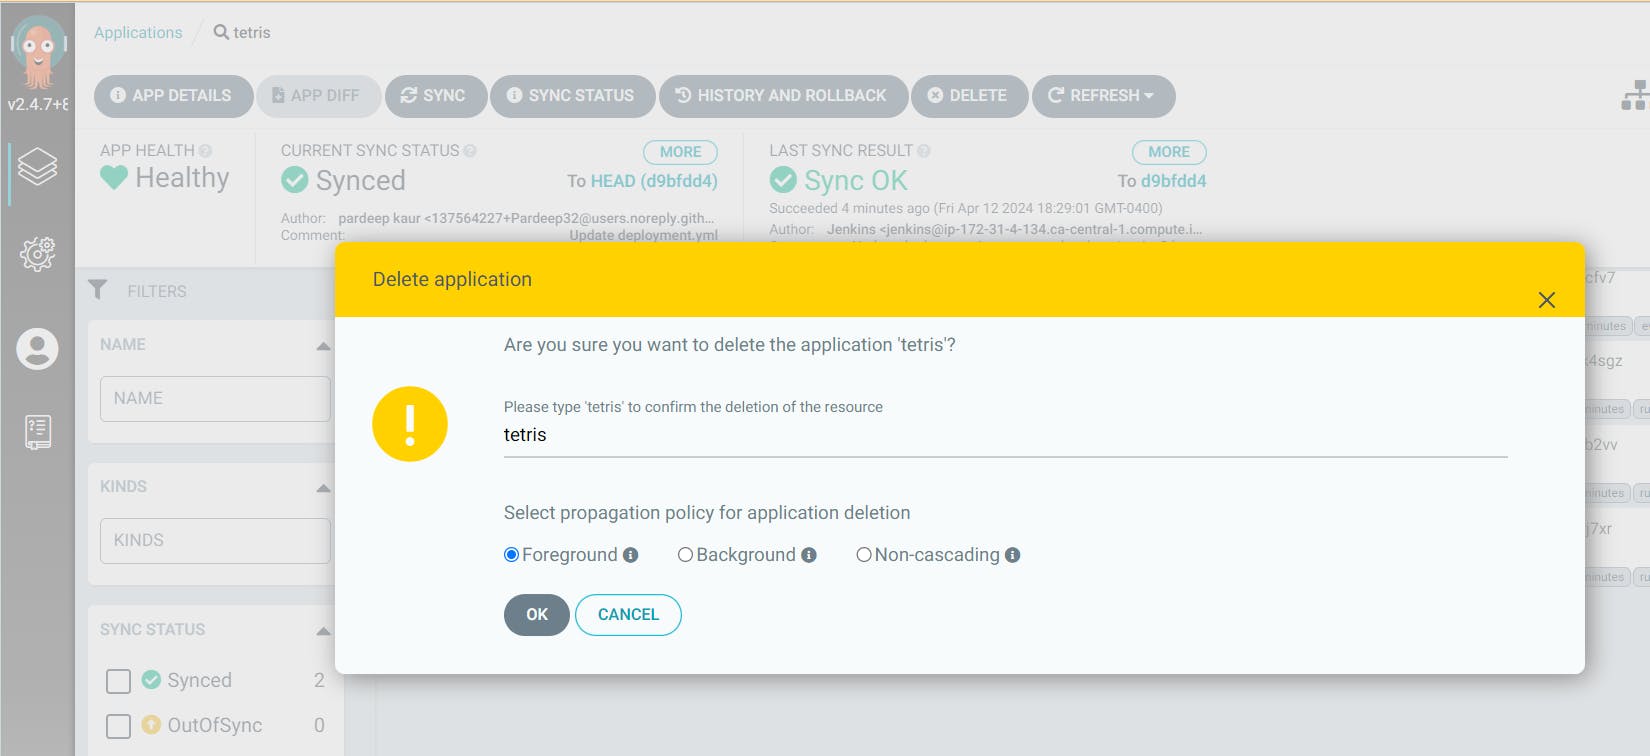
Step16:DESTRUCTION OF RESOURCES
First, delete the app in ARGO CD
Go to Argo CD and click on Tetris App
Click on Delete
Now go to Putty and Remove Argo CD Service
kubectl delete svc argocd-server -n argocd

Now you can see in the Aws console that load balancers will be deleted.

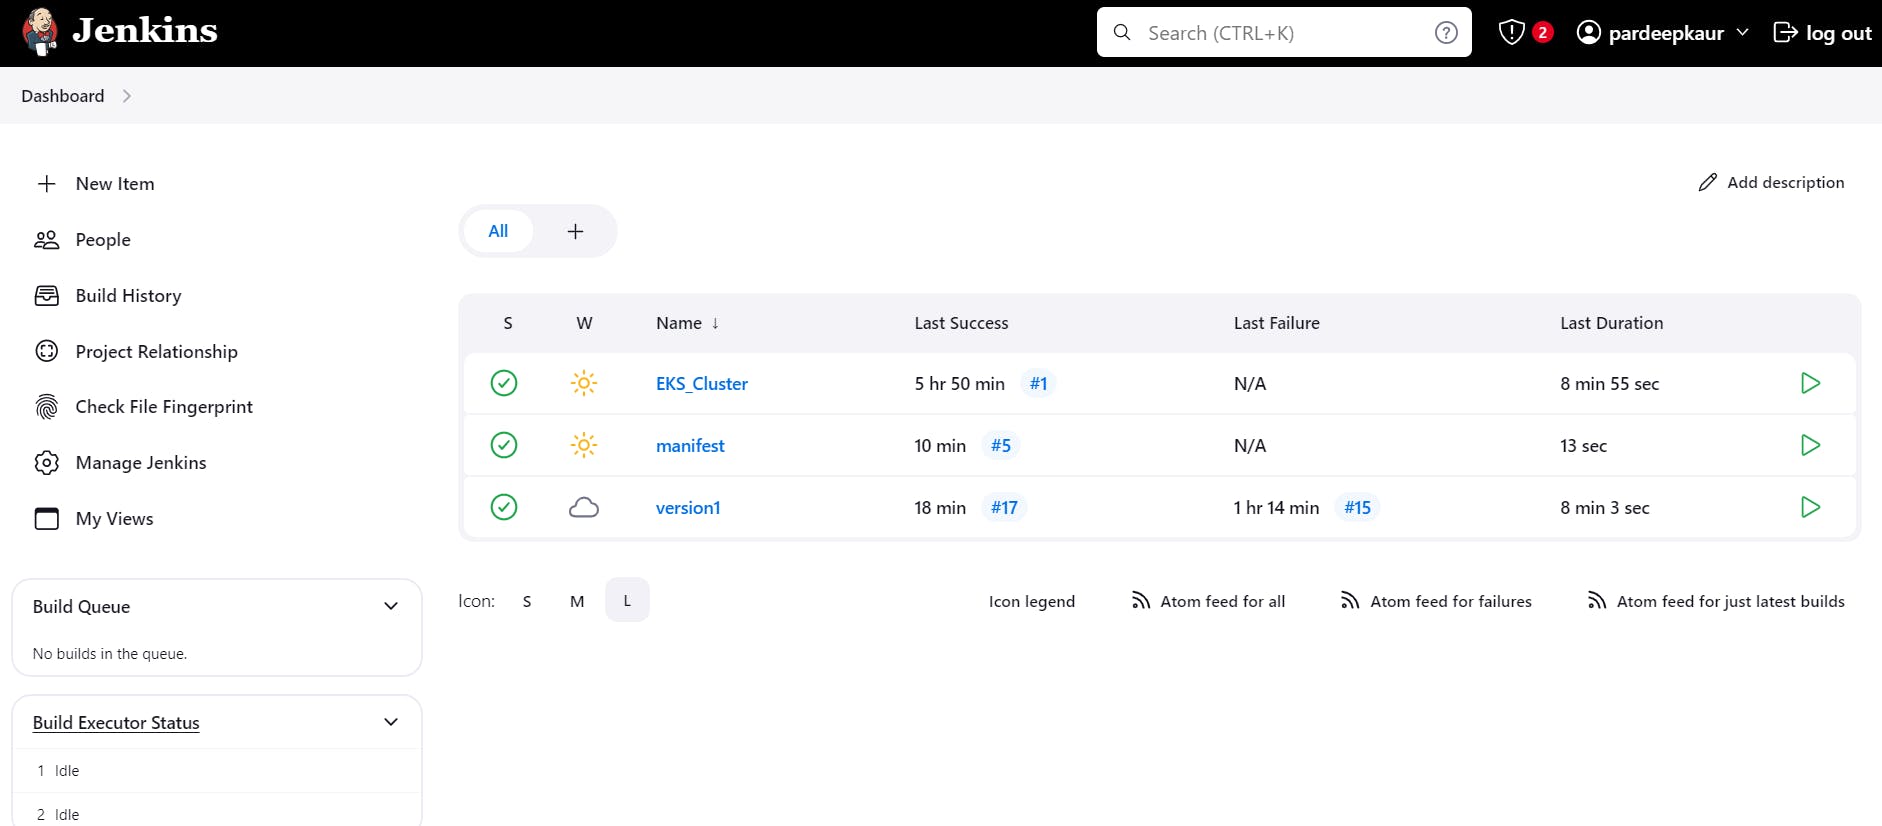
Now Go to Jenkins Dashboard and click on EKS_Cluster job
And build with parameters and destroy action
It will delete the EKS cluster that provisioned
then delete ec2 instance.